
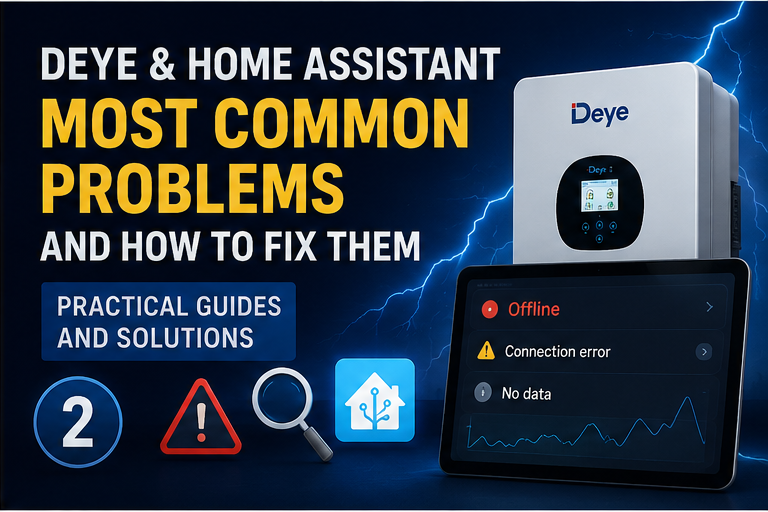

Deye Inverter Troubleshooting: Modbus, Battery & Data Problems Fixed
Mark
Autor
Deye Inverter Troubleshooting: Modbus, Battery & Data Problems Fixed

Did you like this article?

Creating guides takes a lot of time, and I don’t want ads on the site. If I’ve helped you and you feel like it — buy me a coffee. It really motivates me to keep writing!

Deye Inverter and Home Assistant: Complete Troubleshooting for Data, Modbus, Battery and Control Problems

Quick symptom checks

Symptom Likely cause First thing to check
Wrong import/export or household consumption CT/meter direction, placement or sign convention Compare the inverter LCD and HA during a known import/export condition
RS485 communication drops Wiring, communication settings or competing clients Check A/B, the Device ID and whether more than one client polls the bus
Logger works in the app, but HA cannot connect Local logger access, network reachability or firmware changes Confirm the logger IP, supported local protocol and access after the firmware update
Stale or implausible readings Wrong integration profile, scaling or lost updates Check timestamps and compare the exact model/profile with the LCD
Battery communication or SOC problems BMS communication, configuration or battery limits Check the battery status and alarms on the inverter and BMS
Settings revert or only part of TOU saves Another controller or a mismatched write profile Confirm the value on the LCD and identify all systems writing settings
Deye is probably the most popular hybrid inverter in Polish solar installations hooked up to Home Assistant these days, and I’d guess every second email or comment under my inverter-integration articles is about it. Some problems come back so regularly that I’ve seen them in several different flavors by now: once as “the inverter is stealing power from the grid,” once as “my Modbus drops every hour,” once as “port 8899 suddenly stopped working after an update.”
This guide isn’t limited to one integration or one model. We start by working out whether the problem sits with the electrical installation, the CT clamp or meter reading, the inverter and battery, the logger, the Modbus bus, the Home Assistant integration, or an automation writing settings. Then we go through the most frequently recurring cases, and at the end you’ll get a data-collection procedure you can use to file a sensible report with your installer, the manufacturer, or the integration’s author.
Before the list, there’s one thing worth understanding upfront, because it’ll save you a ton of time.
30+
Diagnostic scenarios
3
Diagnostic layers
100%
With a confirmed fix
2
Integration paths

The Deye and Home Assistant series — where are you in it?

This piece is the diagnostic hub of the series. We’re assuming the inverter is already at least partly visible in Home Assistant, or that you’re trying to figure out why the integration isn’t working. If you need a from-scratch install, a full explanation of Time of Use, or ready-made automations, use the right part of the series instead.

Safety first: what we don’t diagnose by trial and error

Home Assistant can help you spot a problem, but it doesn’t replace electrical measurements or a service visit. Don’t open the inverter, don’t swap CT, battery, AC or PV wiring while it’s live, and don’t change grid code settings, protection parameters or BMS settings just to see if the error goes away.

  • The PV and battery side can carry dangerous DC voltage. Turning off the screen or Home Assistant doesn’t mean there’s no voltage.
  • CT clamps and the meter need the correct orientation and phase order. Physical corrections should be done by an installer.
  • Don’t write to unknown Modbus registers. Reading the wrong address usually just gives you a bad number; writing to the wrong address can change something that actually matters.
  • Before an update, write down the firmware versions and settings. Don’t update several parts of the installation at once.

A 10-minute quick diagnosis

  1. Write down the full model. Not “Deye 10 kW” — the whole code from the rating plate.
  2. Identify your data source. A Solarman logger, RS485, an Ethernet gateway, ESPHome, SolarAssistant, or the cloud.
  3. Compare three places. The Deye screen, the manufacturer’s app, and Home Assistant.
  4. Check the update timestamp. A correct number from a few minutes ago still isn’t useful for fast automation.
  5. Run a controlled load test. Switch on a 1–2 kW load and see which sensors react, and in which direction.
  6. Turn off write-capable automations. While diagnosing, only one system should be controlling the inverter.
  7. Note the exact time it happened. An exact timestamp lets you cross-reference the integration log, entity history, and the inverter’s own events.

Before you go looking for someone to blame: three layers of the problem

There’s a pattern that repeats in almost every discussion about Deye and smart homes. Someone writes “I’ve got an error in Home Assistant” or “the Solarman integration is showing garbage,” and after dozens of replies it turns out the culprit was a missing CT clamp, or a logger firmware update that quietly blocked the port. It’s not really Home Assistant’s fault, or the integration’s — it’s the result of bad data going into the system from the very start.
So before you start poking around in YAML or filing a GitHub issue against the integration, check the problem in this order. It’ll save you a lot of frustration.
1
Hardware

CT clamps, RS485 wiring, termination, crosstalk from AC/DC cables. This is always where I start, because it’s the most common cause and also the easiest one to skip past while jumping straight to software.
2
Firmware

Logger and inverter updates can block a port, reset the Modbus ID, or change the RS485 port’s operating mode — with no warning in the changelog.
3
The integration

Solarman, HACS, ESPHome, register definitions, breaking changes after an add-on update — this is where you end up looking most often, but less often than you’d think is where the problem actually lives.
Spikes like a temperature of minus a hundred degrees, or sixty-something kilowatts on an eight-kilowatt inverter, are almost always a symptom of layer one or two, not a bug in the integration itself. Stick to this diagnostic order, not the reverse.

1. The inverter draws power from the grid despite PV surplus and a full battery

This is the most frequently recurring topic I’ve seen. It affects the whole Deye hybrid family: SUN-5K, 8K, 10K, 12K, 20K, single- and three-phase, standalone and running in parallel. This isn’t a defect in one unlucky unit — it’s a repeatable behaviour pattern.
Symptoms With panel production around 5–6 kW and household draw of 3–4 kW, the inverter still pulls a few hundred watts up to 1 kW from the grid. It happens even with a fully charged battery and sunny weather — conditions where grid import should theoretically be zero.
Cause Two things usually stack up. First, missing or badly connected external CT clamps, so the inverter can’t see the building’s real consumption and can’t adapt to it. Second, the inverter itself draws a small amount of power to stay synchronised with the grid as an on-grid device, typically ten-something to a few dozen watts, plus roughly 100–135 W overnight for its own control electronics. In parallel Master-Slave setups, there’s a third cause: the slave gets bad consumption data from the master and loses sync in its draw decisions.
How to check this on your own system

1. On the inverter’s screen or in Home Assistant, check whether external CTs are even connected and showing up in the configuration.
2. Turn on a big load (a kettle, an oven) and watch whether the Load/Grid Power reading reacts in real time. If it doesn’t react, the CTs aren’t working correctly.
3. Compare grid import in Home Assistant against the utility meter’s reading over a few hours of sunny weather.
4. If import is a few dozen watts, that’s normal. If it’s a few hundred watts or more, move on to the fix below.
2. Turn on a big load (a kettle, an oven) and watch whether the Load/Grid Power reading reacts in real time. If it doesn’t react, the CTs aren’t working correctly. The most commonly confirmed combination of settings is Zero Export to CT mode, Zero Export Power set low, around 2–30 W, Solar Sell disabled, Energy Pattern set to Load First, and every grid charge/discharge schedule turned off. One person described this exact setup and its effect: dropping Zero Export Power from 40 W to 20 W cut their daily import from about 2 kWh to 1.5 kWh. There are also completely different cases: the draw came from reactive power on a SmartLoad-type load, like an electric water heater, and once it was disconnected from that inverter output the system started working correctly.
An important caveat Not every bit of grid draw is a bug to chase down. 20–75 W per inverter is normal synchronisation behaviour and can’t be brought down to zero. Only a draw in the range of a few hundred watts up to 1 kW is an anomaly worth diagnosing — don’t chase the last few watts, because there’s nothing left to find there.

2. Wrong household consumption reading and Zero Export/CT problems

A close relative of problem one, but with a different leading symptom: the inverter simply doesn’t see how much the house is actually consuming, regardless of whether it’s currently producing more or less than needed.
Symptoms The utility meter shows a clear jump in draw after switching on a load, say a 2 kW kettle, but on the inverter’s screen, both Load and Grid barely change. Zero Export doesn’t work because the inverter has no real data to adapt to. There’s also a reverse variant: Zero Export to CT overstates the shown household consumption by up to three times the real figure.
Cause No external CT clamps on the grid-side supply cable, or CTs fitted facing the wrong way or on the wrong phase. On top of that, there’s a confusing distinction between two modes: Zero Export to Load uses the inverter’s internal CT in its pass-through path, while Zero Export to CT needs external clamps fitted on the main cable after the meter. Mixing these two modes up produces exactly the symptoms described.
How to check this on your own system

1. Work out which Zero Export mode you’re actually running in, and check whether the CTs that mode needs are even fitted.
2. Switch on a load with a known power draw and check the sign of the value (positive or negative) in Home Assistant — the meter should react proportionally.
3. If the sign is wrong, swap the CT wires on the inverter’s pins — it’s the fastest test.
4. Check which phase each CT is assigned to, especially on three-phase installations with an uneven load across phases.
2. Turn on a big load (a kettle, an oven) and watch whether the Load/Grid Power reading reacts in real time. If it doesn’t react, the CTs aren’t working correctly. Mount external CTs on the main cable, with the arrow on the clamp’s body pointing toward the inverter, not toward the grid. Deye’s documentation can be inconsistent here — there are two versions of the manual floating around with opposite arrows — so it’s better to verify empirically by the power sign than trust the printed manual blindly. Getting each CT assigned to the right phase matters too. If the reading is still wrong despite correct mounting, swapping the CT wires on the inverter’s pins is the simplest diagnostic test I know.

3. Modbus RS485 communication keeps dropping

The number one problem for anyone building their own integration through an ESP32, a USB-RS485 converter, or mbusd, instead of using a ready-made Wi-Fi dongle. If you’re building your own bridge, you’ll run into this sooner or later.
Symptoms Communication works, but every so often it cuts out for a fraction of a second, timeouts show up, garbage bytes appear in the log, or reading freezes completely after 12–24 hours and needs a physical unplug-replug of the adapter to get going again.
Cause A few independent sources of interference tend to stack up in practice: an RS485 cable run alongside AC or DC wiring, i.e. classic crosstalk, an unnecessary 120 Ω termination resistor on a port that shouldn’t have one, and a collision with the inverter’s built-in Wi-Fi module, which can send data over the same RS485 bus in parallel with an external device. On a large string inverter, one user described it plainly: with the inverter’s Wi-Fi module connected, response sequences got mixed up with random bytes, and the problem disappeared once it was disconnected. On top of that, one Deye-reading library’s documentation describes a known bug on certain inverter-plus-logger combinations that double-adds the CRC checksum to the Modbus frame, which looks like corrupted data to the parser on the other end.
How to check this on your own system

1. Check the RS485 cable’s route — does it run alongside AC or DC cables for any significant length?
2. As a test, disconnect the inverter’s built-in Wi-Fi module and see whether stability improves.
3. Check whether a 120 Ω termination resistor is fitted on the port, and if so, try removing it.
4. If you’re connecting directly to the serial port, try putting mbusd in between as a mediator, to eliminate conflicts between several processes fighting for access to one port.
2. Turn on a big load (a kettle, an oven) and watch whether the Load/Grid Power reading reacts in real time. If it doesn’t react, the CTs aren’t working correctly. A short, shielded, twisted cable routed well away from AC/DC wiring, with the shield grounded at one end only, on the USB adapter’s side, not the inverter’s. Remove the 120 Ω termination on the BMS port, since that port is a single point on the bus and doesn’t need a resistor, even though intuition suggests otherwise. If you suspect a Wi-Fi module collision, disconnect it as a test — it’s the fastest diagnostic. For stability, it’s worth putting mbusd in as a middle layer between the serial port and a TCP-based integration, rather than connecting directly, since mbusd can handle retries and request queuing in a way a single integration usually doesn’t.

4. Port 8899 gets blocked after a logger firmware update

This problem hit a very large chunk of the DIY community all at once, because it isn’t about one particular unit — it’s a global firmware update Deye has been pushing to every logger since mid-2024. If your integration worked for months and then suddenly died with no change on your end, this is suspect number one.
Symptoms After an OTA logger update, port 8899, previously used for local Modbus TCP reading without going through the cloud, stops responding. Port 48899, which used to be used to configure the logger over the AT protocol, is sometimes closed too. Data still shows up in the Solarman app, but the local integration stops working overnight, with no change on the user’s end and no message in the app.
Cause Solarman loggers are built on Hi-Flying HF-A11 chips, which by default exposed port 8899, letting you send and receive Modbus RTU frames in parallel with normal Solarman cloud operation. Newer firmware started filtering that port, requiring the full Solarman V5 protocol handshake instead of the simpler mode, and some versions added TLS encryption on the cloud-communication port, which makes local access from outside even harder.
How to check this on your own system

1. Check the logger’s firmware version in the Deye Cloud panel, or locally through port 48899.
2. Try a telnet connection or a simple script against ports 8899 and 48899 to see which one actually responds.
3. Check the date of the last OTA update and compare it against the date the integration stopped working.
2. Turn on a big load (a kettle, an oven) and watch whether the Load/Grid Power reading reacts in real time. If it doesn’t react, the CTs aren’t working correctly. 2. Try a telnet connection or a simple script against ports 8899 and 48899 to see which one actually responds.

5. Bad values in the Solarman integration in Home Assistant

A temperature of minus a hundred degrees, sixty-something kilowatts of power on an eight-kilowatt inverter, identical readings across all three phases, entities disappearing after every add-on update — if you’re using the ready-made Solarman integration from HACS, you’ll see one of these sooner or later.
Symptoms Sensors show physically impossible values, a negative temperature around minus a hundred degrees, or power several times the inverter’s rated output. Some entities go unavailable after a Home Assistant or integration update; the External CT Power sensor is missing from some definition files, even though it’s present in others.
Cause Three independent sources. First, using the wrong register-definition file for your model, where a read lands on a completely different register than intended, producing nonsensical values. Second, breaking changes introduced in newer versions of the integration or of Home Assistant itself, which change entity mapping without telling the user. Third, and this matters: value spikes can actually be a symptom of unstable RS485 communication as described in point three, not a bug in the integration itself — so before you start debugging YAML, check the layer below.
How to check this on your own system

1. Compare your exact inverter model against the list of supported models in the integration’s repository.
2. Check whether the bad values appear cyclically (which fits the RS485 layer) or constantly (which points more toward a wrong register definition).
3. Check the Home Assistant logs for warnings about reading a specific register.
4. Check the integration’s version history and see whether the problem started right after some update.
2. Turn on a big load (a kettle, an oven) and watch whether the Load/Grid Power reading reacts in real time. If it doesn’t react, the CTs aren’t working correctly. 3. Check the Home Assistant logs for warnings about reading a specific register.

6. Modbus Server ID reset and RS485 port reassignment after a firmware update

This one stings particularly badly, because it shows up out of nowhere, after something that on the surface has nothing to do with communication: a routine, ordinary inverter firmware update, the kind a lot of us do without thinking twice, because “well, an update is a good thing.”
Symptoms After a firmware update, RS485 stops responding, even though communication over Wi-Fi or RS232 still works fine. An integration that had run stably for months suddenly stops reading data, with no error explaining why.
Cause A firmware update can reset the Modbus Server ID value, i.e. the Modbus SN, which stops reading since the add-on tries to connect using the old, now-outdated ID. It can also happen that an update swaps a port’s assignment from Meter-485 to BMS or the other way round, which in practice means an external device gets no response at all on its previous settings, even though physically nothing changed.
How to check this on your own system

1. Go into Advanced Settings / Multi-Inverter on the inverter’s panel and check the current Modbus Server ID value.
2. Compare it against the value stored in the integration’s configuration.
3. Check which physical port the adapter is actually connected to — Meter-485 or BMS.
2. Turn on a big load (a kettle, an oven) and watch whether the Load/Grid Power reading reacts in real time. If it doesn’t react, the CTs aren’t working correctly. Set the Modbus Server ID back to the previous, known value that isn’t zero, in Advanced Settings / Multi-Inverter, then restart the inverter. If RS485 stopped responding after an update despite a correct ID, check whether the adapter is still connected to the right physical port, since firmware can switch that without warning. A good habit going forward, one I follow myself: write down your Modbus Server ID and port configuration in a notebook or in Home Assistant before every planned firmware update.

7. RS485 port working as Master instead of Slave on grid-tie models

A narrower but very clear-cut problem affecting large grid-tie string inverters, not hybrids. If you have a large string inverter, this point is for you — not for a typical home setup with storage.
Symptoms The RX LED on the RS485 port blinks continuously, roughly once a second, regardless of whether anyone is sending requests. The same adapter and the same settings work fine as a slave, and respond to Modbus requests without any configuration changes, on a different, smaller model.
Cause On large string/grid-tie inverters, the RS485 port defaults to being used solely for parallel communication between several inverters and one shared energy meter, where the inverter itself acts as master — not for reading data through an external device. It’s a completely different philosophy than on hybrids, where the port is ready out of the box to work with an external Modbus master.
2. Turn on a big load (a kettle, an oven) and watch whether the Load/Grid Power reading reacts in real time. If it doesn’t react, the CTs aren’t working correctly. One person solved this with help from Deye’s support team, who remotely updated the version of the communication processor’s software, the so-called Communication CPU Software Version. Only after that update did an extra option appear in the COM settings letting you pick between METER mode and 485 mode, where picking 485 forces the port to work as a slave. Without that firmware update, the mode-switching option isn’t even visible in the inverter’s menu at all — so if you don’t see it, it doesn’t mean you’re doing something wrong, just that you need a newer software version.

8. Battery BMS problems: Pylontech, JK-BMS, an understated capacity

The inverter can be configured flawlessly and the system still won’t work, because the problem sits in communication with the battery’s BMS. There are two recurring scenarios here: Pylontech batteries over CAN, and packs built on JK-BMS.
Symptoms No Li-BMS communication despite CAN being connected, with the inverter showing default values instead of real battery data. On JK-BMS installations running in parallel, BMS errors show up, and the battery can shut itself off after 5–10 minutes of operation. A separate, very common topic: the storage’s real, usable capacity is noticeably lower than the rated figure, and that’s not a bug — it’s the effect of specific settings.
Cause The wrong lithium/BMS communication mode set on the inverter — Pylontech needs a specific protocol, not a generic lead-acid battery mode. On top of that there’s a wrongly entered capacity in Ah and charge/discharge current limits, inconsistent firmware versions between JK-BMS modules in a parallel install, or Activate Battery mode left switched on, which in normal operation limits charging to trickle and makes it look like the battery refuses to charge.
How to check this on your own system

1. Check the battery communication mode set in the inverter’s menu and compare it against your BMS manufacturer’s recommendations.
2. Verify the entered capacity in Ah and the current limits against the battery’s datasheet, not from memory or a guess.
3. Check whether Activate Battery mode happens to be left permanently switched on.
4. On a parallel install, check that every BMS module is running the same firmware version.
2. Turn on a big load (a kettle, an oven) and watch whether the Load/Grid Power reading reacts in real time. If it doesn’t react, the CTs aren’t working correctly. Set up the lithium/BMS communication as the very first step, before configuring any of the inverter’s other working modes. For Pylontech that’s usually Lithium Mode 00. Enter the capacity and current limits per the battery’s datasheet — for example, for a Pylontech US3000C module that’s 74 Ah and 37 A of continuous charge and discharge current. It’s also worth making sure Activate Battery mode is switched off during normal operation, since it’s only meant for reviving deeply discharged or damaged cells, not everyday use, and leaving it on permanently looks exactly like an understated storage capacity.

9. The logger’s Wi-Fi module won’t connect to the home network

Less dramatic than the previous points, but definitely the one solved most often on a first install, so it earns a spot on this list — sooner or later you’ll run into it.
Symptoms The logger can’t see the home network even though it’s perfectly visible on a phone, or it connects briefly and drops right away. Configuration through the AP_xxxx hotspot works fine, but switching over to the target home network fails.
Cause Most Wi-Fi modules in Deye loggers only support the 2.4 GHz band, so trying to connect to a 5 GHz network, or a network with automatic band switching, fails with no readable error message, which can easily throw you off for a good half hour. The second common culprit is special characters in the Wi-Fi password, plus signal that’s too weak where the inverter is mounted, which is usually a garage or basement, far from the router.
2. Turn on a big load (a kettle, an oven) and watch whether the Load/Grid Power reading reacts in real time. If it doesn’t react, the CTs aren’t working correctly. Set up a separate 2.4 GHz network, or a guest network with simpler encryption, just for devices like this one. A password with no special characters or punctuation. Reset the module by holding its button for 5–10 seconds, and with weak signal, consider a Wi-Fi repeater close to the inverter instead of relying on the main router’s range, which is usually poor in a garage or basement.

10. The inverter doesn’t start automatically in the morning despite voltage on the panels

Rarer than the previous problems, but documented in enough detail to fully understand the case, and specific to a three-phase Deye grid-tie inverter.
Symptoms In the morning, despite up to 500 V on the PV panels, the inverter sits in a Waiting state for hours, with no error code on the display. Manually switching the inverter off and back on starts it up correctly right away, as if nothing had happened.
Cause A bug in the inverter’s firmware combined with a second, unconnected PV string that, despite not being physically connected, was reporting false voltage and current readings of around 25 V and 0.4–0.6 A, throwing off the auto-start logic.
2. Turn on a big load (a kettle, an oven) and watch whether the Load/Grid Power reading reacts in real time. If it doesn’t react, the CTs aren’t working correctly. In the end, what fixed it was a service ticket to Deye and a remote firmware update from their support team. Until the fix, a working workaround was manually restarting the inverter every morning, which was annoying but effective. Don’t fit any bridges or shorts on the PV input. An unused input should stay protected and only ever connected the way the specific model’s manual describes; DC-side diagnostics should be handled by a properly qualified installer who knows how to produce readings like these.

11. The inverter doesn’t start correctly after a firmware update

This last point is more of a warning than a typical technical problem, but it keeps coming back often enough in the context of inverters bought outside the authorised sales network that I couldn’t leave it out.
Symptoms The inverter stops responding after a firmware update triggered remotely through the Deye cloud, the touch panel freezes on the logo or shows a black screen, and the buttons themselves do nothing.
Cause A failed, interrupted, or mismatched update can leave the mainboard, LCD panel, BMS, or logger software out of sync with each other. User reports also mention problems with units sourced from other distribution regions, but without a proper service diagnosis you shouldn’t automatically assume the manufacturer deliberately locked the device. This isn’t a typical hardware fault — it’s the effect of a deliberate manufacturer policy toward inverters bought through grey-market channels.
2. Turn on a big load (a kettle, an oven) and watch whether the Load/Grid Power reading reacts in real time. If it doesn’t react, the CTs aren’t working correctly. Prevention works better than a cure here. Buy inverters only from authorised distributors for your market, register the device against the country where it’s actually installed, and treat every automatically-triggered update with a degree of caution, especially if you have any doubts about where the hardware came from. If a lockup has already happened, the only reliable path is contacting Deye’s authorised service in your country — DIY attempts at reviving it through service ports usually go nowhere, since the block sits on the cloud side, not on the device itself.

12. Home Assistant shows import and export swapped

This usually doesn’t mean the inverter is faulty. Integrations define the grid-power sign differently: in one, a positive value means import, in another, export. On top of that, a wrongly set register profile, or a CT assumed to be wired the wrong way round, can flip the physical measurement.

Test: after sunset, turn off battery discharge and switch on a known load. The utility meter should show draw. Note the sign and value of the Grid Power sensor. Then run a separate export test on a sunny day, if your installation is legally allowed to export energy.
Fix: don’t touch the CT right away. First confirm the integration’s sign convention. For the dashboard, you can build template sensors for import and export that split the value into positive and negative. An installer should only correct the CT’s physical orientation once the inverter’s own screen also reads the flow backwards.

13. Battery power has the wrong sign, or doesn’t match SOC

A positive battery power value doesn’t have a universal meaning. It can mean charging or discharging. SOC updates more slowly than instantaneous power, and the BMS can correct its estimate after a full charge or a longer rest period.

  • Compare Battery Power against the direction of the arrow on the inverter’s screen.
  • Watch SOC for at least a few minutes during stable charging.
  • Don’t calculate battery energy directly from a sign-varying sensor without correctly splitting out the directions.

14. Entities are available, but the data is stale

An entity’s state can still look correct even though the integration hasn’t pulled a fresh frame in a long time. This is especially dangerous in PV-surplus, battery-charging, and import-limiting automations.

Rule: entity availability and data freshness are two different things. An automation should know the time of its last valid update, and should stop controlling anything once the data’s age exceeds an acceptable limit.

Check the second-by-second sensor history, the integration’s log, the number of reconnects, and whether several clients are polling the same interface. Don’t automatically shorten the polling interval — overly aggressive polling can make things worse.

15. Daily energy resets at the wrong time, or jumps after a restart

The cause can be a mismatched time zone between the inverter, the logger and Home Assistant, a different definition of “today” in the cloud, an internal counter restarting, or incorrect register scaling.

For the Energy panel, a total counter that keeps growing over time is better than a daily-production sensor. A daily sensor can be handy for display purposes, but once it resets you need to be careful with your long-term statistics.

16. The Energy panel double-counts energy, or the balance doesn’t add up

The most common mistake is adding both the whole inverter’s energy and the individual MPPTs’ energy to the panel, or using both the utility meter’s data and a calculated Grid Energy figure at the same time without deciding which source takes precedence.

Validation: over a short, stable period, this balance should roughly hold: PV + import + battery discharge = load + export + battery charging + losses. A small difference is normal, due to different sampling times; a large, persistent one points to a wrong sign, scale, or measurement range.

17. The inverter doesn’t charge the battery to the set SOC

A target SOC isn’t an unconditional command. Behaviour is affected by: the active TOU period, Grid Charge, the operating mode, the maximum charging current, the source’s power, battery temperature, BMS limits, cell voltage, and the globally set reserve.

  1. Check exactly which TOU period is active right now.
  2. Confirm Grid Charge is allowed, if you’re expecting charging from the grid.
  3. Read the charge current limit, and the limits passed down by the BMS.
  4. Compare the target SOC against the global shutdown, restart and low-battery levels.

You’ll find the full logic behind these fields in the article Deye Time of Use: SOC, Grid Charge and the six time slots.

18. The battery charges or discharges much slower than set

The Power value, or the maximum current in the inverter’s menu, is only one of several limits. Real power is the smallest of what the inverter, the battery, the BMS, temperature, voltage, current SOC, the wiring, and the available energy source all allow.

Especially at high SOC, the BMS can gradually reduce current to balance the cells. At low temperatures, many lithium batteries reduce or completely block charging. Don’t try to “fix” this by raising limits without first checking the BMS’s own messages.

19. A setting changed from Home Assistant reverts after a few seconds

There are four main possible causes: the integration has no write access and only changes the entity’s state locally, the inverter rejects the value, another automation is overwriting the setting, or another system — the cloud, SolarAssistant, a second Modbus client — is writing its own profile.

A controlled test: turn off every automation, manually change one low-risk parameter, wait a full read cycle, check the inverter’s screen, and then read that same parameter again. A green entity state on its own isn’t confirmation that the write actually landed.

20. Only part of Time of Use gets saved

A single TOU profile can consist of many independent registers: hours, SOC, power, Grid Charge and Gen Charge for six periods. If an automation only writes part of it, or runs the operations too quickly, the inverter can end up with a mix of old and new settings.

Write logical groups in a fixed order, use the short delays your integration requires, do a read-back after each group, and don’t rewrite the whole schedule every minute. Ideally, only change the parameters that actually need to change.

21. Two integrations work fine separately, but cause disconnects together

A serial port can only have one direct owner. A logger or Modbus TCP gateway can also limit the number of simultaneous sessions. Home Assistant, SolarAssistant, a diagnostic app and a test script running at the same time can interrupt each other’s transmissions.

Good architecture: pick one client to talk to the inverter, and distribute the data further through MQTT or Home Assistant. Don’t assume that because each system worked fine on its own, the port can serve them all in parallel.

22. A Master–Slave setup shows incomplete or doubled data

In a parallel install, you need to work out which values are global and which belong to a specific inverter. Summing Load or Grid across every device can double the result if each inverter reports the shared meter reading. Reading only the master, on the other hand, might not include the details of every MPPT and battery.

First verify each unit’s role, its unique Modbus SN/ID, and the multi-inverter documentation of your integration. Then compare the sensors during a controlled load and production test. Don’t automatically sum entities just because their names look similar.

23. After a Home Assistant restart, an automation runs a dangerous or costly command

After starting up, some entities briefly show a state of unknown or hold onto their last database value. An automation that triggers on a state change can treat that initialisation as a real event.

  • Require every key entity to be available and holding a valid number.
  • Add a settling delay after HA or the integration starts.
  • Don’t write anything based on a single reading.
  • Keep a safe, physical fallback schedule in the inverter for whenever HA is unavailable.

24. An automation keeps flipping a setting back and forth forever

A threshold with no hysteresis causes oscillation. Example: turn on a boiler above 1 kW of export, turn it off below 1 kW. Once the boiler switches on, export immediately drops, the device gets switched off, and export comes back up.

Use a separate on-threshold and off-threshold, a minimum run time, averaging or a sustained-surplus condition, and a limit on how often you write to the inverter.

25. The logger works in the app, but Home Assistant can’t connect

The cloud app working confirms the logger has an internet connection, but it doesn’t guarantee a local API is available. What matters is the logger model, its firmware, the port, the protocol, Wi-Fi client isolation, the VLAN, and firewall rules.

Check the IP address, whether it’s reachable from Home Assistant’s network, the logger’s model and serial number, and the documentation of the integration you’re using. Don’t forward port 8899 from the internet to the logger. Test locally.

26. RS485 works on a short test cable, but drops frames once fully installed

A classic sign of a physical-layer problem: the wrong wire pair, a star topology, no common reference where one’s needed, interference, too long a run, wrong termination, or a non-isolated adapter.

Don’t diagnose with just a ping. RS485 isn’t Ethernet. What matters is CRC errors, timeouts, the number of valid frames, and behaviour under the installation’s actual load. Route the cable away from AC and PV cables, use a twisted pair, and use a bus topology matching the documentation.

27. After an integration update, some entities disappeared or got renamed

A change to the profile, sensor definitions, or the discovery mechanism can create new entities and leave the old ones unavailable. Automations still referencing the old identifiers keep failing silently.

Before updating, note down the integration’s version and a list of your key entities. After updating, check Repairs, the entity registry, disabled entities, and the project’s changelog. Don’t delete old energy statistics right away, since a changed identifier can break the history.

28. The inverter works fine, but the forecast and automation make bad decisions

This doesn’t have to be a Deye problem at all. A wrong PV forecast, overlooked overnight consumption, storage losses, or an energy price that ignores distribution fees can all lead to economically bad decisions even though the inverter carries out its commands correctly.

Separate three layers: the input data, the automation’s decision, and Deye’s execution. Log the reason behind every decision — the prices used, the forecast, the SOC, and the intended target.

How to write a good problem report

The sentence “Deye doesn’t work in HA” doesn’t let anyone tell an installation error apart from a register-profile issue. A good report should include:

  • the full inverter model, the logger or adapter model, and the battery type;
  • the firmware version of the inverter, panel, BMS and logger, if available;
  • the Home Assistant and integration version;
  • the communication method, address, port, Modbus ID and RS485 parameters, with passwords omitted;
  • the exact time of the error, and a short log excerpt covering that event;
  • a comparison of the reading on the inverter’s screen, the app, and HA;
  • what’s already been checked, and whether the problem still happens with automations disabled.

Bonus: the most common fault codes on the touch panel

Beyond integration problems, sooner or later you’ll see one of a handful of recurring fault codes on the inverter’s panel. Here’s a short rundown of what they actually mean and where to start diagnosing.
Code
Meaning, and what to check
F13
A mode change, or a momentary loss of the battery from the inverter’s view. Usually clears on its own after a moment — no need to panic right away.
F19
An insulation resistance fault. Linked to moisture and the PV installation’s grounding quality; gets worse in rain or humid air.
F20
DC overcurrent. Reduce the load at startup in off-grid mode, especially if you have large inrush loads like a heat pump.
F22
A remote shutdown, for example through your operator’s remote control or a power-limiting feature in your tariff.
F23
Leakage current. Check the PV installation’s grounding and the condition of the DC cable insulation, especially anywhere exposed to moisture.
F56
Battery DC voltage too low. The battery is heavily discharged, or the BMS protection tripped — needs a full inverter power-off/power-on cycle.

Checklist: what to check before you contact support

Before you open a GitHub issue or call service, go through this list. In most of the cases I’ve described above, you’ll find the answer right here — not in the next add-on update.
1
External CTs are physically fitted, on the right phase, facing the right way.
2
The RS485 cable doesn’t run alongside AC/DC cables, and termination is where it’s actually needed.
3
The Modbus Server ID and RS485 port assignment match what you wrote down before the last update.
4
The register definition file used by the integration actually matches your inverter model.
5
The battery’s BMS communication is set to the right mode, and the capacity and current limits match the datasheet.
6
The date the problem started lines up with some update — firmware, integration, or a HACS add-on.

If you’re still planning your integration: two paths to choose from

Before picking how to connect the inverter to your smart home, it’s worth deciding deliberately which side of the trade-off you want to be on, since that decision determines which of the eleven problems above you’ll end up dealing with.
A Wi-Fi dongle + port 8899/Solarman
Set up in 10 minutes, zero soldering, great for getting started. The risk: Deye can block the port after the next logger OTA update, and then you’re left with just the mobile app and no local reading in Home Assistant.
Your own RS485 → Modbus TCP bridge
More work up front — an ESP32, a Waveshare or Elfin EW11, good wiring — but independence from Deye’s cloud and its future updates, plus the ability to write registers, meaning real control, not just reading.
Personally, on new installations I integrate with Home Assistant, I’m increasingly picking the second path, precisely so I’m not dependent on whether Deye decides to block another port. The key pieces of a bridge like this are an RS485-to-TCP converter (a Waveshare, or a simple ESP32 with the right project), a short, well-routed cable to the inverter’s port, and mbusd as a middle layer if you want several clients reading the same data at once.
A note on ports On many hybrids, the physical BMS port carries both RS485 and CAN on the same connector, so connecting your own bridge will need a splitter or a Y-cable to avoid colliding with the bus the battery is using.

What’s next?

Got a similar problem that isn’t listed here, or a different fix for the same symptom? Leave a comment — I’m happy to update this article with your case.
Społeczność MarkLabs

Dyskutuj na forum

Pytania, doświadczenia i rozwiązania do tego artykułu publikujemy teraz na forum MarkLabs.

Otwórz dyskusję na forum

Wymagane jest bezpłatne konto MarkLabs. Dotychczasowe komentarze bloga nie są przenoszone.

buymeacoffee.com