

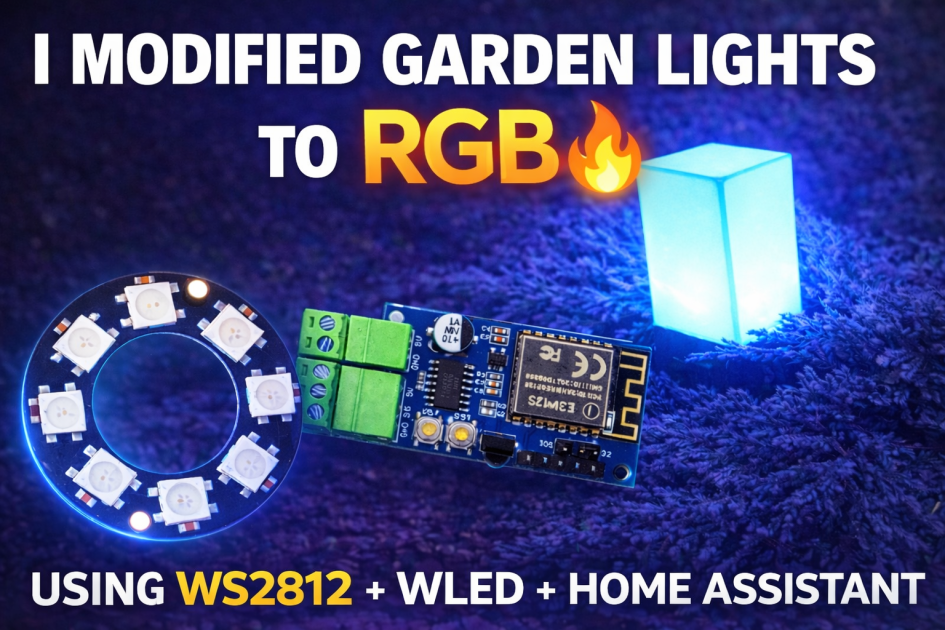

Smart Garden Lighting DIY — Retrofit Post Lights with WS2812 and ESP8266 (Part 1: Hardware)
Mark
Autor
Smart Garden Lighting DIY — Retrofit Post Lights with WS2812 and ESP8266 (Part 1: Hardware)

Did you like this article?

Creating guides takes a lot of time, and I don’t want ads on the site. If I’ve helped you and you feel like it — buy me a coffee. It really motivates me to keep writing!

Why retrofit instead of buying smart lights?

Off-the-shelf smart garden lights are expensive, locked into proprietary apps, and offer limited control. If you already have garden post lights installed — you’re halfway there. With a $1.50 WS2812 LED ring and an ESP8266 controller, you can turn any standard garden fixture into a fully addressable RGB light with hundreds of effects, full Home Assistant integration, and safe 5V DC operation.

Smart Garden Lighting DIY — Retrofit Post Lights with WS2812 and ESP8266

This guide covers the hardware side of the build: components, wiring, assembly, and safety. Part 2 covers WLED firmware setup and Home Assistant automations.

What you’ll end up with: A garden lighting system with full RGB color control, dozens of animated effects via WLED, motion-triggered automations in Home Assistant, and 5V DC wiring instead of mains voltage near ground level.

The controller — one module does it all

The key component is the ESP8266 WIFI WS2812 RGB Lamp controller — a compact ready-made module that costs around $8 on AliExpress. It combines an ESP8266 microcontroller with Wi-Fi, a WS2812 data output, and a 5V power input in one small enclosure. No soldering a dev board, no breadboard, no custom PCB.

Why not a bare ESP8266? You could build the same thing from a NodeMCU and some wiring, but this module is cleaner, easier to mount in a weatherproof enclosure, and costs roughly the same. For a garden install you want something tidy.
Smart Garden Lighting DIY — Retrofit Post Lights with WS2812 and ESP8266

Components list

# Component
1 ESP8266 WIFI WS2812 RGB Lamp controller
The brains of the system. ~$8. → AliExpress
2 WS2812 8-LED ring
One per fixture. Fits perfectly into a standard E27 bulb socket opening. ~$1.50/each. → AliExpress
3 Male/female connectors
Soldered to each ring for tool-free swapping if a ring ever fails. → AliExpress
4 3-core cable
YKY 3×1.5mm² burial cable or Cat5e (use 3 twisted pairs). 2-core will not work — you need 3 wires: 5V, GND, Data.
5 5V PSU (min. 5A per 10 rings)
Size generously: 10 rings × 8 LEDs × 60mA = up to 5A at full white brightness. Add 20–30% headroom.
Cost per fixture: roughly $2–3 (ring + connectors). The controller is shared across the whole run, so its cost spreads across all lights in the chain.

How WS2812 chaining works

Each WS2812 ring has 4 pins:

+5V — power GND — ground
DI — Data In: signal input DO — Data Out: signal to next ring

Rings are connected in a daisy chain: the DO of one ring connects to the DI of the next. The controller sends the full data stream down the chain and each ring reads its own pixel data and passes the rest along.

Most common mistake: swapping DI and DO. DI is always the input — that’s where the signal comes from the controller or the previous ring. DO is the output — the signal goes out to the next ring. Getting these backwards is the #1 reason lights don’t respond.
Chain length limit: voltage drop limits how many rings you can run on one line. In my setup, 10 rings over 15–20 metres work reliably with no issues.

Assembly — replacing the bulb socket

The WS2812 8-LED ring is a near-perfect drop-in replacement for a standard E27 bulb socket. No drilling, no modifying the fixture body.

Smart Garden Lighting DIY — Retrofit Post Lights with WS2812 and ESP8266

Step Action
1 Remove the E27 bulb socket from the fixture
2 Fit the WS2812 ring into the opening — it sits flush
3 Secure the ring — no modification to the fixture needed
4 Solder male/female connector to the ring pins for easy future servicing

Smart Garden Lighting DIY — Retrofit Post Lights with WS2812 and ESP8266

Wiring diagram

Important: you need 3 wires between fixtures (5V, GND, Data). A 2-core cable will not work.

Option A — 3-core burial cable — if your existing garden cable already has 3 cores (like mine), you’re good to go.
Option B — Cat5e cable — use 3 twisted pairs (one pair per wire). Works well at these distances with WS2812 signal.

Daisy chain signal path:

Controller → Ring 1 (DI) → Ring 1 (DO) → Ring 2 (DI) → Ring 2 (DO) → Ring 3 (DI) → …

Power (+5V and GND) runs in parallel to each ring from the main PSU. Data runs in series through the chain.

Smart Garden Lighting DIY — Retrofit Post Lights with WS2812 and ESP8266

Safety — 5V DC instead of mains voltage

One of the biggest wins of this build: the entire garden cable network runs at 5V DC. Mains voltage is confined to the weatherproof enclosure housing the controller and PSU — nowhere near ground level or children playing nearby.

Warning: Mains voltage work can be lethal. Only connect the PSU to mains with power isolated and verified off with a meter. If you’re not confident with mains wiring, have a qualified electrician do that part.
IP65 enclosure — house the controller and PSU in a weatherproof enclosure rated at least IP65 for outdoor installation.
PSU sizing — 10 rings × 8 LEDs × 60mA = up to 5A at full white. Always add 20–30% headroom to avoid running the PSU at its limit.
Mains feed cable — the cable bringing 230V/120V to the enclosure must meet local wiring regulations. Everything downstream of the PSU is safe 5V.

What’s next

1 This article — hardware build
Components, wiring, assembly, safety.
2 Firmware and integration
Flashing WLED, configuring effects, Home Assistant integration, motion-triggered automations.

Questions about the hardware build? Drop them in the comments.
Społeczność MarkLabs

Dyskutuj na forum

Pytania, doświadczenia i rozwiązania do tego artykułu publikujemy teraz na forum MarkLabs.

Otwórz dyskusję na forum

Wymagane jest bezpłatne konto MarkLabs. Dotychczasowe komentarze bloga nie są przenoszone.

buymeacoffee.com