Table of contents
Smart Home from Scratch – Complete Guide to Home Assistant
Last updated: 2026-07-18
Module 1 Smart Home and Home Assistant, Without the Chaos No hardware, no installation, no wiring. Module 1 is where…
 How This Course Works, and What You'll Actually Learn
Free
How This Course Works, and What You'll Actually Learn
Free
- A full walkthrough of all 23 modules | What you don't need to worry about yet | A realistic week-by-week timeline | How to use this course so it actually sticks
 Is Home Assistant Actually Right for You?
Free
Is Home Assistant Actually Right for You?
Free
- What Home Assistant actually requires long-term | Who it's genuinely not a good fit for | A five-question test to check your own fit | Simpler alternatives if HA isn't the right call
 What Is a Smart Home, Really?
Free
What Is a Smart Home, Really?
Free
- The real difference between 'connected' and 'smart' | The four building blocks behind every automation | Why remote control isn't the end goal | A practical exercise to find your own starting problem
 Home Assistant vs. Google Home, Alexa, and Apple Home
Free
Home Assistant vs. Google Home, Alexa, and Apple Home
Free
- The business model behind each platform | Where Google Home, Alexa, and Apple Home hit their limits | What Matter and Thread actually change | The hybrid model: Home Assistant as the brain, voice assistants as the interface
 Tuya, KNX, Loxone, Fibaro, and Professional Systems
Free
Tuya, KNX, Loxone, Fibaro, and Professional Systems
Free
- What Tuya actually is, and why so many cheap devices share it | Fibaro, Loxone, and KNX compared for cost and reliability | US/UK equivalents: Lutron, Control4, and premium wired systems | How to integrate an existing system instead of replacing it
 Why Home Assistant Often Wins as the Smart Home Hub
Free
Why Home Assistant Often Wins as the Smart Home Hub
Free
- Why local operation matters more than it sounds | One brain, any brand: the biggest practical advantage | A worked example of real energy savings | HACS: a powerful tool that needs some judgment
 Your Smart Home Plan: What to Automate and Where to Start
Free
Your Smart Home Plan: What to Automate and Where to Start
Free
- Turning a household annoyance into sensor, condition, action | Why an automation without a sensor is just a timer | How to prioritize by frequency and simplicity | A simple plan format you'll reuse in later modules
 Beginner Mistakes: What Not to Do at the Start
Free
Beginner Mistakes: What Not to Do at the Start
Free
- Why shopping before planning causes most other mistakes | Which automations are too risky to build first | A real story: ten bulbs, zero automations | A checklist to run before every purchase
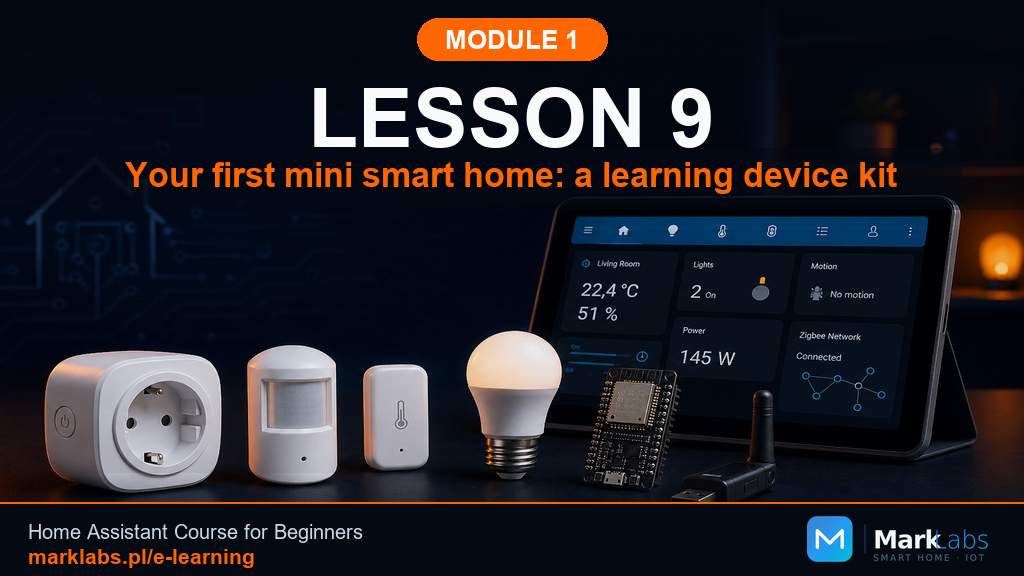 Your Mini Smart Home Kit: The Starter Shopping List
Free
Your Mini Smart Home Kit: The Starter Shopping List
Free
- Two kit options: minimum and optimal | What to check before buying any device | Budget alternatives, and when they make sense | What to skip until after Modules 3 and 4
 Module Wrap-Up: You're Ready for the Technical Foundation
Free
Module Wrap-Up: You're Ready for the Technical Foundation
Free
- A checklist covering everything from Module 1 | What you genuinely still don't need to know yet | What to expect in Module 2's first week | Why there's no rush to install anything yet
Module 2 A Home Ready for Home Assistant Still no Home Assistant install here, that's Module 5. Module 2 builds the…
 Before You Install Home Assistant: What a Stable Smart Home Actually Needs
Free
Before You Install Home Assistant: What a Stable Smart Home Actually Needs
Free
- Why a shaky network causes most beginner smart home failures | The real minimum foundation versus the optional extras | Three levels of ambition, from a weekend project to a full renovation | A checklist to know when your home is genuinely ready
 Where to Put Home Assistant, and Why Ethernet Beats Wi-Fi Here
Free
Where to Put Home Assistant, and Why Ethernet Beats Wi-Fi Here
Free
- Why Home Assistant should be treated like a server, not an app | Good spots versus places to avoid entirely | Fallback options when there's no Ethernet jack nearby | Placement logic that applies no matter which hardware you choose
 Wiring Your Home for a Smart Home
Free
Wiring Your Home for a Smart Home
Free
- The one rule every experienced installer agrees on | Which cable to buy, and where an Ethernet drop earns its keep | PoE, outdoor runs, and the neutral wire problem in older homes | DIY versus hiring a low-voltage contractor, with realistic costs
 Your Utility Closet, Electrical Panel, and UPS: Staging and Powering Your Gear
Free
Your Utility Closet, Electrical Panel, and UPS: Staging and Powering Your Gear
Free
- Closet, rack, or shelf: picking what fits your ambition | Why your electrical panel is a job for a licensed electrician | What a UPS actually protects against, and why it matters | A realistic budget for backup power
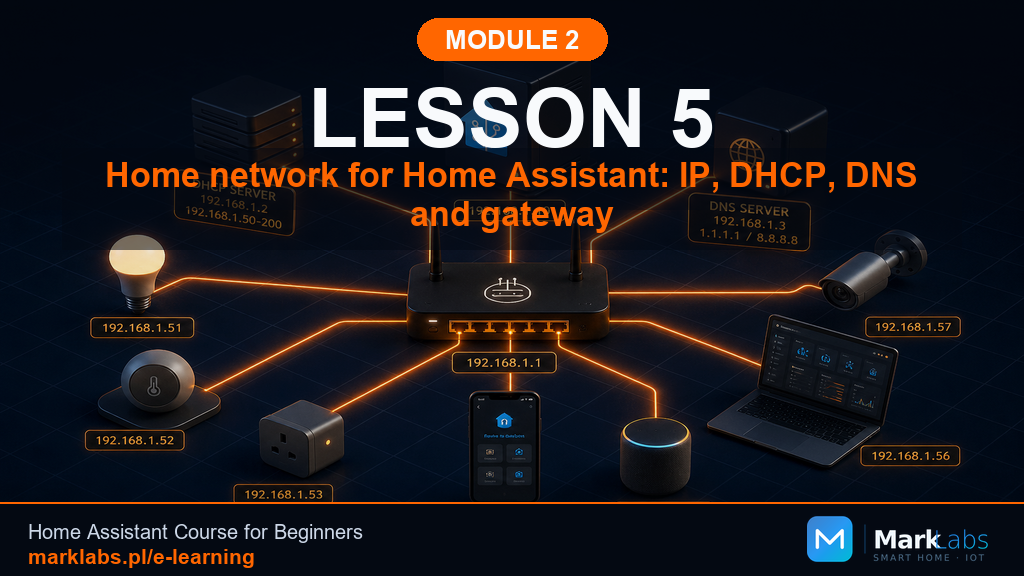 Your Network Explained: IP Addresses, DHCP, DNS, and the Gateway
Free
Your Network Explained: IP Addresses, DHCP, DNS, and the Gateway
Free
- What an IP address actually is, and how to find your own | DHCP, gateways, and DNS explained without the jargon | Why a guest network can't see Home Assistant, by design | Why Zigbee devices don't have IP addresses at all
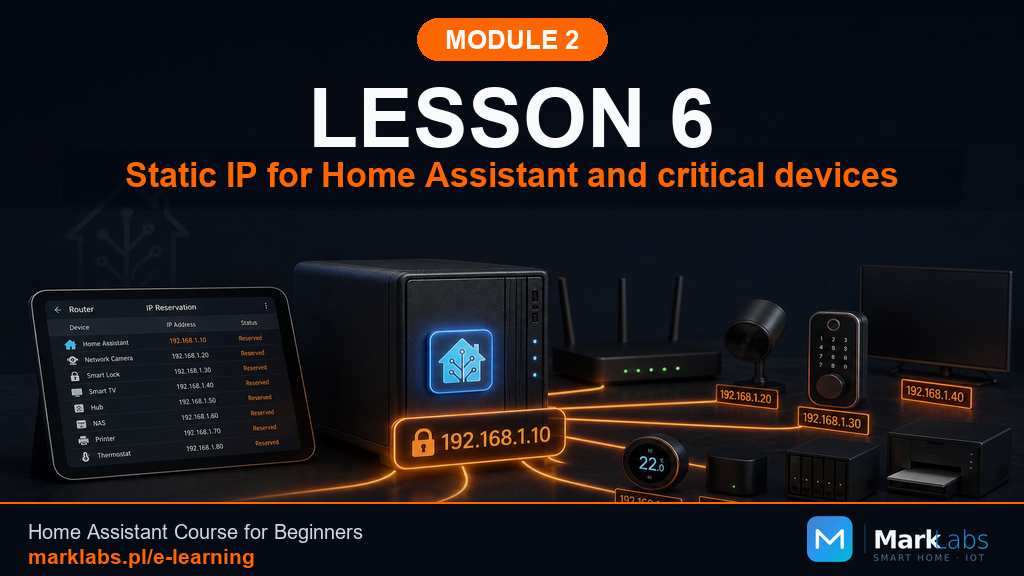 A Fixed Address for Home Assistant and Your Key Devices
Free
A Fixed Address for Home Assistant and Your Key Devices
Free
- DHCP reservation versus a static address, and which one to use | How to find a device's MAC address and plan your addressing scheme | A worked example, start to finish | The most common causes of a reservation that seems not to work
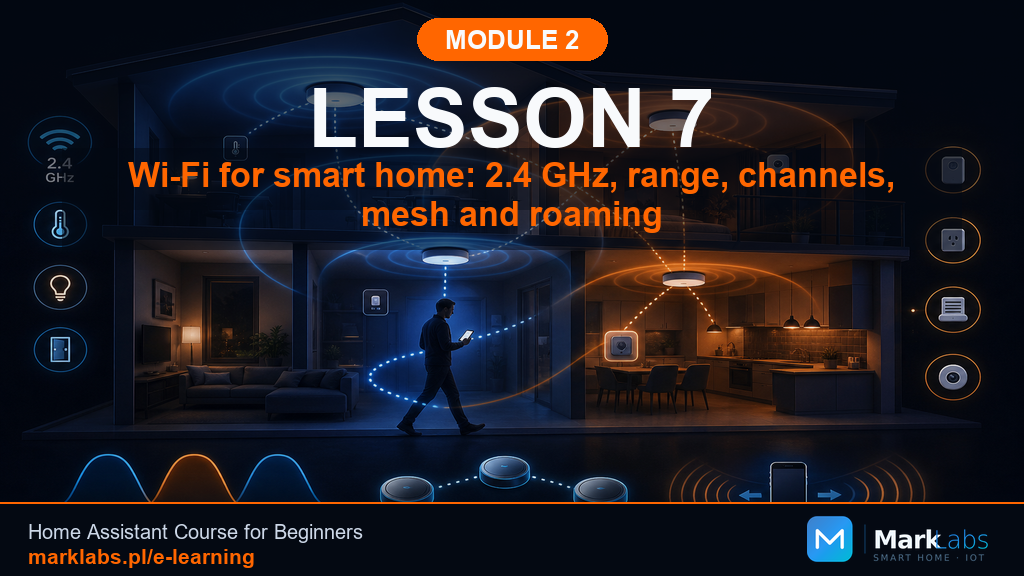 Wi-Fi for a Smart Home: Bands, Range, Channels, Mesh, and Roaming
Free
Wi-Fi for a Smart Home: Bands, Range, Channels, Mesh, and Roaming
Free
- 2.4GHz versus 5GHz: which band for which devices | Mesh systems, repeaters, and roaming behavior compared | Channel selection that leaves room for Zigbee later | A room-by-room signal check before you start pairing devices
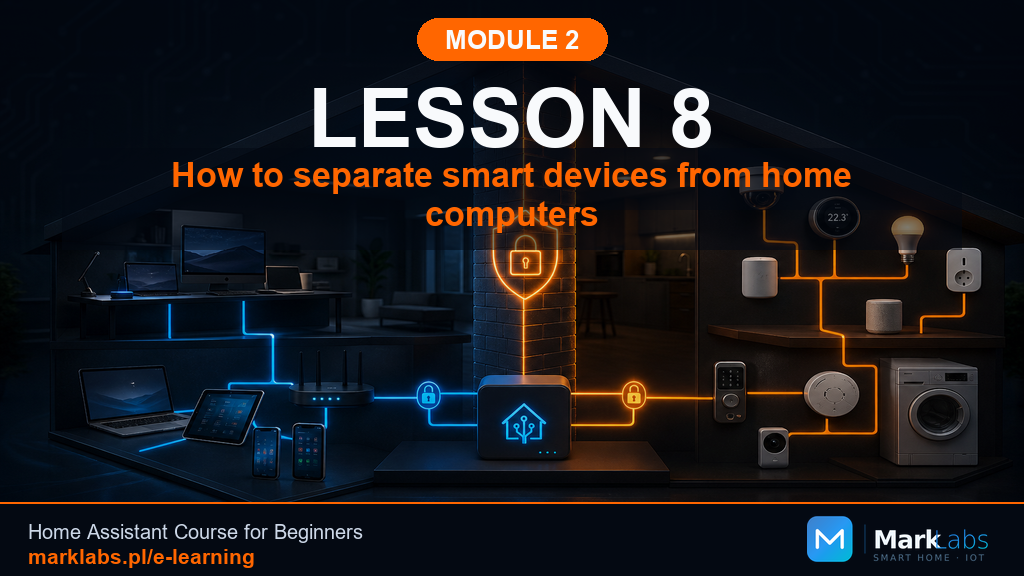 Separating Your Smart Devices From Your Everyday Computers
Free
Separating Your Smart Devices From Your Everyday Computers
Free
- Why separation is worth considering, without becoming a security expert | Guest networks, second SSIDs, and what genuinely isolates devices | Client isolation: helpful for guests, harmful for smart devices | What might break after segmentation, and how to avoid it
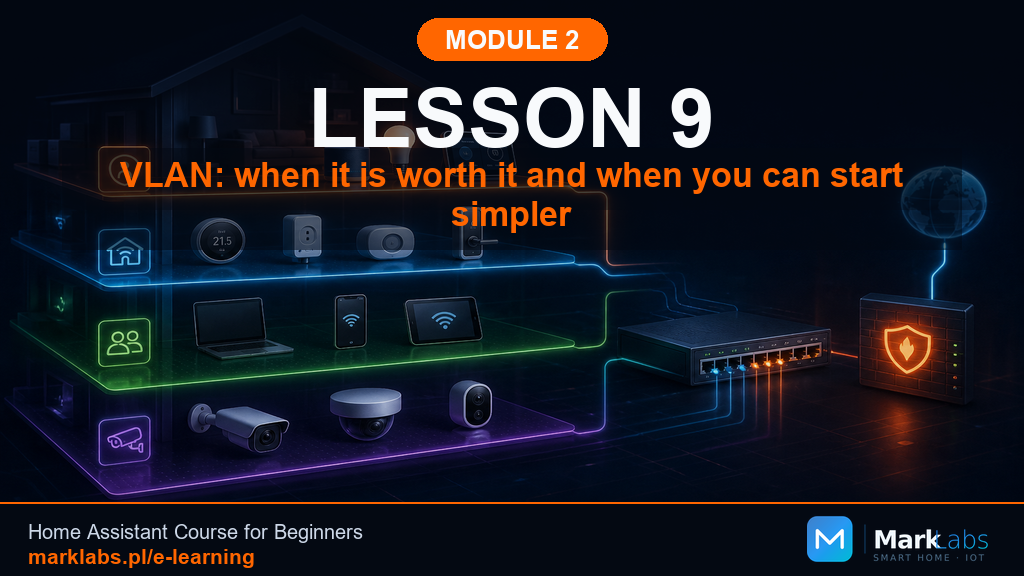 VLANs: When They're Worth It, and When Simpler Is Fine
Free
VLANs: When They're Worth It, and When Simpler Is Fine
Free
- What a VLAN actually is, without the jargon | What hardware you actually need for real VLAN segmentation | A typical VLAN layout for a Home Assistant household | The single most common VLAN mistake, and how to avoid it
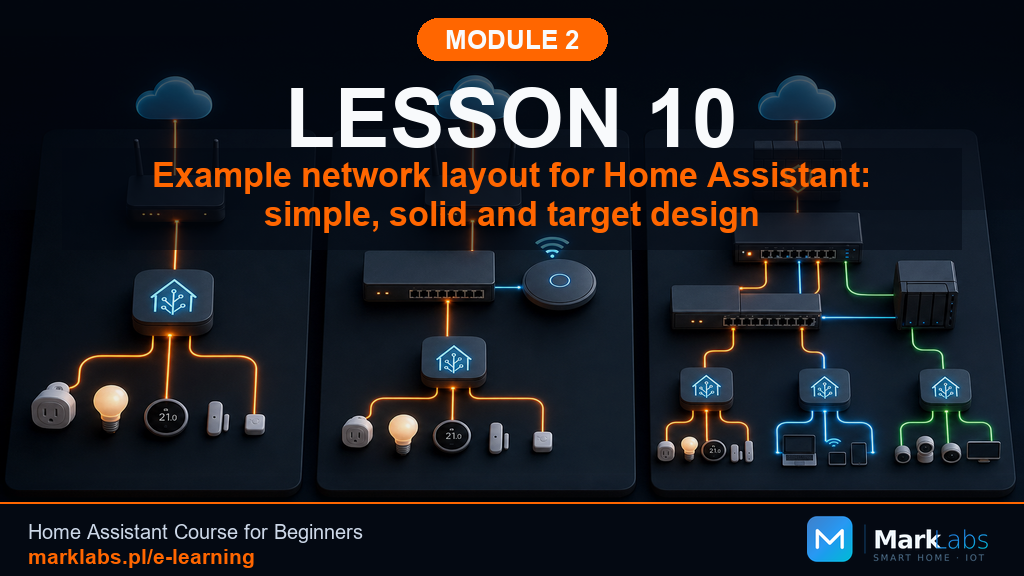 Three Example Network Layouts: Simple, Reasonable, and Full-Featured
Free
Three Example Network Layouts: Simple, Reasonable, and Full-Featured
Free
- Layout 1, 2, and 3 explained with real costs and timelines | A side-by-side comparison table across every key feature | Why starting simple is never a wrong choice | Three real households and the layout each one actually chose
 The Most Common Network Problems in Home Assistant, and How to Diagnose Them
Free
The Most Common Network Problems in Home Assistant, and How to Diagnose Them
Free
- Rule number one: internet and local network are different things | A simple diagnostic path that works for almost any symptom | Why Zigbee problems and Wi-Fi problems are never the same issue | When to stop troubleshooting alone and ask the community
 Module Wrap-Up: Is Your Home Actually Ready for Home Assistant?
Free
Module Wrap-Up: Is Your Home Actually Ready for Home Assistant?
Free
- A complete readiness checklist covering everything from this module | The one item worth double-checking before you move on | What's next: choosing the actual hardware to run Home Assistant on | Why you don't need to be a network engineer to succeed here
Module 3 Home Assistant Server Still no installation here, that's Module 5. Module 3 answers the question that comes…
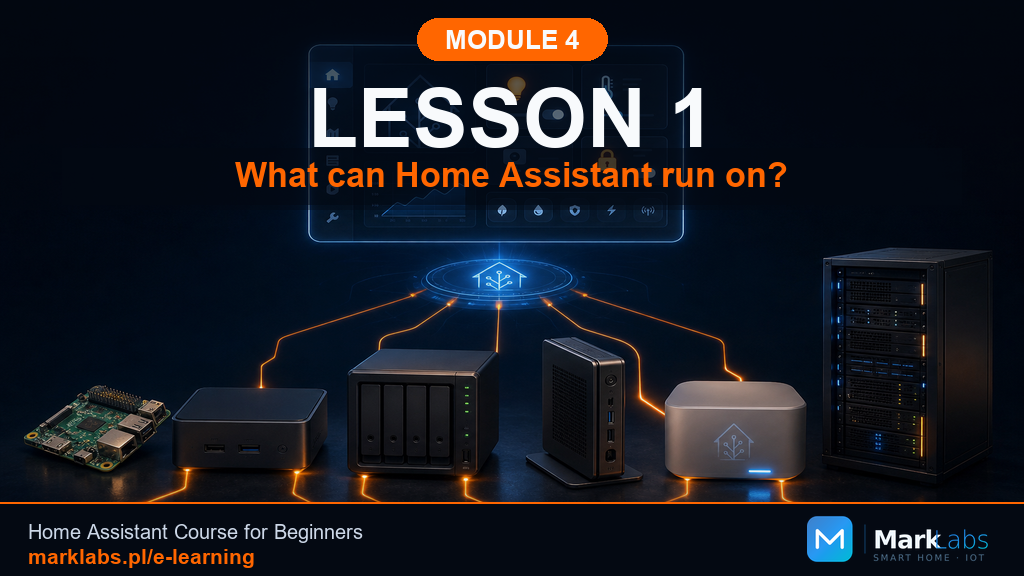 What Can Home Assistant Actually Run On?
Free
What Can Home Assistant Actually Run On?
Free
- Five hardware categories, from official kits to secondhand business gear | Better questions to ask than simply 'will this run Home Assistant?' | The criteria that actually separate a good choice from a fragile one | Why this module comes before installation, not after
 Home Assistant Green and Yellow: Official Hardware, and Who It's For
Free
Home Assistant Green and Yellow: Official Hardware, and Who It's For
Free
- What Green and Yellow actually are, and how they differ | Real limitations worth knowing before you buy | What's in the box, and what you'll still need separately | Real scenarios where official hardware is the right call
 Raspberry Pi as a Home Assistant Server: When Yes, When No
Free
Raspberry Pi as a Home Assistant Server: When Yes, When No
Free
- Pi 4 versus Pi 5: a short, practical answer | The microSD problem, and why booting from SSD matters more than anything else here | A realistic kit cost, and what not to buy | When a Pi is genuinely enough, and when it isn't
 Mini PC as a Home Assistant Server: Headroom and Low Power Draw
Free
Mini PC as a Home Assistant Server: Headroom and Low Power Draw
Free
- N100-family processors explained in plain terms | How much RAM you need, with and without Proxmox | Brand examples to know, not a fixed shopping list | New versus secondhand, and the warranty tradeoff
 Off-Lease Business Thin Clients as a Home Assistant Server: Cheap, Reliable, But Buy Smart
Free
Off-Lease Business Thin Clients as a Home Assistant Server: Cheap, Reliable, But Buy Smart
Free
- What an off-lease thin client actually is, and why it's so cheap | Minimum specs and typical models to look for | Buying pitfalls that separate a great deal from a headache | One question to the seller that saves real disappointment
 NAS as a Home Assistant Server: Convenience or Trap?
Free
NAS as a Home Assistant Server: Convenience or Trap?
Free
- Home Assistant Container versus full Home Assistant OS | When a NAS makes sense, and when it's already too busy | Using a NAS purely for backups, even without hosting Home Assistant | Three real scenarios to compare against your own household
 Hardware for Proxmox: When Virtualization Is Worth Planning For
Free
Hardware for Proxmox: When Virtualization Is Worth Planning For
Free
- What Proxmox actually gives you, in plain terms | How it changes RAM and storage requirements before you buy | When it's genuinely overkill for a Home Assistant-only setup | A quick hardware checklist if you do decide to go this route
 Disk, RAM, Processor, and Power: What Actually Matters
Free
Disk, RAM, Processor, and Power: What Actually Matters
Free
- Why a genuine SSD matters more than any other single spec | How much RAM and storage you actually need, and when to go bigger | Why processor benchmarks mostly don't matter here | How to read a spec sheet without the marketing noise
 What Does a Home Assistant Server Actually Cost Over 5 Years?
Free
What Does a Home Assistant Server Actually Cost Over 5 Years?
Free
- A simple formula for calculating your own electricity cost | Five scenarios compared over five years of continuous operation | The hidden costs easy to overlook when comparing options | When it's genuinely worth paying more upfront
 What Should You Actually Choose? A Simple Recommendation
Free
What Should You Actually Choose? A Simple Recommendation
Free
- Real scenarios: who chose what, and why it fit their household | A quick decision table for every option covered in this module | A checklist before moving on to installation | What's coming next in Module 4
Module 4 Communication Protocols in the Smart Home Your server is chosen, now it's time to understand how your future…
 Z-Wave in Home Assistant: How It Works, What to Buy, and Setting Up Z-Wave JS
Free
Z-Wave in Home Assistant: How It Works, What to Buy, and Setting Up Z-Wave JS
Free
- How Z-Wave's mesh networking and region-specific frequencies work | What a Z-Wave controller is, and which ones to buy | A full Z-Wave JS UI setup walkthrough, step by step | Inclusion, Security S2, and network healing explained
 WiFi IoT in Home Assistant: Shelly, Sonoff, Tasmota, and ESPHome
Free
WiFi IoT in Home Assistant: Shelly, Sonoff, Tasmota, and ESPHome
Free
- Why manufacturer cloud dependency is the single biggest risk with WiFi IoT | Shelly's genuine local API, and other brands worth knowing | Flashing Tasmota and ESPHome to replace cloud-dependent firmware | Network segmentation and security considerations for WiFi devices
 Matter and Thread in Home Assistant: Setup and Devices
Free
Matter and Thread in Home Assistant: Setup and Devices
Free
- What Matter and Thread are, and how they relate to each other | Setting up Home Assistant's built-in Matter server, no commercial hub needed | What device categories Matter supports well today, and what's still thin | Multi-admin: letting several platforms control the same device at once
 Bluetooth BLE in Home Assistant: Sensors and Proxies
Free
Bluetooth BLE in Home Assistant: Sensors and Proxies
Free
- Classic Bluetooth versus BLE, and why the difference matters | How Home Assistant's built-in Bluetooth support works out of the box | Bluetooth Proxy: extending range with cheap ESP32 boards | Popular BLE devices worth buying, and battery life expectations
 Niche Protocols in Home Assistant: mBus, Modbus, KNX, and More
Free
Niche Protocols in Home Assistant: mBus, Modbus, KNX, and More
Free
- M-Bus and wireless M-Bus for utility meter reading | Modbus, the industrial workhorse behind many solar and battery systems | KNX and DALI, professional building automation and lighting standards | OpenTherm and US/UK utility meter data access approaches
 Which Protocol for Which Device: A Complete Smart Home Protocol Map
Free
Which Protocol for Which Device: A Complete Smart Home Protocol Map
Free
- A complete device-to-protocol reference table | Four real household scenarios: apartment, new build, renovation, and solar home | How many controllers and radios you actually need, realistically | A checklist before moving on to Module 5's installation
Module 5 Installing Home Assistant This is the moment the course has been building toward. Your network is ready, your…
 Installing Home Assistant: Choose Your Path and Prep Your Hardware
Free
Installing Home Assistant: Choose Your Path and Prep Your Hardware
Free
- A map of Module 5's lessons: which one matches your hardware | How much time to realistically set aside for your first install | A pre-install checklist and the most common first-night mistakes | Why every route leads to the same shared first-run lesson afterward
 Mini PC and Thin Client: Home Assistant OS Bare Metal, Step by Step
Free
Mini PC and Thin Client: Home Assistant OS Bare Metal, Step by Step
Free
- Picking the correct x86-64 image variant, the most common installation mistake | BIOS and UEFI prep: Secure Boot, boot order, and virtualization settings | Flashing, installing, and first boot walkthrough | Hunting for great-value secondhand thin clients
 Proxmox VE: Installing the Host, Step by Step
Free
Proxmox VE: Installing the Host, Step by Step
Free
- Hardware requirements: virtualization extensions and RAM | Planning your fixed IP address before installing | The full Proxmox installer walkthrough, step by step | Reaching the Proxmox web interface and switching to the free repository
 Home Assistant OS on Proxmox: Creating the VM and First Boot
Free
Home Assistant OS on Proxmox: Creating the VM and First Boot
Free
- Downloading and importing the VM-specific Home Assistant OS image | Creating the VM: CPU, memory, and network configuration | Machine type, BIOS settings, and start-at-boot configuration | Taking your first snapshot before onboarding
 First Run: Creating Your Account, Home, and Basic Settings
Free
First Run: Creating Your Account, Home, and Basic Settings
Free
- Creating a strong administrator account and setting your home's location | Why to skip auto-detected integrations during this first onboarding | A tour of the default dashboard and the Settings menu | Confirming automatic updates are working correctly
 When Installation Doesn't Work: Common Problems and Fixes
Free
When Installation Doesn't Work: Common Problems and Fixes
Free
- A universal diagnostic checklist that resolves most problems | Route-specific troubleshooting for Green, Pi, mini PC, and Proxmox | Finding your device's IP address when .local addresses don't resolve | When starting the installation over is the right call
Module 6 First Steps in Home Assistant Your Home Assistant server is running and you've logged in. Module 6 builds the…
 Home Assistant Core Concepts: Integrations, Devices, Entities, Areas, and Services
Free
Home Assistant Core Concepts: Integrations, Devices, Entities, Areas, and Services
Free
- The chain everything starts from: device, integration, entity | Why entity IDs matter more than they seem once automations arrive | Automation, script, and scene, three genuinely different tools | A real story about naming chaos and the fifteen minutes that fixed it
 Integrations in Home Assistant
Free
Integrations in Home Assistant
Free
- Three ways to add an integration: discovery, search, and manual IP | Local integrations versus cloud-dependent ones, and why it matters | A worked example: adding a Shelly device manually by IP address | Reload before remove, deleting an integration also deletes its history
 Add-ons in Home Assistant
Free
Add-ons in Home Assistant
Free
- Integration versus add-on, two fundamentally different concepts | The Add-on Store and Supervisor, HAOS-only features explained | Container users: the Docker-container equivalent for every add-on | Which add-ons you'll actually meet later in this course
 Home Assistant Starter Tools: What to Install Now, What to Leave for Later
Free
Home Assistant Starter Tools: What to Install Now, What to Leave for Later
Free
- File Editor versus Studio Code Server, choosing the right tool | A real story: a YAML mistake, a backup, and a two-minute fix | Why checking configuration before restarting is the single best habit here | Securing Terminal & SSH before leaving it running unattended
 HACS: The Community Store, Its Risks, and a Safe Installation
Free
HACS: The Community Store, Its Risks, and a Safe Installation
Free
- What HACS actually is, and why it's not officially part of Home Assistant | Three checks before installing any extension: stars, updates, documentation | A safe, step-by-step installation from GitHub authorization onward | HACS is entirely optional through this module, used lightly only later
 MQTT and the Mosquitto Broker: What It's For and When You'll Need It
Free
MQTT and the Mosquitto Broker: What It's For and When You'll Need It
Free
- When you'll actually need MQTT: ESPHome, Tasmota, and budget devices | Installing Mosquitto Broker and creating a dedicated MQTT user | MQTT Discovery: automatic entity creation, no manual topic configuration | A real story: a Tasmota plug that seemed dead until MQTT was ready
 Cleaning Up After Installation: Names, Areas, Entities, and Documentation
Free
Cleaning Up After Installation: Names, Areas, Entities, and Documentation
Free
- A simple naming convention: area, device, function | A worked example: one device, from cryptic default to instant clarity | Areas, labels, and floors, three complementary organizational tools | Starting a Home Assistant Server notebook before you actually need it
Module 7 Remote Access to Home Assistant Your Home Assistant server works beautifully at home. Module 7 makes it…
 Remote Access to Home Assistant: LAN, WAN, NAT, CGNAT, Ports, and Security
Free
Remote Access to Home Assistant: LAN, WAN, NAT, CGNAT, Ports, and Security
Free
- LAN versus WAN, and why your home network is invisible from outside by default | NAT and CGNAT explained, and how to check which one your ISP uses | Ports, and why open port forwarding is this course's default to avoid | A security baseline: strong password and two-factor authentication before anything else
 Nabu Casa: The Simplest Remote Access for Beginners
Free
Nabu Casa: The Simplest Remote Access for Beginners
Free
- Why Nabu Casa works behind CGNAT when nothing else easily does | A two-step setup: subscribe, then toggle Remote UI on | Automatic local-to-remote switching in the Home Assistant mobile app | Sharing one subscription across every family member's account
 WireGuard VPN: Private Home Access Without Exposing Your HA Panel
Free
WireGuard VPN: Private Home Access Without Exposing Your HA Panel
Free
- Why a VPN keeps your Home Assistant panel completely invisible to the internet | Three ways to run WireGuard: router, HAOS add-on, or Container | Generating and installing a configuration for each of your devices | Why classic WireGuard fails behind CGNAT, and what that means for you
 Tailscale: VPN Without Port Forwarding, When You're Behind CGNAT
⏱ 25 min
Free
Tailscale: VPN Without Port Forwarding, When You're Behind CGNAT
⏱ 25 min
Free
- How NAT traversal lets two devices connect without an open port | Installing Tailscale on HAOS and Container in minutes, not hours | The tradeoff: Tailscale's own coordination servers versus full self-hosting | A real story: a lost weekend on WireGuard, solved in ten minutes with Tailscale
 Cloudflare Tunnel: Your Own Address Without Port Forwarding
Free
Cloudflare Tunnel: Your Own Address Without Port Forwarding
Free
- What Cloudflare Tunnel actually is, and the outbound-only pattern behind it | The one real requirement: owning a domain name | Cloudflare Tunnel versus Nabu Casa, and versus a full VPN | Why a public address still needs the same account security as everything else
 Cloudflare Tunnel in Practice: Domain, DNS, Tunnel, and Diagnostics
Free
Cloudflare Tunnel in Practice: Domain, DNS, Tunnel, and Diagnostics
Free
- A glossary that removes the DNS jargon before you need it | Public Hostname versus Service URL, the single most common setup mistake | Home Assistant's trusted proxy setting, the one manual YAML edit in this module | An ordered diagnostic checklist for when home.yourdomain.com won't load
 Remote Access to Home Assistant: Which Method Should You Choose
Free
Remote Access to Home Assistant: Which Method Should You Choose
Free
- A decision map starting from your CGNAT status | A full comparison table: setup effort, cost, network scope, and reliance | Real decisions from this course's community, and why each one made sense | A five-line notebook template to document whatever you land on
Module 8 Smart Home Security Module 7 made your Home Assistant server reachable from anywhere. Module 8 makes sure…
 Home Assistant Security: What's a Real Threat, and What's Just Fear-Mongering
Free
Home Assistant Security: What's a Real Threat, and What's Just Fear-Mongering
Free
- The real threats: weak passwords, exposed ports, shared logins | What's fear-mongering: exotic hacks versus mundane, avoidable mistakes | Local access versus remote access, and why the gap matters | This module's six-lesson plan, from accounts to a genuine emergency plan
 User Accounts, Roles, and Two-Factor Authentication: Why Not Everyone Needs Admin
Free
User Accounts, Roles, and Two-Factor Authentication: Why Not Everyone Needs Admin
Free
- The four account types: administrator, household member, wall tablet, emergency | Setting up two-factor authentication and storing recovery codes safely | Why a single shared family login is a real, avoidable risk | A real household audit: finding and removing a forgotten account
 Passwords, Tokens, the Mobile App, and a Lost Phone
Free
Passwords, Tokens, the Mobile App, and a Lost Phone
Free
- Why a password manager matters more than password complexity alone | Long-lived access tokens: treat them exactly like passwords | A lost phone: remote-lock, revoke the session, revoke VPN access, in order | Getting a new phone without leaving the old one silently logged in
 Home Assistant Backups: Local, Automatic, and Off-Server
Free
Home Assistant Backups: Local, Automatic, and Off-Server
Free
- Why a local-only backup doesn't survive the drive it lives on failing | Setting up an automatic schedule with a genuine off-server destination | Testing a restore, an untested backup is only a hypothesis | A real story: an SD card failure recovered in under an hour
 Home Assistant Updates: When to Click, When to Wait, and How Not to Break Your System
Free
Home Assistant Updates: When to Click, When to Wait, and How Not to Break Your System
Free
- Security patches: update promptly. Major versions: wait and read first | A 9-step update procedure: backup, one thing at a time, verify | What to do when an update breaks something, restore, don't troubleshoot live | Reading changelogs efficiently, without reading every single line
 Cloudflare Access: An Extra Layer of Protection in Front of Home Assistant
Free
Cloudflare Access: An Extra Layer of Protection in Front of Home Assistant
Free
- Tunnel versus Access: the hallway versus the locked front door | A 10-step safe rollout procedure that avoids locking yourself out | Access for household members, webhooks, and the mobile app | A real story: a policy tested on one device but not another
 Your Emergency Plan: What to Do When Home Assistant Won't Start
Free
Your Emergency Plan: What to Do When Home Assistant Won't Start
Free
- The 5-minute checklist: power, router, boot time, connection | Isolating local versus remote failure before troubleshooting further | Five scenarios, A through E, covering nearly any outage you'll encounter | A real story: a router firmware update that broke a DHCP reservation
Module 9 Zigbee in Home Assistant Module 8 secured and stabilized your Home Assistant server. Module 9 brings your…
 Zigbee in a Smart Home: What It Is and Why It's Not the Same as WiFi
Free
Zigbee in a Smart Home: What It Is and Why It's Not the Same as WiFi
Free
- A mesh network explained plainly, no jargon required | Coordinator, router, and end device: the three roles in a Zigbee network | Why low power makes Zigbee the right fit for battery sensors | How Zigbee, 2.4 GHz WiFi, and your router coexist without conflict
 Zigbee Coordinators: Which One to Choose, Where to Plug It In, and What to Avoid
Free
Zigbee Coordinators: Which One to Choose, Where to Plug It In, and What to Avoid
Free
- Which coordinator to choose for a first Zigbee network | USB extension cables and why USB 3.0 ports can cause interference | Where to physically place your coordinator for the best coverage | Backing up your coordinator's network data before anything goes wrong
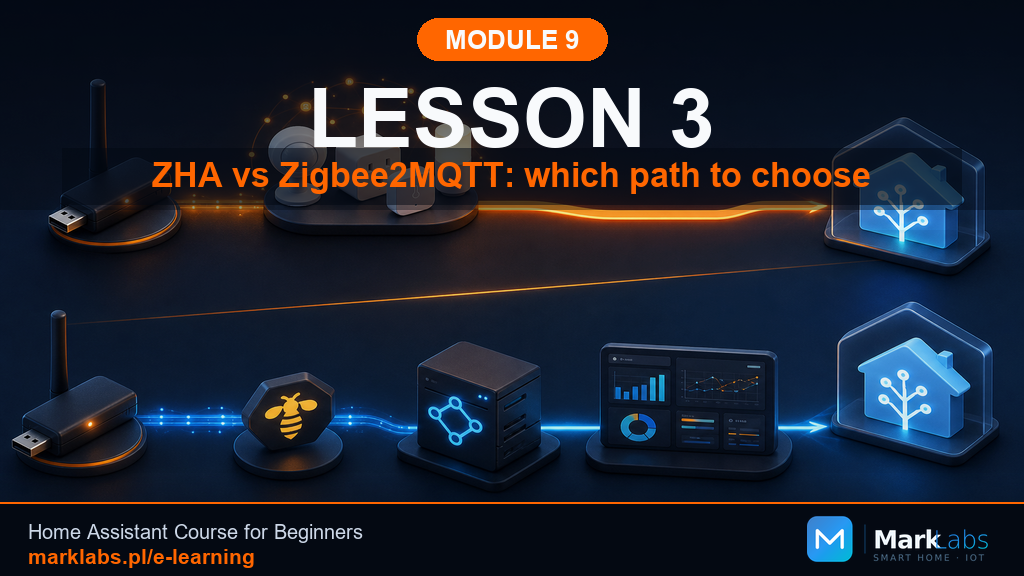 ZHA vs Zigbee2MQTT: Which Path Should You Choose
Free
ZHA vs Zigbee2MQTT: Which Path Should You Choose
Free
- ZHA: the simpler, built-in path with no extra add-on required | Zigbee2MQTT: broader device coverage and deeper configuration options | A three-question decision tree that gets most readers to a clear answer | Why switching later is possible, but means re-pairing every device
 ZHA Step by Step: Installation and First Configuration
Free
ZHA Step by Step: Installation and First Configuration
Free
- Installing ZHA through Home Assistant's setup wizard, step by step | Why the by-id port path beats a numbered ttyUSB path | Common first-installation problems and how to resolve them | Why a restart test before pairing any devices matters
 Zigbee2MQTT Step by Step: Installation, Mosquitto, and First Configuration
Free
Zigbee2MQTT Step by Step: Installation, Mosquitto, and First Configuration
Free
- Three pieces of the puzzle: coordinator, add-on, and Mosquitto | Configuring the add-on with the minimum settings, no copy-pasted configs | permit_join: enabling it briefly, never leaving it on permanently | A full restart test confirming the whole stack reconnects on its own
 Your First Zigbee Devices: A Smart Plug, a Temperature Sensor, and a Motion Sensor
Free
Your First Zigbee Devices: A Smart Plug, a Temperature Sensor, and a Motion Sensor
Free
- Why these three specific devices make the ideal starting set | Factory reset and fresh batteries: preparation that prevents most pairing failures | Testing and recording each device before moving to the next | A real story: a motion sensor saved by a fresh battery, not a factory reset
 Naming, Areas, and Organization for Zigbee Devices
Free
Naming, Areas, and Organization for Zigbee Devices
Free
- The area_function naming pattern: Office Desk Plug, not a manufacturer default | Assigning Home Assistant Areas so dashboards and automations can reference rooms | A starter naming dictionary covering areas and functions for the rest of this course | Why organizing now, with three devices, beats cleaning up later with dozens
 Zigbee Mesh: Range, Routers, Channels, and Interference
Free
Zigbee Mesh: Range, Routers, Channels, and Interference
Free
- Why more router devices genuinely strengthen your whole mesh network | Reading a network map to spot a weak link before it becomes a problem | Zigbee and 2.4 GHz WiFi coexistence, calmly, without unnecessary panic | A real story: a garage sensor fixed by one nearby router, not a new coordinator
 Common Zigbee Problems: Won't Pair, Drops Out, Reports Incorrectly
Free
Common Zigbee Problems: Won't Pair, Drops Out, Reports Incorrectly
Free
- What not to do in the first fifteen minutes of troubleshooting | A step-by-step diagnostic procedure, from symptom to device-level reset | When a full coordinator reset actually makes sense, and why it's rare | Incident notes: three columns that save real time on recurring problems
 Closing Out the Module: A Stable Mini Smart Home on Zigbee
Free
Closing Out the Module: A Stable Mini Smart Home on Zigbee
Free
- A six-item module closing checklist, confirmed, not just attempted | Consolidating your device documentation table for the mesh you've built | Zigbee versus ESPHome: which fits which need, ahead of Module 10 | When to buy your fourth device, and when deliberately not to
Module 10 ESPHome From Scratch Module 9 brought certified Zigbee devices into your smart home. Module 10 takes a…
 ESPHome: What It Is, How It Works, and When It Makes Sense
Free
ESPHome: What It Is, How It Works, and When It Makes Sense
Free
- What ESPHome actually is, and how a YAML file becomes real firmware | ESPHome versus buying a certified Zigbee device: two legitimate approaches | When building your own device makes sense, and when it genuinely doesn't | What this module will and won't cover, set clearly from the start
 ESP32, ESP8266, and Starter Boards: What to Buy and What Not to Touch Yet
Free
ESP32, ESP8266, and Starter Boards: What to Buy and What Not to Touch Yet
Free
- ESP32 versus ESP8266: the practical differences that matter for beginners | Spotting a good board and avoiding common seller pitfalls | The charge-only USB cable trap, and why it silently blocks flashing | A minimal shopping list for your first ESPHome project, a few dollars total
 Installing ESPHome in Home Assistant
Free
Installing ESPHome in Home Assistant
Free
- Installing the ESPHome add-on through Home Assistant's add-on store | A tour of the Device Builder dashboard and New Device wizard | Compilation explained: how YAML becomes firmware your board can run | USB versus OTA: two ways to get firmware onto a device, compared
 Your First ESPHome Device: an ESP32 Visible in Home Assistant
Free
Your First ESPHome Device: an ESP32 Visible in Home Assistant
Free
- A minimal six-section YAML file, enough to flash a working device | Compiling and flashing your board over USB, step by step | Reading logs as your primary diagnostic tool from day one | What a correct first result looks like, and what to do if it isn't
 ESPHome YAML Without Fear: What a Configuration Is Made Of
Free
ESPHome YAML Without Fear: What a Configuration Is Made Of
Free
- A YAML file's anatomy, section by section, from top to bottom | Indentation explained clearly, with a correct-versus-incorrect example | !secret and secrets.yaml: keeping passwords out of your configuration | A common compile-error cheat sheet for your first weeks with ESPHome
 Your First ESPHome Sensor: Temperature, Humidity, or a Simple Reading
Free
Your First ESPHome Sensor: Temperature, Humidity, or a Simple Reading
Free
- BME280 versus DHT22: which sensor fits a first project best | A full pin diagram: SDA, SCL, VCC, and GND wired correctly | Your first OTA update, now that USB flashing is no longer required | Two temperature sources side by side: ESPHome versus Zigbee compared
 Inputs and Outputs: Button, Reed Switch, LED, and Relay at Low Voltage
Free
Inputs and Outputs: Button, Reed Switch, LED, and Relay at Low Voltage
Free
- Binary sensors, switches, and buttons: three different YAML entity types | Pull-up and pull-down resistors, explained with plain intuition, not jargon | Wiring a button, reed switch, and LED with a resistor, safely | Why mains-voltage relay projects stay entirely outside this course's scope
 Mini ESPHome Project: Your Own Control Module for Home Assistant
Free
Mini ESPHome Project: Your Own Control Module for Home Assistant
Free
- Merging sensor, button, reed switch, and LED sections into one YAML file | Compiling, uploading, and testing the combined project as a whole | Building a dashboard that places ESPHome and Zigbee entities side by side | A restart test confirming your finished project survives real-world conditions
 ESPHome Diagnostics: Offline, WiFi, YAML, OTA, and Logs
Free
ESPHome Diagnostics: Offline, WiFi, YAML, OTA, and Logs
Free
- Determining failure type first: offline, WiFi, YAML, or OTA specifically | An eight-step diagnostic procedure, from symptom to resolution | Logs as your primary diagnostic tool, read carefully, not skimmed | A practice scenario: your device offline after a router restart
 Closing Out the ESPHome Module: Documentation, Testing, and What's Next
Free
Closing Out the ESPHome Module: Documentation, Testing, and What's Next
Free
- A four-item module closing checklist: restart, OTA, documentation, dashboard | A documentation table template covering every device you've built | Zigbee versus ESPHome: a clear decision framework for your next device | What's next: Module 11 turns these entities into real automations
Module 11 Automations From Scratch Modules 9 and 10 filled your home with entities, a Zigbee smart plug, a hand-built…
 Automations in Home Assistant: Trigger, Condition, and Action Without Fear
Free
Automations in Home Assistant: Trigger, Condition, and Action Without Fear
Free
- What a trigger, a condition, and an action actually are, in plain English | Why this three-part structure never really changes, no matter how complex an automation gets | Where to build automations in Home Assistant's visual editor | A calm, deliberate first step before writing any real automation logic
 Your First Automation: Hallway Motion Turns On an ESP32 LED
Free
Your First Automation: Hallway Motion Turns On an ESP32 LED
Free
- Choosing a trigger entity and confirming it reports state correctly | Building the action step in the visual editor without any YAML | Testing the automation deliberately before trusting it | Why starting with a low-stakes LED is the right first move
 Conditions in Automations: When Your Home Should React, and When It Should Stay Quiet
Free
Conditions in Automations: When Your Home Should React, and When It Should Stay Quiet
Free
- What a condition actually does, and how it differs from a trigger | Building a time-based condition step by step in the visual editor | State and sun-position conditions as two other genuinely common patterns | The subtle but important difference between a condition and a second trigger
 Temperature Automations: Thresholds, Values, and Caution
Free
Temperature Automations: Thresholds, Values, and Caution
Free
- Numeric state triggers: above, below, and why the direction matters | Choosing a genuinely sensible threshold value for your own space | Avoiding rapid re-triggering as a value hovers near the threshold | Testing a numeric automation without waiting for real weather to cooperate
 ESPHome Button as an Automation Trigger
Free
ESPHome Button as an Automation Trigger
Free
- Button press triggers, and the difference between single and long presses | Building a manual override that coexists with automatic behavior | Why a physical button remains valuable even in a fully automated home | Testing button-triggered automations reliably
 Zigbee Smart Plug in Automations: Practice and Safety
Free
Zigbee Smart Plug in Automations: Practice and Safety
Free
- Why a smart plug automation deserves more caution than an LED | Choosing safe test devices, and which ones to avoid entirely | The one-sentence rule: saying an automation's effect out loud before enabling it | A documentation habit for tracking what's plugged into each smart plug
 Automation Modes: Single, Restart, Queued, and Parallel
Free
Automation Modes: Single, Restart, Queued, and Parallel
Free
- single, restart, queued, and parallel, explained with one real example each | Why restart is often the right fit for motion-plus-delay automations | When queued and parallel are genuinely worth reaching for | Setting mode deliberately in the YAML editor
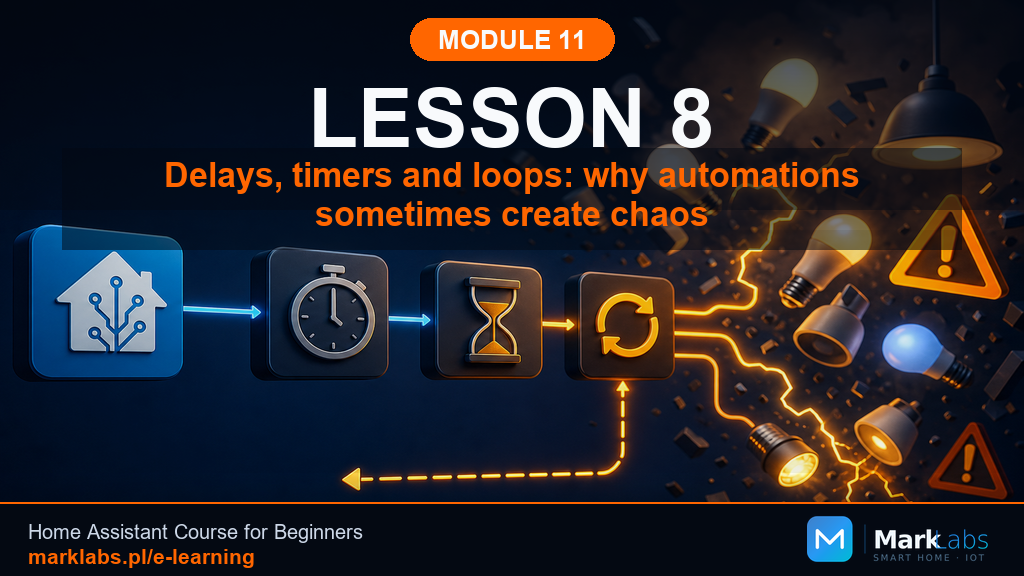 Delays, Timers, and Loops: Why an Automation Sometimes Turns Into Chaos
Free
Delays, Timers, and Loops: Why an Automation Sometimes Turns Into Chaos
Free
- How a delay action pauses an automation's own progress, not just a device | The loop trap: when an action changes the same entity its trigger is watching | How to stop a runaway loop safely, once you've built one | A brief preview of timers, arriving properly in Module 12
 Debugging Automations: Trace, History, Logbook, and States
Free
Debugging Automations: Trace, History, Logbook, and States
Free
- Developer tools' States: the fastest first check for any entity | Entity history and the logbook: what happened, and when | Trace: one automation's complete step-by-step run | Matching a symptom to the right tool, fastest to deepest
 Mini Project: Hallway Plus Office, Your First Layered Smart Home Logic
Free
Mini Project: Hallway Plus Office, Your First Layered Smart Home Logic
Free
- Three coordinated automations: evening motion, a button override, and a temperature signal | Why building and testing one automation at a time still matters here | A closing checklist and a final three-rule test | What genuinely counts as finishing this module, and what doesn't
 Push Notifications: How Home Assistant Talks to Your Phone
⏱ 35 min
Free
Push Notifications: How Home Assistant Talks to Your Phone
⏱ 35 min
Free
- Where notify.mobile_app comes from, and testing it directly first | Building a motion-triggered notification automation step by step | Notifications with action buttons, a brief preview | Why not every event genuinely deserves to interrupt your day
Module 12 Helpers, Scenes, and Scripts Module 11 taught you to build automations from trigger, condition, and action.…
 Helpers in Home Assistant: What They're For and When to Use Them
Free
Helpers in Home Assistant: What They're For and When to Use Them
Free
- What a helper actually is, and how it differs from a sensor or a switch | The main helper types: boolean, number, select, and timer, at a glance | When a helper is genuinely the right tool, and when it's overkill | Where to create helpers in Home Assistant's Settings menu
 input_boolean: Your Own Logical Switch
Free
input_boolean: Your Own Logical Switch
Free
- Creating input_boolean.test_mode_hallway step by step | Adding a test-mode condition without disabling the automation entirely | Testing both directions, helper on and helper off, and comparing traces | Why forgetting to flip test mode back off is this module's most common mistake
 input_select and choose: A Home Mode Instead of a Separate Rule for Every Situation
⏱ 30 min
Free
input_select and choose: A Home Mode Instead of a Separate Rule for Every Situation
⏱ 30 min
Free
- Creating input_select.home_mode with three clearly named options | Routing automation logic through a choose action based on the current mode | Why one mode helper reads considerably better than several separate flags | Testing every mode option methodically before trusting the pattern
 Timer as a Better Delay: hallway_off Step by Step
Free
Timer as a Better Delay: hallway_off Step by Step
Free
- Why a timer helper beats a delay buried inside one automation | Building the A/B automation pair: one starts the timer, one reacts to it finishing | Testing the full cycle step by step, from motion to LED off | Pause, cancel, and finish actions a plain delay never offered
 input_number: A Temperature Threshold Without Editing the Automation
Free
input_number: A Temperature Threshold Without Editing the Automation
Free
- Creating input_number.office_temp_threshold with a sensible min, max, and step | Swapping a hard-coded trigger value for a template reading the helper's state | Why forgetting the number conversion in a template silently breaks a trigger | Choosing between one shared threshold and one helper per room
 Scenes: A Saved State for Several Devices at Once
Free
Scenes: A Saved State for Several Devices at Once
Free
- Building a Movie Night scene from several real devices' current states | Why a scene is faster to build and update than an equivalent automation | Activating a scene manually, then from an automation with scene.turn_on | The one mistake that bakes a wrong state permanently into a scene
 Scripts: A Reusable Action You Can Call by Name
Free
Scripts: A Reusable Action You Can Call by Name
Free
- Building script.evening_routine, dimming a light, waiting, then activating a scene | Calling the same script from Developer Tools, a dashboard button, and an automation | Why an automation should own the trigger while a script owns the sequence | Checking a script's mode before calling it from more than one place
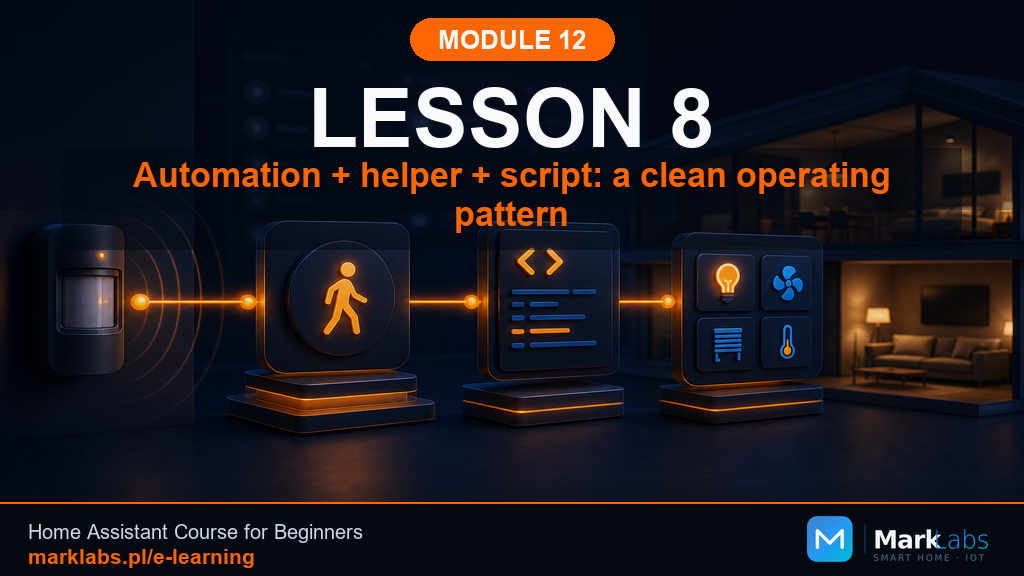 Automation Plus Helper Plus Script: A Proper Working Schema
Free
Automation Plus Helper Plus Script: A Proper Working Schema
Free
- Building script.hallway_arrival and script.hallway_departure as a matched pair | Rebuilding both hallway automations around the helper, timer, and scripts together | Reading four traceable records from a single motion event | Extending the exact same schema confidently to a second room
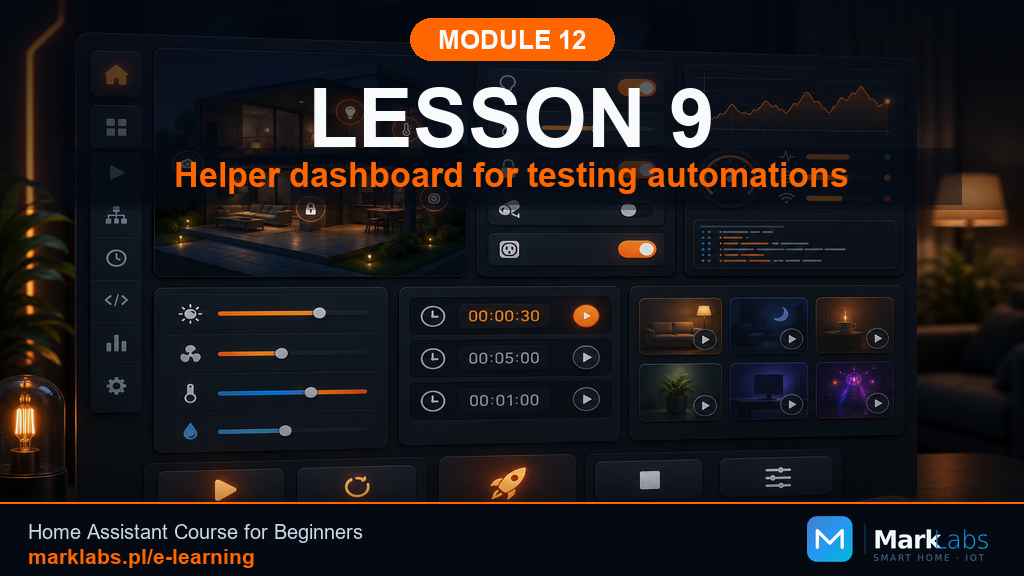 A Diagnostic Dashboard for Testing Your Automations
Free
A Diagnostic Dashboard for Testing Your Automations
Free
- Creating a separate Diagnostics view, tucked behind its own dashboard tab | Grouping entities logically: Helpers, Timers, Scenes and Scripts, Automations | Showing each automation's last-triggered time as a quick first check | Why this view should never sit on your default home screen
 Common Mistakes with Helpers, Scenes, and Scripts
Free
Common Mistakes with Helpers, Scenes, and Scripts
Free
- Forgetting to flip test mode back off, genuinely the most common mistake here | A scene capturing the wrong state, and a script called twice without checking its mode | Vague naming and a notebook left unmaintained | Over-engineering a genuinely simple automation that never needed a helper at all
 Mini Project: Hallway Plus Office 2.0
Free
Mini Project: Hallway Plus Office 2.0
Free
- Mirroring the hallway's full schema onto the office, helper, timer, and two scripts | Adding a shared 'Both Rooms Off' scene as a single manual reset | Extending your diagnostic dashboard and notebook to cover both rooms | Testing both rooms end to end, together and independently
Module 13 Dashboards, the Basics Module 12 gave you helpers, scenes, and scripts, the reusable building blocks behind…
 What a Dashboard Is, and What It Doesn't Replace
Free
What a Dashboard Is, and What It Doesn't Replace
Free
- Why a dashboard is a window onto the house, not the house's actual logic | The difference between glancing at state and controlling it directly | Why a good automation genuinely needs fewer dashboard taps, not more | Setting expectations for the rest of this module's dashboard-building work
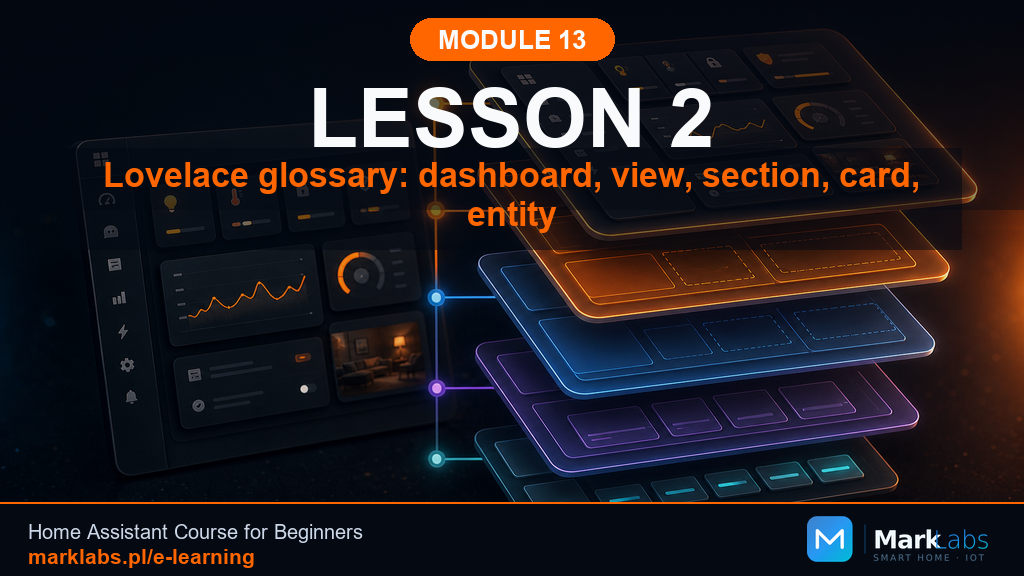 Lovelace Vocabulary: Dashboard, View, Section, Card, Entity
Free
Lovelace Vocabulary: Dashboard, View, Section, Card, Entity
Free
- How a dashboard, its views, and their sections nest inside one another | What a card actually is, and how it differs from the entity it displays | Why precise vocabulary now saves real confusion in later lessons | A quick glossary check against the Home Assistant interface itself
 Planning a Dashboard: Before You Add a Single Card
Free
Planning a Dashboard: Before You Add a Single Card
Free
- The H/A/T/N framework: Habit, Alert, Trace, and Novelty entities | Why planning an audience first prevents a cluttered dashboard later | Sorting the running example entities into each H/A/T/N category | Turning a rough plan into a real, written brief for each dashboard
 View Types: Sections, Masonry, Panel, and Sidebar
Free
View Types: Sections, Masonry, Panel, and Sidebar
Free
- Sections: the flexible grid layout most modern dashboards should start from | Masonry: the older auto-flowing layout and where it still holds up | Panel and Sidebar: single-card focus views and narrow persistent views | Choosing a view type deliberately based on the H/A/T/N plan from before
 Built-in Cards: An Overview and When to Use Each
Free
Built-in Cards: An Overview and When to Use Each
Free
- The entities card: a compact list for related, similar controls | The button card: a single, prominent action worth its own tile | The glance card: quick state at a glance across several entities | Choosing between similar-looking cards based on what a screen actually needs
 Names, Icons, Areas, and Labels: Order Before the Dashboard
Free
Names, Icons, Areas, and Labels: Order Before the Dashboard
Free
- The six-question checklist for naming any entity clearly and consistently | Assigning icons that actually match an entity's real function | Grouping entities into areas that mirror the house's real rooms | Using labels for cross-cutting groups that areas alone can't capture
 Charts on the Dashboard: When a Graph Earns Its Space
Free
Charts on the Dashboard: When a Graph Earns Its Space
Free
- History-graph versus statistics-graph: what each is actually built for | The honest test for whether a trend is worth a chart's screen space | Sizing and placing a graph so it doesn't crowd out simpler controls | Examples where a plain number reads better than any chart could
 The Home Dashboard: Building the Start Screen
Free
The Home Dashboard: Building the Start Screen
Free
- Choosing Start's entities using the Habit category from the H/A/T/N plan | Grouping hallway and office controls into clearly labeled sections | Adding the movie-night scene button as a single, prominent action | Testing Start against the same household members who'll actually use it
 The Office View: A Pattern for Every Room
Free
The Office View: A Pattern for Every Room
Free
- The Climate, Control, Scenes pattern for structuring any room view | Placing the office temperature threshold helper where it's actually useful | Wiring the office LED and its scene into a single coherent section | Reusing the exact same pattern for any future room without starting over
 Rebuilding the Diagnostic Dashboard: What to Keep, What to Hide
Free
Rebuilding the Diagnostic Dashboard: What to Keep, What to Hide
Free
- What genuinely belongs on a diagnostic view versus an everyday one | Trimming timer, helper, and trace entities down to what's actually reviewed | Reapplying consistent naming and icons across the rebuilt view | Comparing the old Module 12 version against the newly rebuilt one
 The Technical Dashboard: Helpers, ESPHome, Zigbee, and Service
Free
The Technical Dashboard: Helpers, ESPHome, Zigbee, and Service
Free
- What belongs on Technical versus what still fits on Diagnostic | Surfacing ESPHome device status and Zigbee network health in one place | Keeping Technical out of the everyday view-switcher on purpose | Reaching Technical deliberately, rather than stumbling into it by accident
 Control from the Dashboard: Switch, Script, Scene, Helper
Free
Control from the Dashboard: Switch, Script, Scene, Helper
Free
- Wiring a switch tile with a correct, tested toggle action | Calling a script directly from a button card's tap action | Triggering a scene from the dashboard exactly as automations do | Testing every wired control individually before trusting the layout
 The Phone Dashboard: A Remote Control, Not a Command Center
Free
The Phone Dashboard: A Remote Control, Not a Command Center
Free
- Why Mobile deserves its own trimmed list, not a copy of Start | Single-column layout with generously sized, one-thumb-friendly tap targets | The one-hand test for deciding what genuinely belongs on Mobile | Keeping Technical and Diagnostic off the phone's view-switcher entirely
 The Desktop and Tablet Dashboard: More Room, Not More Clutter
Free
The Desktop and Tablet Dashboard: More Room, Not More Clutter
Free
- Multi-column Sections layouts for wider desktop and tablet screens | What genuinely earns its place once there's more room, graphs, forecasts, summaries | Why Technical detail still stays off Start regardless of screen size | Positioning Tablet between Mobile's constraints and Desktop's extra room
 Mini Project: A Complete Three-Tier Dashboard Set
Free
Mini Project: A Complete Three-Tier Dashboard Set
Free
- Revisiting all six views against this module's original design discipline | A final checklist for confirming every view still earns its place | Deciding who in the household actually sees which tier | Screenshotting the finished set as a baseline for spotting future drift
Module 14 The Central Home Panel Module 13 built dashboards for individual screens, a phone here, a laptop there.…
 The Central Home Panel: What Your Options Actually Are
Free
The Central Home Panel: What Your Options Actually Are
Free
- Why a wall panel needs a different design brief than a personal phone | The real building blocks ahead: tablet, mount, power, kiosk software, dashboard | Fully Kiosk Browser as this module's chosen path, and why | Setting expectations for what this module will and won't cover
 Choosing a Tablet, Power, and Wi-Fi for the Panel
Free
Choosing a Tablet, Power, and Wi-Fi for the Panel
Free
- Why the panel tablet's job is different from a personal Android or iPad | Size, age, and screen criteria that matter more than raw spec sheets | Why the panel can't live on battery, and what permanent power looks like | A fifteen-minute on-site Wi-Fi and visibility test before buying a mount
 A Separate Panel User and a Separate Dashboard
Free
A Separate Panel User and a Separate Dashboard
Free
- Why the panel shouldn't run on your own administrator account | Creating a dedicated Home Panel user and a matching Panel dashboard | Setting the Panel dashboard as that account's default view | Testing the new account without mixing it up with your own
 The Panel's Wall-Screen Structure
Free
The Panel's Wall-Screen Structure
Free
- Choosing Sections over Masonry, Panel, or Sidebar for this screen | The panel's five views and what each one is genuinely for | Why Start has to work instantly, with no scrolling | Testing the planned structure with a household member before building
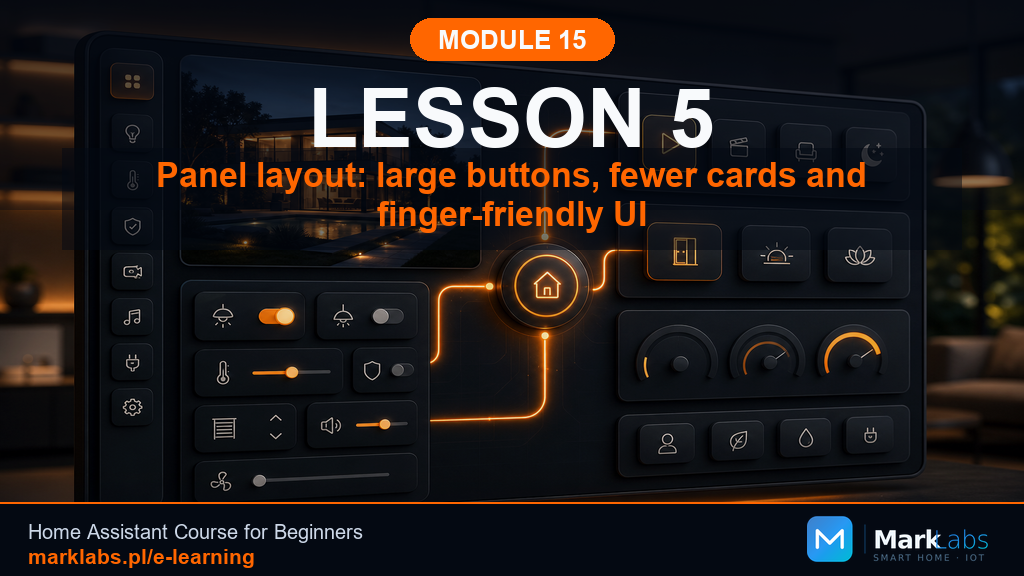 Panel Layout: Big Buttons, Fewer Cards, Touch-First
Free
Panel Layout: Big Buttons, Fewer Cards, Touch-First
Free
- The finger rule and why panel touch targets need real size | Splitting Start into clear zones instead of one long scroll | Why a status isn't always a button, and the accidental-tap problem | A distance test and an evening test before calling the layout done
 Fully Kiosk Browser: Installation and Full Configuration
Free
Fully Kiosk Browser: Installation and Full Configuration
Free
- Free version versus the PLUS license, and what each genuinely buys you | The Start URL, kiosk mode, and full-screen settings that matter most | Power, screensaver, and motion-detection options worth understanding | Remote Administration, a fixed tablet IP, and exporting your settings
 The Fully Kiosk Integration in Home Assistant
Free
The Fully Kiosk Integration in Home Assistant
Free
- What the Fully Kiosk integration actually exposes inside Home Assistant | Adding the integration and checking entities in Developer Tools | Unavailable versus unknown, and why that distinction matters here | A simple diagnostic card and a restart test for the new entities
 The Panel Screen: Screensaver, Brightness, and Night Mode
Free
The Panel Screen: Screensaver, Brightness, and Night Mode
Free
- The three screen states: screensaver, dimmed, and physically off | A night-mode helper and two automations built around it | Deciding when the panel should and shouldn't wake on motion | Evening, night, and post-restart tests before calling it done
 Panel Security: Gate, Alarm, Cameras, Kids, and Guests
Free
Panel Security: Gate, Alarm, Cameras, Kids, and Guests
Free
- A three-tier risk framework for deciding what belongs on the panel | Gate and door status versus the open action itself | An alarm integration as a data source, not a replacement alarm keypad | Cameras, kids, guests, and limiting risk without overcomplicating things
 Mini Project: The Home Panel on a Fully Kiosk Tablet
Free
Mini Project: The Home Panel on a Fully Kiosk Tablet
Free
- An eight-step review across every panel component built this module | A security audit and a no-instructions household-member test | A settings backup and a short service note for future you | A traffic-light framework for deciding when the panel's genuinely ready
Module 15 Dashboards Pro with HACS Module 13 built a sound, working dashboard. Module 14 gave the household its own…
 Dashboard Pro: What Changes After Module 13, and What Doesn't
Free
Dashboard Pro: What Changes After Module 13, and What Doesn't
Free
- Why a custom card is judged by the problem it solves, not its looks | A decision framework for when a system card is genuinely not enough | What this module's ten lessons will and won't touch | Copying a backup of the Module 13 dashboard before any changes
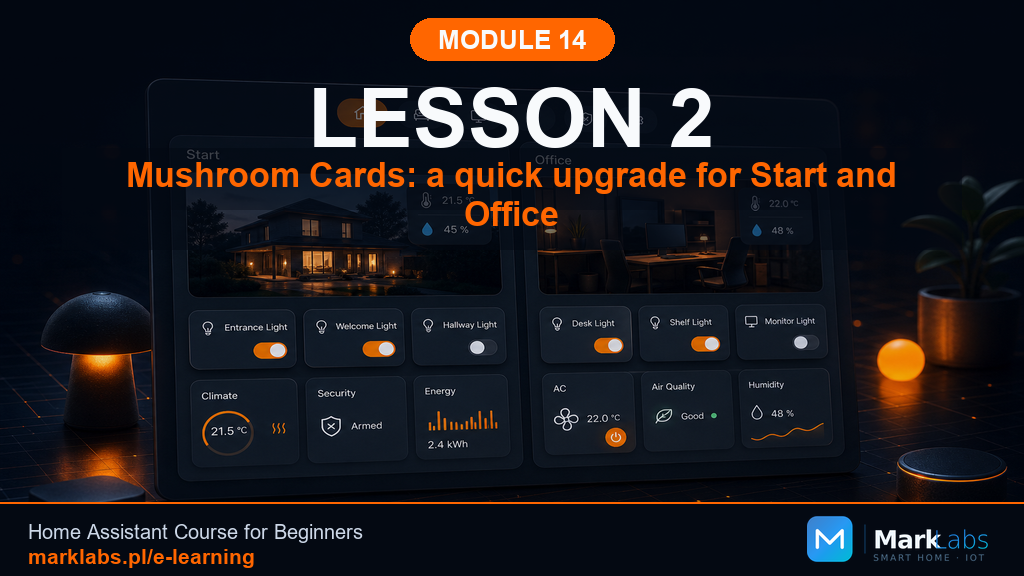 Mushroom Cards: A Fast Upgrade for Start and Office
Free
Mushroom Cards: A Fast Upgrade for Start and Office
Free
- Installing Mushroom Cards from HACS and refreshing Home Assistant | Mushroom's visual editor versus writing YAML by hand | Choosing which Start and Office tiles genuinely benefit from the swap | Testing the new tiles on a phone before calling it done
 Mushroom Template Card: Your Own State Description, No New Automation
Free
Mushroom Template Card: Your Own State Description, No New Automation
Free
- Why a Template Card is a description, not a decision-maker | Three starter Jinja functions that cover most everyday cases | Building the Office Now card at minimum and standard depth | Testing templates safely in Developer Tools before publishing them
 Button Card: Buttons That Look and Behave Exactly As Advertised
Free
Button Card: Buttons That Look and Behave Exactly As Advertised
Free
- Why Button Card complements Mushroom instead of replacing it | Tap, hold, and double-tap actions, and when each one is appropriate | Building a status LED toggle, a scene button, and a hold-only diagnostic | A decision guide for choosing Mushroom versus Button Card
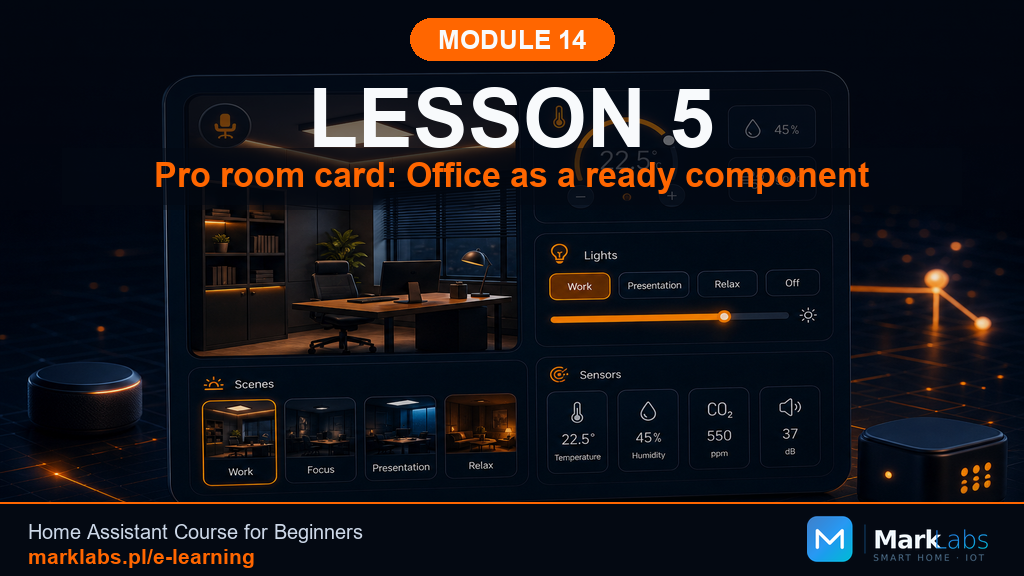 The Room Card Pro: Office as a Finished Component
Free
The Room Card Pro: Office as a Finished Component
Free
- What separates a real room card from a pile of individual tiles | Choosing between a vertical-stack and a grid layout | Building the office room card at minimum, standard, and extended depth | Adjusting the layout for mobile without losing the desktop view
 ApexCharts: Climate Pro and Charts That Actually Explain Something
Free
ApexCharts: Climate Pro and Charts That Actually Explain Something
Free
- Why a chart needs a question behind it before you build it | Installing ApexCharts Card and comparing it against history-graph | Building Climate Pro at minimum, standard, and extended depth | A debugging checklist for when a chart shows up empty
 Auto Entities: Technical Lists That Update Themselves
Free
Auto Entities: Technical Lists That Update Themselves
Free
- Why Auto Entities isn't a magic search, filters have to be correct | Building an unavailable-entities list, a battery list, and a low-battery alert | A full reference for Auto Entities' include, exclude, and sort options | Why this stays on the Technical view and never reaches the household
 Card Mod and Theme: One Consistent Look, No Christmas Tree
Free
Card Mod and Theme: One Consistent Look, No Christmas Tree
Free
- What a theme controls globally versus what Card Mod refines per card | Five style rules, one accent, rounding, border, spacing, no random colors | Applying Card Mod at the view level instead of on every card separately | Testing the new style on phone and desktop before locking it in
 Bubble Card: Popups That Echo the Panel You Already Built
Free
Bubble Card: Popups That Echo the Panel You Already Built
Free
- Why this experiment stays contained instead of becoming a rebuild | Building an Office popup with a hash, a trigger, and a card list | What belongs in a household popup, and what never does | A fallback plan for removing Bubble cleanly if it doesn't fit
 Mini Project: Dashboard Home Pro
Free
Mini Project: Dashboard Home Pro
Free
- A sixteen-point checklist covering every Pro layer and the documentation itself | A step-by-step Home Assistant backup procedure before calling the module done | Documenting HACS dependencies and a fallback plan for each card | Clearing out leftover test entities before the final backup
Module 16 The Phone in Home Assistant Module 14 gave the household a shared wall panel. Module 16 tu s to the device…
 The Phone in Home Assistant: How It Differs From the Wall Panel
Free
The Phone in Home Assistant: How It Differs From the Wall Panel
Free
- Why a phone and a wall panel solve different problems, not the same one twice | What the Companion App adds beyond a browser tab | A realistic map of what this module will and won't build | Setting expectations for privacy, battery, and reliability limits
 Installing the Home Assistant Companion App
Free
Installing the Home Assistant Companion App
Free
- Where to download the official Companion App safely | Connecting the app to a local and a remote Home Assistant URL | First-login troubleshooting for the most common connection errors | Confirming the app registered correctly as a new device
 The User, the Phone, and the Device in Home Assistant
Free
The User, the Phone, and the Device in Home Assistant
Free
- The difference between a user account, a person entity, and a device | Why one person can have several devices, and what that changes | Where to check a phone's device registration in HA's settings | Common naming mistakes that cause notifications to go to the wrong place
 Phone Entities: Battery, Wi-Fi, Charging, Sound Mode, and Sensors
Free
Phone Entities: Battery, Wi-Fi, Charging, Sound Mode, and Sensors
Free
- Where to find and enable optional phone sensors in the app's settings | What battery, charging, Wi-Fi, and sound-mode entities are each good for | Why enabling every sensor at once creates clutter, not value | A short list of the entities the rest of this module depends on
 Household Presence: person, device_tracker, and Real-World Problems
Free
Household Presence: person, device_tracker, and Real-World Problems
Free
- The difference between one phone's presence and whole-household presence | Why presence updates aren't instant, and what causes the delay | Common real-world failure modes: dead battery, battery saving, false triggers | Good uses for presence, and what not to base on it alone
 Zones and Geofencing: Home, Work, School, the Store
Free
Zones and Geofencing: Home, Work, School, the Store
Free
- What a zone is, and how it differs from plain not_home | Step-by-step: adding a new zone in HA's settings | Privacy-first defaults: zone-name-only versus exact location | A working automation for entering and leaving a test zone
 Phone Notifications: The Basics of notify
Free
Phone Notifications: The Basics of notify
Free
- The notify action: a specific phone versus a general target | Sending a first test notification from Developer Tools | Android and iPhone permissions notifications depend on | Avoiding notification spam and the daily push limit
 Good Notifications: When, To Whom, and What to Say
Free
Good Notifications: When, To Whom, and What to Say
Free
- Three priority tiers: information, heads-up, and urgent | Technical anti-spam mechanisms: for:, cooldowns, and notification modes | Wording that leads to a decision instead of just reporting an event | Why 'sent' doesn't mean 'received' or 'confirmed'
 Actionable Notifications: Buttons in a Notification
Free
Actionable Notifications: Buttons in a Notification
Free
- Why 'show details' is the safest first action to add | Risky actions worth leaving for later: locks, gates, alarms | Android and iPhone differences in how action buttons appear | A complete working example: a confirm button and its handling automation
 Critical Notifications: Flooding, Smoke, Freezing, and Technical Alarms
Free
Critical Notifications: Flooding, Smoke, Freezing, and Technical Alarms
Free
- What a smart-home sensor can and can't replace from a certified alarm system | Configuring iOS Critical Alerts and Android high-priority channels | A complete escalation automation: repeat, clear-on-resolution, sensor-unavailable alert | Why a backup plan outside Home Assistant still matters
 The Phone as a Remote: Mobile Dashboard and Quick Actions
Free
The Phone as a Remote: Mobile Dashboard and Quick Actions
Free
- Phone versus wall panel versus computer: different screens, different jobs | The three-second rule for a mobile dashboard's first screen | Which card types work well on a phone: Tile, Entities, Area, Button | How to create a separate mobile dashboard step by step
 NFC, Shortcuts, and Quick Actions from Your Phone
Free
NFC, Shortcuts, and Quick Actions from Your Phone
Free
- NFC tag versus home-screen shortcut: what each is good for | What not to attach to a tag or shortcut without a second safeguard | Where to physically place a tag, and the test-first-then-stick rule | A complete working automation: an NFC tag by the bed triggers Goodnight
 Privacy, Battery, and the Phone's Reliability in Home Assistant
Free
Privacy, Battery, and the Phone's Reliability in Home Assistant
Free
- Location permission levels: always, while using, and never | How battery saving can silently break delivery of notifications | What should keep working without a phone at all | A lost-phone emergency checklist: sessions, passwords, and device removal
 Mini Project: The Phone as a Personal Remote and Notification System
Free
Mini Project: The Phone as a Personal Remote and Notification System
Free
- Building three notification types: information, a warning, and one with an action | A nine-row acceptance table covering Wi-Fi, LTE, Do Not Disturb, and more | A minimum version versus an expanded version of the project | A backup plan proving the home still works when the phone doesn't
Module 17 Energy in Home Assistant Module 17 tu s Home Assistant toward electricity, water, gas, and solar. It starts…
 Energy in Home Assistant: What's Worth Measuring, and Why
Free
Energy in Home Assistant: What's Worth Measuring, and Why
Free
- Good reasons to measure energy versus reasons that just produce a pretty chart | Why measuring isn't the same as saving, and what has to happen in between | A map of what you can measure: electricity, water, gas, solar, and battery storage | Power versus energy intuition, with a simple car-speed analogy
 The Energy Dashboard Step by Step: Electricity, Water, Gas, and Your First Configuration
Free
The Energy Dashboard Step by Step: Electricity, Water, Gas, and Your First Configuration
Free
- Why not every entity qualifies for the Energy Dashboard | Cumulative energy versus instantaneous power, and why the distinction matters | total versus total_increasing state classes, explained with examples | Ready-made template sensors for an outlet, a water meter, and a gas meter
 Power, Energy, Costs, and Entities: W, kWh, Dollars, utility_meter, and Common Mistakes
Free
Power, Energy, Costs, and Entities: W, kWh, Dollars, utility_meter, and Common Mistakes
Free
- Why a 2000 W kettle isn't necessarily more expensive than a 10 W standby load over a year | Power sensor versus energy sensor: what each one is actually for | Configuring the Integration helper to derive kWh from a power sensor | Building a daily/monthly utility_meter and a cost template sensor
 Your First Measurement: A Zigbee Outlet, a Shelly Plug, and Ready-Made Helper YAML
Free
Your First Measurement: A Zigbee Outlet, a Shelly Plug, and Ready-Made Helper YAML
Free
- What to pick for a first measurement, and what to avoid starting with | Pairing steps and sensible entity naming for a metered outlet | Building a standby binary_sensor with delay_on and delay_off | Why automatic shutoff should come only after a period of plain observation
 Whole-Home Measurement: Shelly 3EM, DIN Rail Meters, Current Transformers, and Safety
Free
Whole-Home Measurement: Shelly 3EM, DIN Rail Meters, Current Transformers, and Safety
Free
- What a whole-home meter measures that a single outlet plug never will | Shelly 3EM and DIN rail Modbus meters compared | Current transformers: range, direction, and phase assignment | Ready-made template sensors for splitting import and export from one power reading
 Solar in Home Assistant: PV, Import, Export, Self-Consumption, and Dynamic Pricing Integrations
Free
Solar in Home Assistant: PV, Import, Export, Self-Consumption, and Dynamic Pricing Integrations
Free
- Four figures to track: PV production, import, export, and home consumption | Self-consumption versus self-sufficiency, with working template sensor formulas | Net metering and export credits explained without assuming one specific scheme | How a dynamic pricing integration fits alongside your solar data
 Real Savings: Standby, Rate Plans, PV Surplus, Dynamic Pricing, and Payback-Aware Automations
Free
Real Savings: Standby, Rate Plans, PV Surplus, Dynamic Pricing, and Payback-Aware Automations
Free
- Why real savings are usually smaller and more boring than the ads suggest | Building a PV-surplus binary_sensor with delay_on and delay_off hysteresis | Rate plans in plain terms: flat-rate, time-of-use, and weekend-window pricing | Six full automation examples, from notification-only to fully automatic
 A Modern Energy Dashboard: Power Flow, Energy Flow, ApexCharts, and Gradient Charts
Free
A Modern Energy Dashboard: Power Flow, Energy Flow, ApexCharts, and Gradient Charts
Free
- A minimal energy view using only Home Assistant's built-in cards | Power Flow Card Plus versus Energy Flow Card Plus: power now versus energy over time | ApexCharts examples for instantaneous power, cumulative energy, and dynamic pricing | Why building the perfect dashboard in one pass is the most common mistake
- Five data source options, from a manual reading to a full pulse meter | Converting pulses to liters and cubic meters with the right conversion factor | Building a continuous-flow leak alarm without drowning in false alarms | Why m³ of gas isn't the same as the energy figure on your bill
 Mini Project: A Home Energy Audit, PV, and Your First Savings Plan
Free
Mini Project: A Home Energy Audit, PV, and Your First Savings Plan
Free
- A structured review of the Energy Dashboard and your own dashboard from Lesson 8 | Identifying your three biggest loads and one pointless standby scenario | Choosing one automation to keep and one to disable or fix | A fillable home energy report template and a small, testable 7-day plan
Module 18 Home Security in Home Assistant Module 18 tu s Home Assistant toward keeping your home and household safe.…
 Home Security in Home Assistant: Boundaries, Risks, and a Response Plan
Free
Home Security in Home Assistant: Boundaries, Risks, and a Response Plan
Free
- Where Home Assistant genuinely helps with security, and where it must never be the only layer | Building a personal risk map for your own home before writing a single automation | The five-step chain: detect, confirm, notify, escalate, respond | Setting up the audit-started helper that tracks your progress through the module
 The Notification Foundation: Phone, Household Groups, Priorities, and Reliability Tests
Free
The Notification Foundation: Phone, Household Groups, Priorities, and Reliability Tests
Free
- Why a single mobile_app notify target isn't enough for a household | Building script.notify_household as a shared entry point for every future automation | Two priority levels and what actually changes between them on iOS and Android | A weekly test automation that catches a silently broken notification path
 Critical Notifications: Escalation, SMS, Repeats, Acknowledgment, and Fallback
Free
Critical Notifications: Escalation, SMS, Repeats, Acknowledgment, and Fallback
Free
- Why one push notification isn't an escalation, and what has to happen after it's ignored | Building script.life_alarm, script.flood_alarm, and script.intrusion_alarm as separate escalation tracks | Adding an SMS gateway fallback with rest_command for when push fails entirely | An acknowledgment action (I'M RESPONDING) that stops the repeat cycle without silencing the underlying alarm
 Flood Sensors: Kitchen, Bathroom, Washer, Dishwasher, Boiler Room, and a Water Valve
Free
Flood Sensors: Kitchen, Bathroom, Washer, Dishwasher, Boiler Room, and a Water Valve
Free
- Where flood damage actually starts, and where a sensor is worth the money | Grouping flood sensors so one automation covers every location at once | Automating a smart water valve closure alongside the escalation script | A test helper that proves the whole flood chain works without actually flooding anything
 Smoke, CO, and Gas: Certified Detectors, Warnings, and Home Assistant as an Extra Layer
Free
Smoke, CO, and Gas: Certified Detectors, Warnings, and Home Assistant as an Extra Layer
Free
- Certification standards to look for: UL 217 and EN 14604 for smoke, UL 2034 and EN 50291 for CO | A mounting-location table so detectors actually catch what they're meant to catch | Three realistic ways to connect a certified detector to Home Assistant | A single automation that differentiates test, smoke, CO, and gas triggers in the notification text
 Doors, Windows, the Gate: Contact Sensors, Left-Open Openings, and Home Modes
Free
Doors, Windows, the Gate: Contact Sensors, Left-Open Openings, and Home Modes
Free
- Introducing input_select.home_mode as the backbone for the rest of the module | A left-open reminder that doesn't nag every time you step outside | An exit delay so arming Away doesn't trigger an alarm on your own way out | Mode-aware automations for the gate, the door at night, and a windows checklist before leaving
 Weather + Windows + Safety: Rain, Wind, Frost, Heat, and Open Windows
Free
Weather + Windows + Safety: Rain, Wind, Frost, Heat, and Open Windows
Free
- The difference between a forecast and a current-condition sensor, and why it matters here | A unit-normalization template sensor so wind speed reads consistently regardless of source | Four weather automations: rain, wind with a for: 3 minutes guard, frost, and heat | Why this lesson recommends notifying instead of automatically closing windows
 Motion, Presence, and Home Modes: Home, Night, Away, Guests
Free
Motion, Presence, and Home Modes: Home, Night, Away, Guests
Free
- A presence-source trust table comparing phone, PIR, mmWave, and contact sensors | Why Guests mode is deliberately left out of automatic switching | An everyone-away automation for Away mode, with a two-person household variant | Two warning boxes on why phone presence alone is not sufficient for security decisions
 A Simple Alarm in Home Assistant: Zones, Delays, a Siren, and False Alarms
Free
A Simple Alarm in Home Assistant: Zones, Delays, a Siren, and False Alarms
Free
- Why this lesson frames its input_boolean alarm as a teaching model, not a production system | Perimeter versus interior zones, and why they get different response speeds | An entry delay after a perimeter opening versus instant response to interior motion | A false-alarm stop procedure using acknowledgment plus a dedicated stop script
 Security System Failures: No Internet, No Power, an Offline Sensor, a Low Battery
Free
Security System Failures: No Internet, No Power, an Offline Sensor, a Low Battery
Free
- Why unavailable sensor data is a genuine unknown, not a safe default | A critical-sensors group and a template sensor counting how many are currently offline | A no-internet automation with a local TTS response and a conditional SMS fallback | A monthly test checklist covering all nine failure-monitoring helpers built across the module
 A Home Security Dashboard: Status, Alerts, Cards, Buttons, and Event History
Free
A Home Security Dashboard: Status, Alerts, Cards, Buttons, and Event History
Free
- Designing sensor.home_security_status with a deliberate priority order for conflicting signals | Nine dashboard cards, from overall status to a dedicated tests section | A conditional card that only appears while an alarm is actually active | Why the dashboard explicitly warns that OK doesn't mean the same thing as safe
 Mini Project: Your Own Home Security Plan and Scenario Tests
Free
Mini Project: Your Own Home Security Plan and Scenario Tests
Free
- A copy-paste home security plan template that lives outside Home Assistant | An entity and helper inventory table covering everything built across the module | A responsible-people table so notifications and acknowledgments have a clear owner | Three dashboard-driven scenario tests: a quiet house, a failure test, and Away mode
Module 19 Thermal Comfort in the Home with Home Assistant Module 19 tu s Home Assistant toward the temperature,…
 Thermal Comfort in the Home: What You Want to Achieve, and What Not to Break
Free
Thermal Comfort in the Home: What You Want to Achieve, and What Not to Break
Free
- The module's two rules: measure first, and never fight the existing heat source controller | Five comfort factors beyond temperature: humidity, CO2, thermal mass, and distribution | A read/suggest/control framework for deciding how much HA should touch the heating system | Setting up input_select.comfort_mode and a first heating system map template
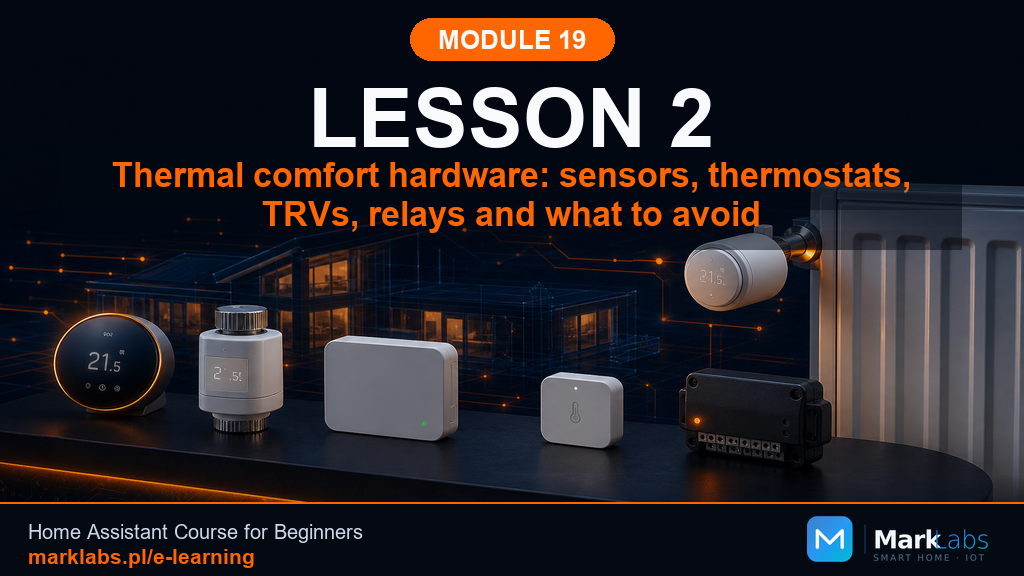 Hardware for Thermal Comfort: Sensors, Thermostats, TRV Heads, Relays, and What to Avoid
Free
Hardware for Thermal Comfort: Sensors, Thermostats, TRV Heads, Relays, and What to Avoid
Free
- A device-role table comparing sensors, TRV heads, room thermostats, and relays | Per-room sensor mounting guidance for the living room, bedroom, bathroom, and kitchen | Zigbee, Z-Wave, Wi-Fi, and ESPHome compared for a heating setup specifically | A detailed electrical safety warning before working with relays or underfloor actuators
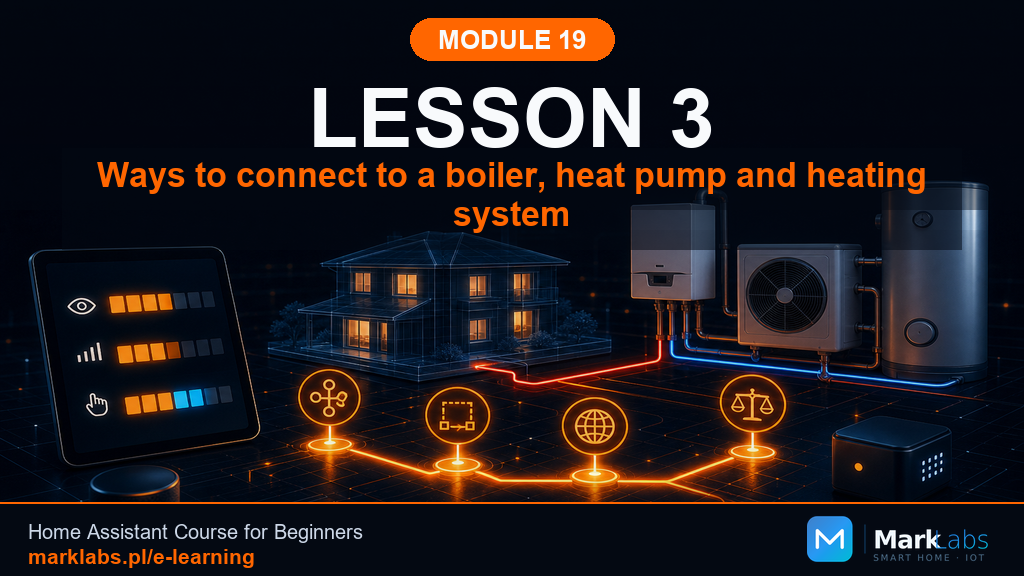 Ways to Connect to the Boiler, Heat Pump, and Heating System
Free
Ways to Connect to the Boiler, Heat Pump, and Heating System
Free
- Ten integration routes ranked by difficulty, locality, and risk | OpenTherm and Modbus explained in depth, including their read-first philosophy | Why an on/off boiler contact doesn't always mean no modulation is happening | New helpers: heating_integration_path and boiler_integration_level
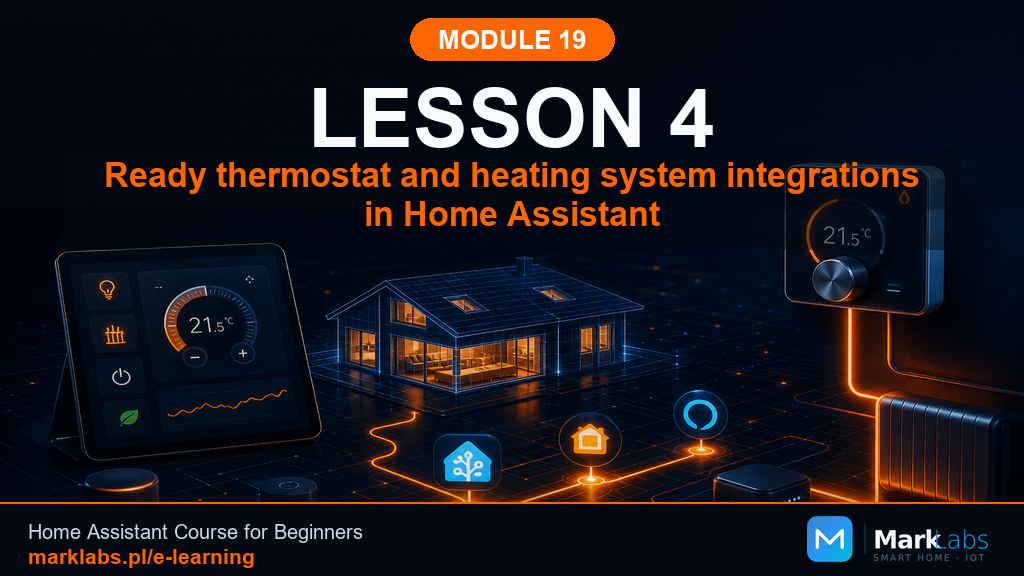 Ready-Made Thermostat and Heating System Integrations in Home Assistant
Free
Ready-Made Thermostat and Heating System Integrations in Home Assistant
Free
- Key climate entity attributes: target and current temperature, hvac_mode, preset_mode, hvac_action | A per-system integration survey covering cloud and local options | Why you should always compare a climate entity's reading against a separate sensor | A general five-step process for adding any new heating integration
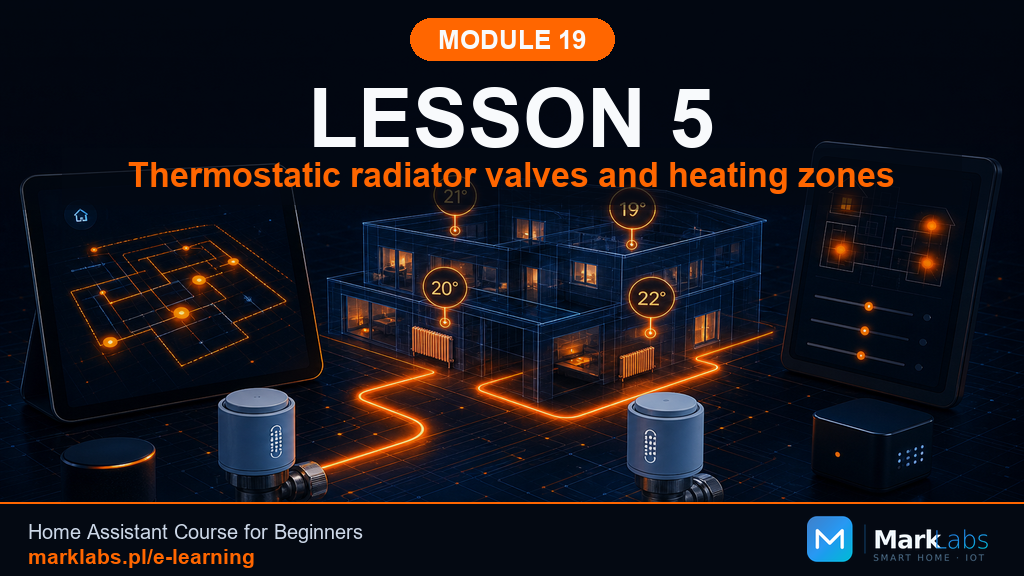 TRV Heads and Heating Zones
Free
TRV Heads and Heating Zones
Free
- Defining a heating zone as a TRV head paired with an independent room sensor | Five comfort-mode temperature helpers: comfort, eco, night, away, and guests | A mode-driven script.set_living_room_trv_temperature with an open-window pause | Recovery automation for when a TRV head returns from unavailable or unknown
 Generic Thermostat, a Relay, and On/Off Control Without the Chaos
Free
Generic Thermostat, a Relay, and On/Off Control Without the Chaos
Free
- A full generic_thermostat YAML example with target_sensor, heater, and initial_hvac_mode off | Hysteresis explained through cold_tolerance and hot_tolerance with real-world examples | Why min_cycle_duration is not an electrical safeguard, and what it actually protects | Handling sensor failure with an alert automation and an optional auto-off for the thermostat
 OpenTherm, Modbus, and Boiler Protocols: When to Read Data, and When to Control It
Free
OpenTherm, Modbus, and Boiler Protocols: When to Read Data, and When to Control It
Free
- OpenTherm Gateway setup, polling delays, and why advanced override switches stay disabled by default | A read-only Modbus YAML template explicitly marked with example addresses, not real ones | Why you should never guess a Modbus register address from a forum post | A protocol comparison table: OpenTherm Gateway, Modbus, eBUS, EMS-ESP, and manufacturer integrations
 Humidity, the Bathroom, a Fan, and Comfort After a Shower
Free
Humidity, the Bathroom, a Fan, and Comfort After a Shower
Free
- Four humidity threshold helpers, including a separate Night-mode threshold | A wait_for_trigger and timeout pattern that guarantees the fan never runs forever | Why the automation checks that the fan switch is already off before acting | A manual Plan B for when the fan relay isn't reachable from Home Assistant
 CO2, Air Quality, Airing Out, an Air Purifier, and HRV
Free
CO2, Air Quality, Airing Out, an Air Purifier, and HRV
Free
- A rough CO2 ppm reference table, with a reminder that it's a starting point, not a diagnosis | A reminder automation that adjusts its wording when outdoor PM2.5 data is missing | The difference between real CO2 (NDIR) sensors and VOC or eCO2 estimates | Why HRV bypass, anti-freeze, and preheater functions stay read-only without documentation
 Comfort Modes, Schedules, and Manual Override
Free
Comfort Modes, Schedules, and Manual Override
Free
- Morning and night schedule automations that respect Away, Summer, and manual override | A comfort_manual_override helper paired with a timer that resets automatically | Why heating inertia means a schedule needs lead time before the target hour | A single chain from schedule to comfort_mode to TRV automation, once a day, not every five minutes
 Thermal Comfort Dashboard: Rooms, Modes, Charts, and Diagnostics
Free
Thermal Comfort Dashboard: Rooms, Modes, Charts, and Diagnostics
Free
- A home_comfort_status template sensor with an explicit priority order for conflicting signals | A full dashboard YAML with summary, room, and diagnostics sections | Distinguishing a data problem from a logic problem from an execution problem | A markdown seasonal-testing card, with a warning that its checkboxes don't save state
 Mini Project: a Home Thermal Comfort Plan and Scenario Testing
Free
Mini Project: a Home Thermal Comfort Plan and Scenario Testing
Free
- A copy-paste home thermal comfort plan template that lives outside Home Assistant | A room map and entity inventory covering everything built across the module | A seasonal testing schedule: before heating season, during the season, before summer, before smog season | Three dashboard-driven scenario tests: a calm house, override versus schedule, and air quality
Module 20 Lighting and Blinds in Home Assistant Module 20 tu s Home Assistant toward the two hardware categories every…
- The module's rule: manual and Plan B first, scenes second, automations last | Why a dashboard is never a Plan B, and why detach mode needs its own test | A five-step command priority hierarchy from safeguards to automation | Four hardware categories and a first room-by-room light and blind map
- The point, circuit, actuating device, control device, and entity glossary | Four light functions: main, task, wayfinding, and decorative | Three incompatible dimming methods: 230V dimmer, low-voltage controller, internal bulb dimming | Zigbee coordinator versus manufacturer hub, and how devices join Home Assistant
- Why a classic lighting circuit's live-through-the-switch wiring kills smart bulb standby | unavailable versus unknown, and why automations must not treat them the same | A five-need decision table: on/off, brightness, color, switch compatibility, Plan B | An eight-step test procedure for verifying Plan B behavior without Home Assistant
- Why a neutral wire may be absent from a switch box, and why wire color isn't proof | Momentary button configuration and detach mode: two different problems | Staircase and cross-circuit topology requiring full electrician diagnosis | A market comparison and a fifteen-field point card for the electrician
- Three dimming paths that must not be mixed: wall dimmer, smart bulb, strip controller | Why flickering can come from the load, driver, dimmer mode, or calibration | Calculating a strip's power and current before choosing a power supply | RGB, RGBW, CCT, and addressable strips are not the same thing
- Six cover types: exterior shutter, fabric blind, Venetian blind, curtain, awning, skylight | Why a cover entity doesn't turn two relays into a safe blinds controller | Layers of protection: drive design, limit switches, thermal protection, interlock, local STOP | Market examples: Shelly Dimmer Gen3, Shelly Plus RGBW PM, IKEA FYRTUR, Somfy protocols
- Limit switches, module calibration, and position are three different things | Why a door contact sensor can't confirm a patio is empty | A patio lockout that opening turns on, but closing never turns off automatically | Wind protection for awnings that a comfort lockout must never block
- Seven layers: physical point, device, integration, HA device, entity, action, logic | Why a device and an entity are not the same thing | Light, switch, and cover entity behavior, including grouped lights and covers | Scene, script, and automation: three tools that are not synonyms
- Four manual control paths: wired switch, battery remote, direct binding, dashboard | Three ways a remote can work: through HA, a manufacturer bridge, or a binding | The event entity's event_type attribute, and why single_press names vary by integration | A Plan B table testing HA-off, network, and module failure as separate scenarios
- Why a scene is a stateless snapshot of target states, not a procedure | The light_mode helper pattern for recording the last deliberately chosen mode | Six scenes: Evening, Night, Movie, Guests, Cleaning, and Leaving home | Why a patio blind belongs in a script with safety conditions, not a light scene
- Why PIR detects movement, not certain human presence | The rule: check lux only when deciding to turn a light on, never to hold it off | Why a timer started at motion-on undercounts real absence time | Why automation should only turn off a light it turned on itself
- How to read sunset and sunrise offsets: negative means before, positive means after | Why the Evening automation and the low-lux overcast-day automation must be separate | Why lux from a motion sensor can be lit up by its own lamp | A fallback pattern for a sunset trigger missed while Home Assistant was down
- Nine control priorities: drive safeguards first, comfort automation eighth | A blinds_season profile chosen by a person, with no automatic auto option | Two separate temperature thresholds plus a minimum move interval to stop oscillation | Why a patio closing lockout must never block STOP or emergency opening
- Why a 'ready' project status is a declaration after testing, not an automatic certification | A four-room mini project: living room, hallway, bathroom, and bedroom | Why a backup restores configuration but never turns on a light during a failure | A mandatory readiness checklist before marking the lighting and blinds plan done
Module 21 Outdoor in Home Assistant Module 21 takes Home Assistant past the walls of the house and out into the…
- Seven outdoor zones ranked from low risk (lighting, weather) to high risk (gates, garage) | The Read, Suggest, Control maturity model applied to every automation in this module | Why outdoor automation has to be more resilient than indoor automation | The garden_mode, automation, and alerts helpers every later lesson builds on
- IP44, IP65, and IP67 explained against real outdoor mounting locations | Power delivery options for devices without a nearby outlet | Junction box selection and the drip loop that keeps water out of enclosures | Why hardware choices made here determine reliability in every later lesson
- Wi-Fi and Zigbee range limits against real garden, garage, and gate distances | LoRa as the option for sensors beyond normal mesh range | PoE as the more reliable wired alternative for cameras and gate hardware | Repeaters and mesh extension for the zones in between
- Fixture placement across patio, driveway, entrance, and garden zones | Motion sensor triggering tuned for outdoor conditions | A night mode that keeps light sensible without disturbing sleep | Why lighting is where this module's automation-last-not-automation-never zones begin
- Dry contact relay wiring for driveway gate control, reused in later lessons | Why a reed sensor confirms true position instead of trusting the last command | The confirmed-closed-before-remote-open safety rule | A week of observation before the first remote pulse is sent
- Reusing the driveway gate's dry contact pattern for the electric strike | Doorbell and intercom integration options into Home Assistant | The shared master switch spanning both the driveway and pedestrian gate | Where automating access control crosses from convenient to reckless
- Garage door control on the shared dry contact wiring pattern | Car presence detection and what it can and can't tell you | Restart-mode motion lighting so a fresh event resets the shutoff countdown | A concrete Plan B for when the garage automation doesn't fire
- Solenoid valve wiring and zone-by-zone sequential watering scripts | A rain-based override that skips scheduled watering automatically | A manual 24-hour pause switch for real-world exceptions | Why irrigation marks the module's shift from safety risk to nuisance risk
- Tank liquid-level sensing and the sensor entity it produces | Dry-run protection that shuts off the pump before damage occurs | Overflow alerting for the tank feeding the irrigation system | A dedicated water dashboard tying level, pump, and alerts together
- Mailbox and package detection using simple contact and weight-based sensors | Trash bin collection day reminders as a low-cost convenience automation | A drainage pit level sensor for an easily forgotten technical point | Frost alerts and their connection to pipe-protection automation
- Local rain, wind, temperature, soil moisture, and sunlight sensors | A combined sensor pattern blending a local station with an online forecast | Availability templates that degrade gracefully instead of freezing state | Why this sensor layer is the foundation for the next lesson's automations
- Irrigation-skip automation driven by rain forecast data | Temperature and sun-driven blind adjustment outdoors | Weather alert automations for wind, frost, and heat | The awning wind-retraction automation, this module's one fully automatic exception
- Camera placement and coverage across entrance, driveway, and garden | Frigate hardware accelerator options and a recommended RTSP-native camera | Camera brand popularity in the Frigate community | Why a camera alone is not a security plan
- A three-section layout: status, control, diagnostics, ordered by check frequency | Confirmation dialogs on gate buttons as the interface-level safety realization | A diagnostics section highlighting sensor battery levels as the top failure cause | Mobile versus desktop views, and keeping the outdoor dashboard separate from the home dashboard
- A failure mode table covering signal, water, frost, battery, internet, and power | A single combined automation detecting prolonged unavailable across key sensors | The drip loop and cable gland technique preventing the module's most common failure | A four-season test schedule turning maintenance into routine, not reaction
- A three-zone risk map: safety, convenience, and technical | A seven-week deployment order, safety first, technical last | A priority shopping list keyed to the module's earlier lessons | A mandatory safety checklist before the first remote gate pulse
Module 22 Multimedia, Audio, and Announcements in Home Assistant Module 22 tu s Home Assistant into a household…
- The two-tier home announcement versus critical announcement model | Why sound needs deliberate design, not just wiring a speaker | The house_silence, volume, and announcement_zone helpers reused all module | What's worth automating with sound, and what should stay manual
- The media_player entity's states, attributes, and supported features | How a TV, speaker, soundbar, receiver, tablet, and player each differ | Checking supported_features before building an automation around a device | Why this entity is the foundation every later multimedia lesson depends on
- Music Assistant setup and streaming provider configuration | Player grouping for synchronized multiroom playback | Library browsing and internet radio through a single interface | Why Music Assistant unifies control across otherwise incompatible speaker brands
- Sonos's local API and why it integrates more smoothly than most | Google and Nest speakers and their cloud dependency | AirPlay and DLNA protocol quirks worth knowing before you rely on them | Bluetooth range limits and MQTT-based DIY speakers as an alternative
- TTS methods and engines, with a focus on the offline Piper engine | Language and voice selection for clear English announcements | Volume control tied to the module's shared silence and volume helpers | The playback delay quirk that clips announcements, and how to fix it
- The snapshot and pause/resume pattern for announcing without losing playback state | Music Assistant's own play_announcement service as an alternative | Priority rules for when a critical announcement needs to override music entirely | Why silently talking over music is worse than a short, deliberate pause
- Wall tablet dashboard and sound integration for multimedia announcements | TTS playback through the tablet's own speaker as a backup channel | Camera display triggered automatically by a doorbell or gate announcement | Night mode dimming versus a fully dark screen, and lock-screen interaction
- The dedicated Home Assistant TV app for Android TV and Google TV | A TV-optimized dashboard layout distinct from the phone and tablet versions | Camera feed display on the TV triggered by doorbell or gate events | Platform limits: Android TV and Google TV versus closed platforms like Tizen and webOS
- A central notification router script reused by every automation in the module | Presence-based and time-based logic for picking phone, tablet, TV, or speaker | A flashing light as a channel for the deaf or hard of hearing, and for silence mode | Why one reusable router beats duplicating channel logic across automations
- Doorbell and pedestrian gate events routed to a home announcement | Driveway gate open events tied to the module's announcement scripts | Package delivery detection extended with an audible, in-house announcement | Why voice announcements catch household members a phone push alone misses
- Why multimedia scenes are built as scripts, not static scene entities | Movie, Cooking, and Guests scenes tying light, sound, and silence together | A Wake-Up scene with a repeat loop gradually raising brightness and volume | Personalizing scenes per household member and for seasonal occasions
- A combined template sensor merging an automatic night window with a manual switch | Why silence turns on from either source but only off when both allow sound | An automatic time-limited shutoff protecting against a forgotten manual switch | Weekday versus weekend schedules, and calendar-based silence for meetings
- Physical Zigbee buttons wired to multimedia scenes with gesture-based actions | The built-in Assist voice assistant, entity exposure, and custom sentences | NFC tags and universal infrared remotes as additional control paths | A central stop_all_media script as a whole-house emergency stop
- A classification table of every alert generated across the course so far | Three questions for deciding an alert's priority: reaction, growing cost, event versus information | Extending an existing automation with a new channel instead of replacing it | Periodic alarm testing and a log to catch alert fatigue before it sets in
- A status section showing silence mode, the announcement zone, and now-playing state | A scenes grid with confirmation reserved only for the whole-house stop button | A diagnostics section checking the Music Assistant server and Piper engine first | Time-of-day-aware conditional cards and a guest-safe, dashboard-only mode
- A hardware inventory identifying the local, internet-independent critical speaker | A six-week deployment order from foundation to control-without-a-phone and dashboard | A priority checklist verifying the TTS engine, speaker, and light signal before going live | Classifying every alert from Modules 18 through 22 using the previous lesson's three questions
Module 23 Maintaining Home Assistant Module 23 closes the course with the layer most people forget about until…
- A table of what breaks after months without maintenance, area by area | The module's four pillars: backup, updates, performance, and access | Three real forum stories behind the most common configuration-loss posts | A time breakdown showing maintenance costs a dozen or so minutes a month
- Home Assistant's rebuilt 2025.1 backup system with schedule and retention | The 3-2-1 rule applied to local, Home Assistant Cloud, and NAS storage | An automation notifying you the moment a scheduled backup fails | Why an untested restore is a purely theoretical backup
- Four independent update layers: Core, Supervisor, the OS, and add-ons | How to read the Breaking Changes section before clicking Update | A safe update order, one layer at a time, with backup first | Plan B: rolling back through Home Assistant OS or a pre-update backup
- purge_keep_days and the exclude and include filtering strategies | Long-term statistics versus raw history, and why the Energy dashboard survives a purge | commit_interval tuning to reduce disk writes on slower hardware | When to migrate from SQLite to MariaDB or PostgreSQL, and a known MariaDB performance trap
- System Health as the first stop for a consolidated view of your install | The Repairs page and distinguishing critical entries from informational ones | The System Log and per-integration debug logging through logger configuration | How to file a bug report, and the integration diagnostics export that speeds it up
- Administrator versus regular user, and what each account type can actually do | Restricting a dashboard's visibility to administrators only | Step-by-step setup for a safe, dedicated account for a child or guest | Long-Lived Access Tokens and why revoking access matters as much as granting it
- Concrete symptoms signaling your current hardware is falling behind | A backup-and-restore migration process that works across different architectures | Common post-migration problems: missing add-ons, hardware-specific integrations, USB ports | USB passthrough as the key challenge when migrating to a Proxmox virtual machine
- Why one flat network lets a compromised IoT device reach everything else | A three-segment architecture: Main LAN, HA LAN, and IoT LAN | The mDNS reflector that VLANs break, and why it's easy to forget | A guest network versus a true VLAN, and where they differ
- What to check before installing any custom integration from HACS | The rule: backup before every new HACS install, not after a problem | Which integrations across this course are HACS, and which are official Core | A safe removal process when a HACS integration stops being maintained
- A weekly, monthly, quarterly, and yearly maintenance schedule | A final checklist tying together all nine pillars from this module | A maintenance log template for tracking system history over time | A mini response plan: what to do, in order, when something breaks anyway
Every lesson is free to read. No paywall, no checkout. If the material saves you time and you want to say thanks, you can buy me a coffee — never required.
