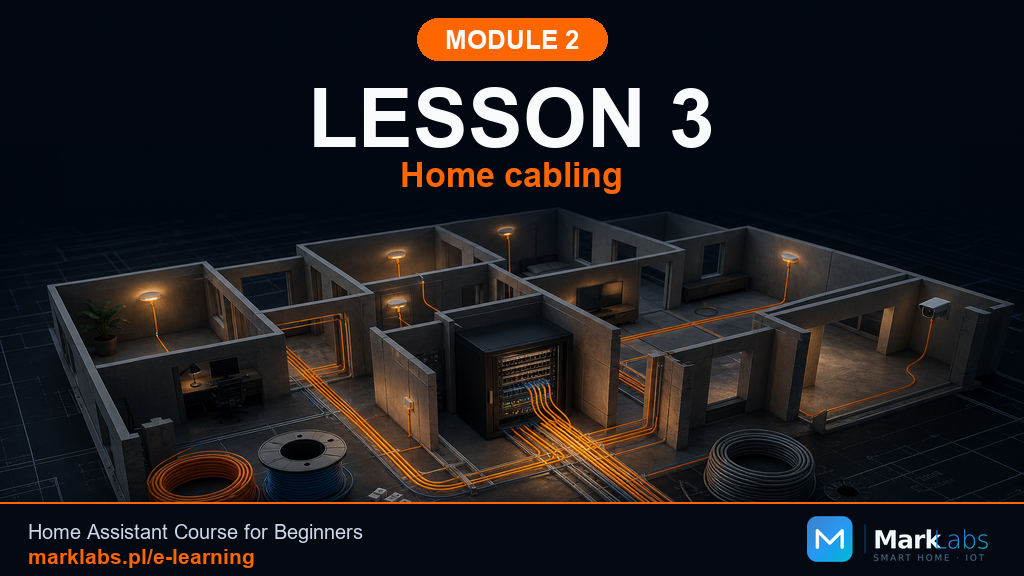
Wiring Your Home for a Smart Home
Not everyone reading this is running new cable through open walls. If that's not you, skim this lesson for the concepts and skip straight to Lesson 4. If you're planning a renovation, finishing a basement, or building new, this is the lesson that saves you from regretting decisions poured into drywall.
The single most important rule
Run more cable than you think you need, to more places than you think you need it. Cable itself is cheap. Opening a finished wall a second time to add "just one more run" is not. Every experienced installer says some version of the same thing: you'll never regret an extra drop, you'll always regret the one you skipped.
Which cable to buy
For in-wall structured wiring, use solid-core Cat6 (or Cat6A if you want serious future headroom, particularly for 10-gigabit runs down the line), rated CMR for vertical in-wall runs or CMP (plenum-rated) if it passes through HVAC air-handling spaces, check your local building code for which applies in your specific run. Stranded-core patch cable is for short desk and equipment-rack jumps only, it isn't rated for in-wall use and won't hold up to being punched into a wall jack reliably.
Where an Ethernet drop earns its keep
Your Home Assistant hub's location, always, no exceptions if you have any say in the matter.
Wireless access point locations, one per floor or zone at minimum, covered further in Lesson 5.
Smart TVs and media centers, streaming performance is noticeably better and more consistent over wire.
A home office or desk. Video calls over a wired connection just work, every time.
How many cables per location?
Run two cables to every important spot, not one. The cost difference between running one cable and two is small, mostly your time, since you're already opening the wall. Having a spare means a future access point or a second device doesn't require reopening anything.
The 100-meter limit, and what to do if you're past it
Standard Ethernet has a maximum reliable run length of about 100 meters (roughly 328 feet) before signal quality degrades. Most homes never come close to this, but a large property or a detached garage run might. If you're near or past that limit, add a network switch partway along the run to regenerate the signal, or look at fiber for that specific long-haul segment.
Where your internet service enters the house
Know where your ISP's line, whether fiber terminating at an ONT, or a cable line, actually enters your home before planning your equipment location. Your central wiring point (your utility closet or panel, covered in Lesson 4) should be reasonably close to this entry point, or you'll need an additional run just to bridge the two.
PoE: power over the same cable
Power over Ethernet (PoE) delivers both data and electrical power through a single Ethernet cable, which is genuinely useful for access points, cameras, and some Zigbee coordinators mounted in ceilings or other spots without a nearby outlet. If you're already running cable to a ceiling-mounted access point location, seriously consider PoE-capable equipment, it saves you from also fishing an electrical line to the same spot.
Outdoor runs need outdoor-rated cable
Standard indoor cable degrades quickly outdoors, UV exposure and moisture will destroy it within a season or two. If you're running cable to a detached garage, a shed, or an outdoor camera, use direct-burial or UV-rated outdoor Ethernet cable specifically, and where possible, run it through conduit for physical protection and easier future replacement.
Not everything in a smart home is Ethernet
Structured wiring for a smart home isn't only about data cable. Low-voltage runs for hardwired sensors, in-wall keypads, and speaker wiring are all worth considering during the same open-wall opportunity, since running them later means opening the wall a second time. You don't need to commit to every possible smart device now, just leave a pull string or empty conduit in walls you're already opening, so adding a cable later doesn't require demolition.
Boxes: depth actually matters
Standard low-voltage wall boxes are often shallower than an electrical outlet box, and cramming multiple bundled Cat6 cables into a too-shallow box makes for tight bend radii that can degrade signal quality over time. Where possible, use a deep low-voltage bracket, and never bend Cat6 tighter than roughly four times its own diameter, sharp kinks are a real, measurable source of packet loss.
Shades, switches, and lighting: think before you close the wall
If you're already opening walls, this is your one cheap opportunity to plan for motorized shades (which often want a nearby power source, not just a low-voltage signal wire), smart switches that need a neutral wire present in the box (many older US homes lack this in switch boxes, and it's the single most common reason a smart switch installation stalls), and any lighting circuit you might eventually want on smart control. Decide now, even if you install later, because retrofitting a missing neutral wire after drywall is a genuinely unpleasant, expensive job.
Don't rely on a single access point
A single router, however powerful, struggles to cover an entire multi-floor home evenly. If you're wiring for the future, plan Ethernet drops to two or three access point locations spread through the house, rather than assuming one central router will reach everywhere reliably. Lesson 5 covers exactly why this matters for Wi-Fi coverage.
Conduit, slack, labels, and documentation
Where you can, run cable through flexible conduit rather than bare in the wall, it makes future replacement or additions dramatically easier. Leave a foot or two of slack at both ends of every run, drywall settles and you'll be glad of the extra length someday. Label every cable at both ends the day you run it, not months later when you can't remember which one goes where. And take photos of every open wall before it's closed, with a tape measure in frame for reference, future you will thank present you the first time you need to find a cable's exact path without demolishing anything.
Test before you close the wall
Test every single run with a cable tester before drywall goes up, not after. A cheap Ethernet cable tester confirms all eight wires are correctly terminated at both ends. Finding a bad run after the wall is closed means reopening it. Finding it before means a five-minute fix.
Never run low-voltage cable alongside mains wiring
Keep low-voltage data cable physically separated from mains electrical wiring wherever possible, running them in parallel too closely can induce electrical interference into your data lines, and in the US, mixing low-voltage and line-voltage wiring in the same box or conduit run without proper separation can also violate your local electrical code (NEC guidance requires separation or approved dividers between the two). If they must cross, cross at a 90-degree angle rather than running parallel, and maintain reasonable separation distance along any parallel run. Any actual electrical panel or circuit work, as opposed to low-voltage data and sensor wiring, should go to a licensed electrician, not a DIY weekend project, both for safety and because most jurisdictions require it for anything touching your home's mains electrical system.
What not to do
Don't run a single cable when two costs almost nothing extra. Don't use stranded patch cable for in-wall runs. Don't skip testing before closing the wall. Don't forget to check for a neutral wire in switch boxes you plan to smart-control. And don't assume you'll remember cable routing without labels and photos, you won't, not in six months.
Plan B: no cables, and can't run them
Renting, or simply not ready to open walls? Powerline adapters and a well-planned mesh Wi-Fi system, covered in Lesson 5, get you most of the reliability benefit without touching a single wall. It's not quite as good as real structured wiring, but it's a completely legitimate, common path, and exactly what most Home Assistant users actually run.
New construction versus an existing home
If you're building new or doing a full renovation, this entire lesson is your checklist to hand to your electrician or low-voltage contractor before drywall. If you're in a finished home with no renovation planned, most of this lesson is aspirational reading, your realistic path is the single new cable from Lesson 2, or the wireless fallback covered throughout this module.
What this looks like for your mini smart home
If you're running new cable at all right now, prioritize the Home Assistant hub location from Lesson 2 first, everything else in this lesson is optional depending on your ambition level. If you're not running any new cable, this lesson's concepts still matter for Lesson 5's wireless planning.
Working with an electrician versus a low-voltage contractor
These are two different trades, and it's worth knowing the distinction before you start calling contractors. A licensed electrician handles anything touching your home's mains electrical system, adding a circuit, running a neutral wire to a switch box, installing an outlet, work that in most US jurisdictions legally requires a license and often a permit and inspection. A low-voltage contractor handles Ethernet, coax, and similar structured data wiring, generally unlicensed work in most places, though check your specific local code. Many smart-home-friendly homes end up using both: an electrician to make sure every switch box has a neutral wire and enough circuits, and a low-voltage contractor (or a confident DIYer) to run the actual data cable. Get quotes from both before drywall goes up, not after.
A practical tool list for a DIY wiring weekend
If you're running your own cable rather than hiring it out, a handful of tools make the job dramatically easier and reduce the risk of a bad termination: a cable puncher (punch-down tool) for terminating cable onto keystone jacks, a keystone jack tester or a basic continuity tester to confirm every run before closing the wall, a fish tape for pulling cable through finished wall cavities without demolishing them, and a stud finder to avoid drilling through something you shouldn't. None of this is expensive or specialized, most of it is available for rent at a local hardware store if you don't want to own it permanently for a one-time project.
Fishing cable through an already-finished wall
Running cable through an already-drywalled wall, rather than open framing, is a genuinely different and more finicky job, but it's still realistic for a single run between two nearby rooms or floors. The general approach: cut a small access hole near where the cable needs to enter and exit, use a fish tape or a weighted line dropped through the wall cavity to create a path, and pull the new cable through following that path. Attic and basement access, where cable can run horizontally above or below the living space before dropping down into a wall cavity, is usually the easiest version of this job, since it avoids fishing cable sideways through multiple stud bays. If a run looks like it needs more than two access holes to complete, it's often worth reconsidering the path entirely, or calling in a low-voltage contractor who does this daily and has purpose-built tools for exactly this scenario.
A note on older homes and asbestos or knob-and-tube wiring
If your home was built before the 1980s, be aware that older insulation materials in walls and attics can contain asbestos, and older electrical systems in some homes still use knob-and-tube wiring, both of which change the calculus around DIY wall work significantly. This isn't meant to alarm you, most homes of that era have been renovated or updated at some point, but if you're planning to open walls in a home you know to be original from that period, it's worth a professional inspection before any DIY cable-fishing project, for safety reasons that go well beyond networking.
Coax: don't ignore what's already there
Many US homes already have coaxial cable (the kind originally run for cable TV) reaching multiple rooms, and it's easy to overlook as a networking resource. MoCA (Multimedia over Coax Alliance) adapters can turn that existing coax into a surprisingly fast, reliable wired network backbone, often faster and more consistent than powerline adapters, without running a single new cable. If your home already has coax jacks in rooms where you'd like a wired connection but don't want to run new Ethernet, this is genuinely worth investigating before assuming your only options are new cable or Wi-Fi.
A patch panel: worth it once you're past a handful of runs
Once you're running more than four or five cables back to your central closet from Lesson 4, terminating each one directly into your switch or router gets messy and hard to trace quickly. A patch panel gives every run a labeled, fixed termination point, with a short, easily replaceable patch cable connecting each panel port to your actual switch. It's a genuinely optional upgrade for a small structured wiring project, but it pays off immediately the first time you need to trace or move a single connection without disturbing everything else plugged in around it.
Fiber: when copper genuinely isn't enough
For the rare case of a run exceeding standard copper's practical distance limit, a large property, a detached structure well beyond a hundred meters away, or a future desire for multi-gigabit speeds over very long distances, fiber optic cable is immune to the electrical interference and distance limits that affect copper Ethernet entirely. It requires different termination equipment and skills than copper, generally a job worth hiring out unless you already have the specific tools, but if you know a long run is coming during a renovation, running empty conduit alongside your copper cable now means fiber can be pulled through later without reopening anything.
Permits and inspections: check before you start
Low-voltage data cabling itself is generally unregulated in most US jurisdictions, but if your wiring project is part of a larger renovation that also touches electrical circuits, new outlets, or structural changes, that broader project likely does require permits and inspection regardless of the data cabling running alongside it. Check with your local building department before work begins, not after, a failed inspection on unrelated electrical work can hold up your entire renovation timeline, including the low-voltage wiring you were excited to finish.
DIY versus hiring a low-voltage contractor: a realistic cost comparison
A DIY approach with rented or inexpensively purchased tools, cable, and a weekend of your own time is significantly cheaper in direct cost than hiring a contractor for the same scope, but it trades your own time and a real learning curve for that savings. Hiring a professional low-voltage contractor costs meaningfully more but delivers tested, certified runs, typically completed in a single day, with a warranty on the work itself. For a single cable run, DIY is usually the easy, obvious choice. For whole-house structured wiring during a renovation, the calculus shifts, many people find the contractor route worth the premium simply to keep the project moving alongside everything else a renovation demands of their attention.
Professional-grade certification testing
The basic continuity tester mentioned earlier confirms a cable is wired correctly, but a professional certification tester goes further, measuring actual signal quality, crosstalk, and length against the formal Cat6 specification, the kind of testing a contractor would provide as part of a paid job. For a DIY home project, basic continuity testing is genuinely sufficient, certification-grade testing matters more for commercial installations or anyone planning to resell a property with a documented, certified network as a selling point.
A wiring project scaled to a weekend
Not every reader is renovating. If you simply want to add two or three strategic Ethernet drops to an otherwise finished home without a full renovation underway, the fishing techniques covered earlier in this lesson, plus a rented fish tape and a Saturday afternoon, cover the vast majority of realistic home scenarios. Pick your top two or three locations from Lesson 2's placement priorities, tackle them one at a time, and treat anything beyond that as a nice-to-have for a future weekend rather than a requirement to finish all at once.
A shopping list for a single-cable weekend project
For the realistic single-run scenario most readers will actually tackle: a box of solid-core Cat6, two keystone jacks and matching wall plates, a punch-down tool, a basic continuity tester, a fish tape, and enough velcro ties and labels to finish the job cleanly. All of it together typically costs less than a single mid-range smart home device, genuinely accessible even for someone who's never run a cable before, and every tool on this list gets reused the next time you add a run.
When a cable run simply isn't realistic
Sometimes the honest answer, after actually assessing a specific wall or ceiling, is that fishing cable through it isn't realistic without opening drywall, a masonry wall, a floor with radiant heating underneath, or a ceiling with no accessible attic path above it. There's no shame in concluding that for a specific run, it simply means falling back to Lesson 5's wireless or powerline options for that one location rather than forcing a fix that isn't worth the risk of damaging a wall or a heating system you can't easily see inside of. Knowing when to stop and accept a wireless fallback is as much a part of doing this well as knowing how to fish a cable in the first place, and it's a genuinely reasonable, mature call to make rather than a concession.
Key takeaways
Run more cable, to more places, than seems necessary right now.
Use solid-core Cat6 or better for in-wall runs, never stranded patch cable.
Never mix low-voltage data cable with mains electrical wiring in the same run.
Test, label, and photograph every run before the wall closes.
With your cabling plan sorted (or deliberately skipped), Lesson 4 covers where to physically stage your equipment: a utility closet, an electrical panel, and a UPS that keeps a short outage from becoming a real problem.
