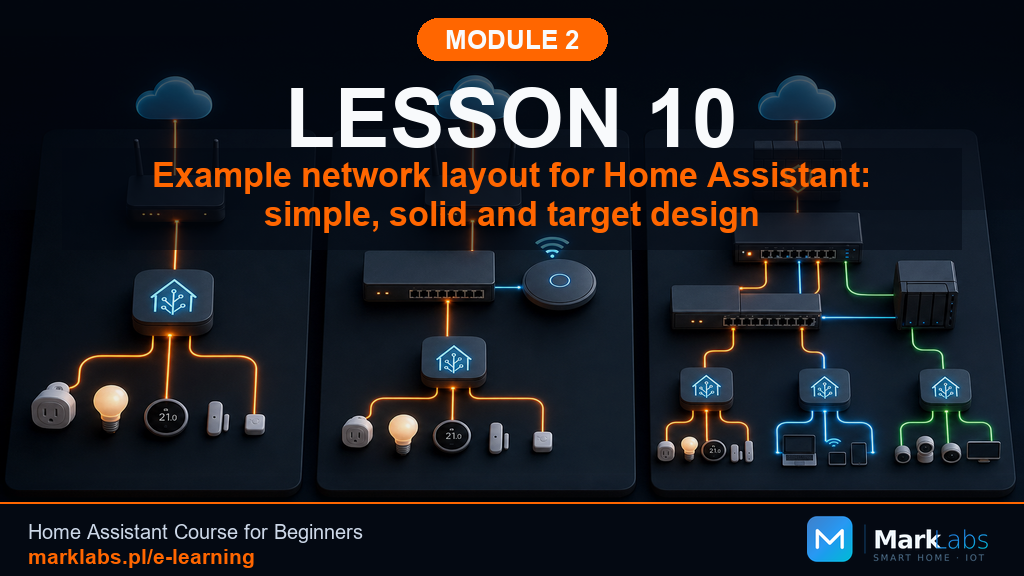
Three Example Network Layouts: Simple, Reasonable, and Full-Featured
Nine lessons of individual concepts can feel overwhelming when you're staring at your own house trying to decide what to actually do. This lesson collapses everything into three concrete layouts, pick the one that matches your ambition and budget, and move forward with confidence.
Why three layouts instead of one blueprint
Every household is different: an apartment and a three-story house have genuinely different needs, and forcing a one-size answer would either underserve the larger home or over-complicate the smaller one. These three layouts represent real, common configurations this course sees across its readers, use them as a starting point, not a rigid rulebook.
Layout 1: the simple start
Your existing router, unchanged. Home Assistant connected by Ethernet if a jack is nearby, otherwise strong, tested Wi-Fi. A DHCP reservation for Home Assistant's address. Guest network enabled. That's it, genuinely enough for a small apartment or a first Home Assistant install anywhere. Total new spending: often zero, beyond whatever the starter kit itself costs.
Layout 2: the reasonable home
A mesh Wi-Fi system or one additional wired access point for full-house coverage. One or two Ethernet runs to key spots (Home Assistant's location and a home office, say). A small UPS protecting the router and hub. DHCP reservations for all infrastructure. A second SSID for smart devices, genuinely isolated if the router supports it. This is the sweet spot for most single-family homes, real reliability and coverage without needing enterprise-grade equipment or a networking background.
Layout 3: the full-featured build
Structured Cat6 wiring throughout the house from Lesson 3. A managed switch and VLAN-capable access points. Real VLAN segmentation, trusted, IoT, cameras, guest. A proper equipment rack or cabinet with a sizable UPS. This is a genuine investment of both money and time, appropriate for a renovation, new construction, or someone who's already found the earlier layouts limiting in practice, not a default recommendation for a first-time install.
Side-by-side comparison
| Feature | Simple | Reasonable | Full-featured |
|---|---|---|---|
| New wiring | None | 1-2 runs | Full structured wiring |
| Wi-Fi coverage | Single router | Mesh or extra AP | Multiple managed APs |
| Segmentation | Guest network only | Second SSID | Full VLANs |
| UPS | Optional | Small unit | Rack-mounted, sized for the whole cabinet |
Not sure which one to pick?
Start with Layout 1, always. It's reversible, cheap, and gets you a working system fast. Every element of Layouts 2 and 3 can be added later without redoing what you already built, they're additive, not replacements. There is no penalty in this course for starting simple.
Where Home Assistant always lives
Regardless of which layout you choose, Home Assistant's core placement logic from Lesson 2 doesn't change: wired where possible, reserved IP address, ventilated, dry. That's true whether it's sitting on a closet shelf in Layout 1 or mounted in a rack in Layout 3.
Common mistakes at each layout level
In Layout 1: skipping the DHCP reservation because "it's just a small setup," and then chasing a mysterious connectivity issue three months later. In Layout 2: buying a mesh system before confirming the coverage problem wasn't just a placement issue. In Layout 3: attempting VLANs before testing basic wired connectivity thoroughly, stacking complexity on complexity instead of validating one layer at a time.
Not buying anything yet
Whichever layout you're aiming for, hold off on new networking hardware purchases beyond what Layout 1 needs (which is usually nothing) until after you've actually installed Home Assistant in Module 5 and confirmed exactly where the real pain points are. A mesh system solves a problem you can only diagnose accurately once the system is live.
How to confirm your layout is actually working
Walk your home checking signal strength everywhere you'll need it, confirm Home Assistant's reserved address is set and stable, and confirm you know exactly which devices are meant to reach which network segments if you've done any separation at all.
Your ISP's modem versus your own router
Many ISP-provided modem/router combo units offer limited configuration options, no DHCP reservations, no VLAN support, weak guest network controls. If you're finding your current equipment can't do what a lesson describes, putting the ISP unit into "bridge mode" (passing the internet connection straight through) and adding your own router behind it often unlocks everything this module has covered, without needing to cancel or replace your actual internet service.
What this looks like for your mini smart home
Pick your layout today, in writing, in your notebook. Even if it's simply "Layout 1, revisit after installation," having it written down gives you a clear default to fall back on when Module 5 arrives.
What it costs to move from Layout 1 to Layout 2
A basic mesh Wi-Fi kit, a small UPS, and a spool of cable for one or two DIY runs together typically land in a moderate range, comparable to a mid-tier device from Module 1's shopping list multiplied by two or three. That's a realistic, achievable upgrade budget, not a major renovation-scale expense.
The question people ask most: mesh Wi-Fi or a single powerful router?
For anything beyond a small apartment, mesh generally wins on real-world coverage and roaming behavior, even against a single expensive high-power router, because physical distance and walls matter more than raw router power. A single router can outperform a cheap mesh kit in a small, open space, but for most multi-room homes, a modest mesh system beats a single router of any price.
Three readers, three layouts, three genuinely happy outcomes
A one-bedroom apartment resident ran Layout 1 for over a year without a single network-related complaint, their existing ISP router, one DHCP reservation, and a starter kit of six devices, proof that simple genuinely is enough for plenty of real households, not just a beginner stepping stone. A family in a two-story single-family home upgraded to Layout 2 after their upstairs bedrooms kept losing connection to downstairs-based devices, a mesh kit and one Ethernet run to a home office solved it completely within a weekend. A hobbyist renovating a century-old house went straight to Layout 3 during an already-planned gut renovation, since the walls were open anyway and the marginal cost of doing it properly the first time was small compared to redoing it later. All three are success stories, measured by whether the network served the household, not by how advanced it looked on paper.
A realistic timeline for each layout
Layout 1 is genuinely an afternoon project, most of it spent finding your router's admin page for the first time rather than doing anything technically demanding. Layout 2 is realistically a weekend: unboxing and pairing a mesh kit, running one or two cables if you're comfortable with basic DIY work, and setting up a UPS and a second SSID. Layout 3 is a multi-week project even when hired out to professionals, and can stretch to months if it's folded into a larger renovation timeline with its own dependencies and scheduling. Knowing this upfront helps you set expectations with yourself, and with anyone else in the household who'll be asking when the internet will "finally be done."
Caught between two layouts? Default to the simpler one
If you're genuinely torn between Layout 1 and Layout 2, or Layout 2 and Layout 3, the tie-breaker is simple: pick the simpler one. Every element of a more advanced layout remains available to add later, with no wasted effort from having started simpler, while the reverse isn't true, over-building for a problem you don't actually have yet costs real money and real time that could have waited until you'd confirmed you needed it. This entire module has been building toward that same principle from Lesson 1 onward: solve the problem you actually have, not the one that sounds more impressive.
Write your choice down, then move on
One last practical step before this module wraps up: add a short "Network Layout" entry to your notebook alongside your other Module 2 notes, just the layout number, today's date, and one sentence on why. It sounds almost too simple to matter, but it turns an abstract decision into a concrete, dated reference point you can return to later, especially useful if you revisit this choice after living with your smart home for a few months and finding your actual needs turned out a little different from what you expected on paper.
Revisiting your layout choice later is normal, not a failure
Plenty of households genuinely outgrow Layout 1 within their first year, not because they chose wrong initially, but because a smart home's real needs only become fully clear once it's actually running day to day. Treating your first layout choice as a hypothesis to test rather than a permanent commitment removes a surprising amount of decision pressure from this lesson, you're not locking in a final answer today, you're picking a sensible starting point to learn from.
A quick gut check for each layout
If a single sentence describes your household best, use it as a shortcut: "I just want it working" points to Layout 1. "I want it working well everywhere in my home" points to Layout 2. "I want the strongest possible foundation and I'm already renovating or building" points to Layout 3. None of these sentences is more admirable than the others, they simply describe different, equally legitimate relationships with a smart home project.
One more thing worth saying plainly
None of these three layouts is the "correct" one this course secretly wants you to reach, there's no hidden expectation that everyone eventually graduates to Layout 3. Plenty of genuinely happy, genuinely reliable Home Assistant households run Layout 1 for years without ever feeling a need to change it. The right layout is whichever one quietly does its job well enough that you stop thinking about your network at all and start thinking about what to automate next, which, after all, is the actual point of everything this module, and this entire course, has been quietly building toward since the very first lesson back in Module 1.
A final sanity check before closing this lesson
Before moving on to Lesson 11, confirm you've picked a layout in writing, confirmed your chosen spot has the Wi-Fi or Ethernet access it needs, and that you're not still second-guessing the decision. If you are still unsure, that's a sign to reread this lesson's comparison table once more rather than pushing forward on a choice you don't actually feel settled on yet.
Key takeaways
Start with Layout 1, it's cheap, reversible, and enough for most first installs.
Every element of the more advanced layouts is additive, nothing needs redoing.
Diagnose real pain points after installation before buying upgrade hardware.
Bridge mode unlocks features a limited ISP router can't otherwise offer.
With a layout picked, Lesson 11 prepares you for the inevitable: the most common network problems you'll actually run into, and a clear diagnostic path for each one.
