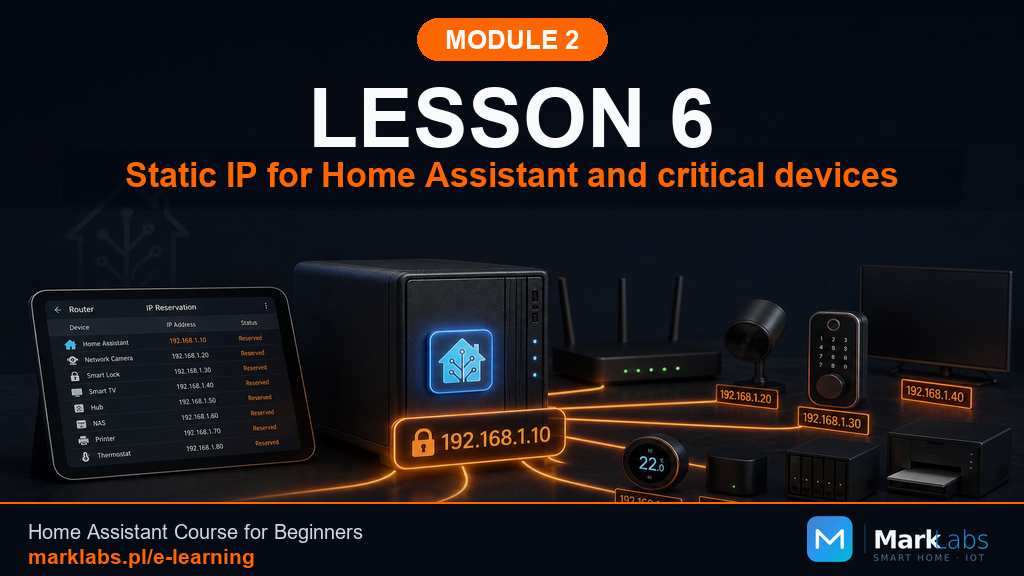
A Fixed Address for Home Assistant and Your Key Devices
DHCP is convenient until the one day your router hands Home Assistant a different address than it had yesterday, and every bookmark, every automation reference, and every dashboard link quietly stops working. This lesson fixes that permanently.
Why Home Assistant needs a fixed address
A DHCP-assigned address usually stays the same for weeks or months, but it's never guaranteed. A router reboot, a firmware update, or simply enough time passing can cause it to reassign addresses. For a phone, that's invisible and harmless. For a server that other devices, apps, and automations reference by address, a sudden change breaks connectivity until you figure out what happened and update every reference. Locking it down once, carefully, removes this entire category of problem forever, permanently, with no ongoing effort required afterward.
DHCP reservation versus a static address
Two ways to achieve the same result. A DHCP reservation tells your router "always give this specific MAC address the same IP," managed centrally on the router, and the device itself doesn't need any configuration change. A static address is configured directly on the device itself, telling it to ignore DHCP entirely and always use one fixed address. For most households, a DHCP reservation is the better choice: it's managed in one place, easier to document, and doesn't risk two devices accidentally claiming the same address through a typo.
Finding a device's MAC address
Your router's connected-devices list typically shows both the IP and MAC address for everything currently online. It's a twelve-character string of letters and numbers separated by colons, unique to that specific piece of hardware. This is the identifier your DHCP reservation will be built around.
Finding your device in a long list
A household with a dozen devices can make a router's connected-device list genuinely confusing. Some routers display a manufacturer-derived device name automatically, useful but not always accurate. The most reliable method: temporarily disconnect everything except the device you're trying to identify, note what disappears from the list, then reconnect everything else. It's a five-minute process that eliminates all guesswork.
Not showing up on the list at all?
Confirm the device is actually powered on and connected to Wi-Fi or Ethernet, confirm it's on your main network rather than a guest network, and give it a minute after boot, some devices take a moment to fully register on the network after power-up.
Plan your addresses before setting anything
Before reserving addresses, decide on a small, memorable range for reserved devices, for example, addresses ending in .10 through .30 reserved for infrastructure (router, Home Assistant, Zigbee coordinator, any access points), leaving the rest of the range for DHCP to assign normally to phones and laptops. This kind of light structure makes your network self-documenting: anyone glancing at your device list can immediately tell which addresses are meant to be permanent.
What not to reserve an address for
Not every device needs this treatment. Phones, laptops, and guest devices don't benefit from a fixed address, they're not servers other things depend on, and the extra bookkeeping isn't worth it. Reserve addresses for infrastructure: your hub, your coordinator, your access points, a NAS, maybe a smart TV you frequently cast to. Everything else, every phone, laptop, and passing guest device, can keep its normal, automatically-assigned address without any issue whatsoever.
Setting a reservation in your router
Every router's admin interface is slightly different, but the general path is consistent: find the DHCP or LAN settings section, look for "reservations," "static leases," or "address reservation," then add an entry pairing the device's MAC address with your chosen IP address. Save the change, and it usually applies the next time that device renews its lease, sometimes requiring a quick reboot of the device itself to pick the new address up immediately rather than waiting.
What not to do
Don't reserve an address that overlaps with your router's own DHCP pool range without adjusting that range first, this can cause two devices to be assigned the same address, a genuinely confusing conflict to diagnose. Don't set a static address directly on Home Assistant's operating system unless you have a specific reason to, a router-side reservation is simpler to manage and easier to change later if needed.
How to confirm your plan is actually ready
You're ready for Module 5's install once you know exactly which IP address you intend to reserve for Home Assistant, you've confirmed that address doesn't already conflict with your router's active DHCP pool, and you've written the address down somewhere you'll actually remember to check.
What this looks like for your mini smart home
Decide now, in advance, on the specific IP address Home Assistant will use once installed, and reserve it in your router today, even though the hardware itself isn't physically running yet. That reservation will simply sit there waiting, ready, the moment you power everything on in Module 5.
A common mistake: an address conflict after a manual change
A frequent troubleshooting scenario: someone manually sets a static address on a device without checking whether their router's DHCP pool already includes that exact address. Weeks later, a new phone joins the network, gets assigned that same address by DHCP (which has no idea it's "taken"), and both devices start behaving erratically as they intermittently fight over the same address. The fix is prevention: keep your reserved range clearly separate from your DHCP pool from the start.
Write it down before you forget
Add a short table to your notebook: device name, MAC address, reserved IP address. Three columns, one row per reserved device. It takes two minutes now and saves real frustration the day you need to remember exactly what you set up months ago.
Reservation versus port forwarding: two different things
It's worth being precise about a distinction that trips up a lot of beginners once they reach Module 7's remote access lesson: a DHCP reservation only guarantees a device's address stays consistent inside your local network, it does nothing on its own to make that device reachable from outside your house. Port forwarding, a separate router feature covered later, is what opens a specific door from the internet through to a specific internal address and port. You genuinely need the reservation covered in this lesson first, since port forwarding rules reference a fixed internal address, but reserving an address alone doesn't expose anything to the outside world by itself.
Reservations survive router reboots, but confirm it anyway
A properly configured DHCP reservation is stored in your router's persistent configuration and survives a normal reboot without issue. The one scenario where reservations can quietly disappear: a full factory reset of the router, or in rare cases, a firmware update that resets certain settings back to defaults. After any major router change, a quick check that your key reservations, especially Home Assistant's, are still in place takes thirty seconds and prevents a confusing "why did the address change" moment down the line.
Mesh systems and reservations: check where the setting actually lives
In a mesh Wi-Fi setup, DHCP is typically managed centrally by the primary unit, not by each individual mesh node, but this varies by manufacturer and it's worth confirming in your specific system's app or admin interface rather than assuming. Some consumer mesh systems, particularly ones designed for maximum simplicity, offer more limited reservation controls than a traditional standalone router, if yours is one of them, and Lesson 10's Layout 3 or advanced setups matter to you, running your own separate router in front of the mesh system (with the mesh units in access-point-only mode) can restore full DHCP control.
Which of your existing devices are worth reserving today
Even before Home Assistant exists, you likely already own a few devices worth reserving now rather than later: any existing network-attached storage, a smart TV you frequently cast to, a printer you access by address rather than name, and your router's own management interface address, which is typically fixed already but worth confirming. Getting into the reservation habit with devices you already own makes the process feel routine by the time Home Assistant itself needs the same treatment in Module 5.
A real story: the address that changed at 2 a.m.
A reader once spent an entire weekend convinced their brand-new Home Assistant install was fundamentally broken: dashboards intermittently failed to load, the Companion App kept losing connection, automations referencing specific device addresses stopped firing entirely. The actual cause, discovered only after posting detailed logs to the community forum, was a router that quietly reassigned addresses every few days during a routine 2 a.m. maintenance window, exactly the scenario this lesson exists to prevent. A five-minute reservation, set up after the fact, ended weeks of confusing, intermittent failures that had nothing to do with Home Assistant's own software at all.
A five-minute exercise before Module 5
Open your router's admin page right now and locate the DHCP reservations or static leases section, even if you don't add anything yet. Familiarity with exactly where this setting lives, before you're rushing to get Home Assistant online during Module 5's install day, removes one more small friction point from an already exciting, slightly nerve-wracking afternoon.
A note on dynamic DNS versus a local reservation
It's worth distinguishing this lesson's local DHCP reservation from dynamic DNS (DDNS), a different tool covered in Module 7 that solves a related but separate problem: keeping a memorable name pointed at your home's public internet address, which your ISP may change periodically. Both exist to fight the same underlying instability, addresses that aren't guaranteed to stay fixed, one operates inside your home network, the other operates on the internet-facing side. You'll want both eventually if you plan on remote access, but only this lesson's local reservation is relevant right now.
Naming devices clearly in your router's interface
Most routers let you assign a custom, human-readable name to each device in their connected-device list, separate from whatever generic manufacturer name it reports automatically. Taking a moment to rename entries as "Home Assistant Hub" or "Living Room Access Point" instead of leaving a string of letters and numbers pays off every single time you glance at that list in the future, turning what would otherwise be a guessing game into an instant, obvious answer.
A worked example, start to finish
Putting the whole process together: open your router's connected-devices page, find the entry for a device you want to reserve, note its MAC address, navigate to the DHCP reservations section, enter that MAC address alongside your chosen IP address (say, 192.168.1.20 for Home Assistant, following the addressing scheme from Lesson 5), save the change, then reboot that specific device once to confirm it picks up the reserved address immediately rather than waiting for its current lease to expire naturally. Five straightforward steps, roughly five minutes of actual hands-on work, and one less thing that can quietly break later without any obvious warning sign to tip you off.
Confirming a reservation actually took effect
After setting a reservation and rebooting the device, don't just assume it worked, verify it. Check the device's own network settings screen (or your router's connected-device list again, whichever is more convenient) and confirm the IP address shown matches exactly what you reserved. This thirty-second verification step catches typos in the MAC address, an easy, common mistake to make when copying a long twelve-character hexadecimal string by hand, before you've built anything, automations included, on top of an incorrect assumption that quietly undermines all of it.
If a reservation seems to "not work"
The most common cause of a reservation that doesn't seem to take effect is simply timing, the device hasn't renewed its current lease yet and won't pick up the new reserved address until it does, which can take anywhere from minutes to the full lease period depending on your router. A manual reboot of the device forces an immediate renewal in nearly every case, and is the first thing worth trying before assuming the reservation itself was entered incorrectly.
The second most common cause: a typo in the MAC address, a single wrong character out of twelve means the reservation simply never matches the actual device, and the device quietly keeps getting a normal, unreserved lease instead, behaving exactly as if the reservation had never been created at all. Double-checking the MAC address character by character against what your router's device list shows resolves this category of problem in seconds once you know to look for it.
Copy-pasting instead of retyping
Wherever your router's interface allows it, copy the MAC address directly from the connected-devices list rather than retyping it by hand into the reservation form. It's a small habit, but it eliminates an entire category of the transcription errors that cause reservations to silently fail, and it takes no extra time compared to typing it out manually.
Key takeaways
A DHCP reservation, managed on the router, beats a static address set on the device itself.
Only reserve addresses for infrastructure, not for every phone and laptop in the house.
Keep your reserved range separate from your DHCP pool to avoid address conflicts.
Reserve Home Assistant's address today, before it's even installed.
With addressing locked down, Lesson 7 turns to Wi-Fi itself: bands, channels, mesh systems, and roaming, the wireless side of the foundation this entire module has been building.
