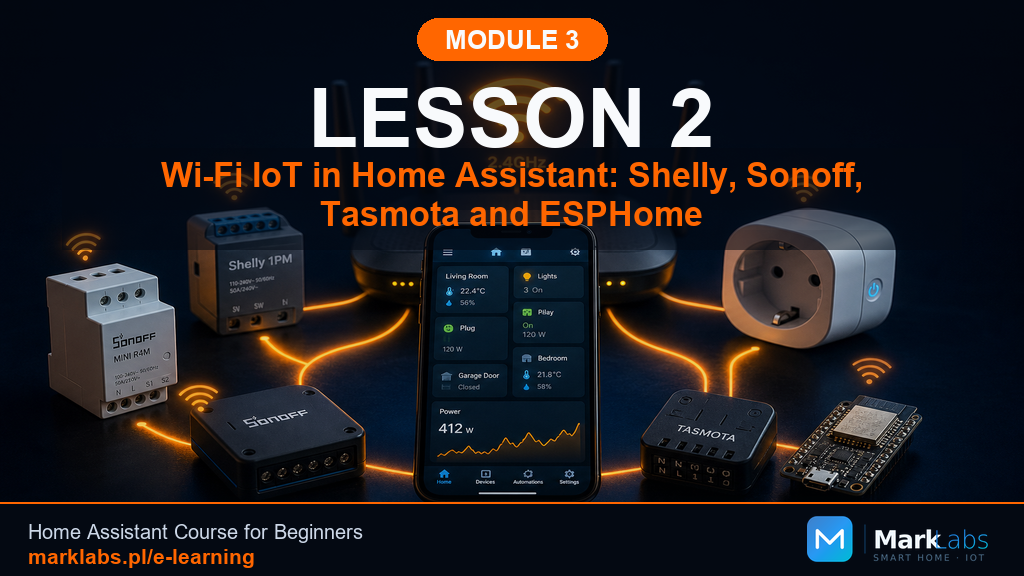
WiFi IoT in Home Assistant: Shelly, Sonoff, Tasmota, and ESPHome
WiFi-connected devices are everywhere, cheap, easy to find at any big-box store, and often the first smart home gadget anyone ever buys. This lesson, deliberately the longest and most detailed lesson in this entire module, covers how to get genuinely real, lasting value out of them without ever handing control of your home over to a manufacturer's cloud server you don't personally control.
What a manufacturer's cloud actually is, and why it matters
Most inexpensive WiFi smart plugs, bulbs, and switches you'll find at a mainstream US or UK retailer don't talk directly to your phone app at all, instead, they connect to your WiFi, phone home to a server run by the manufacturer somewhere on the internet, and your app talks to that same server, which then relays commands back down to the device. This round trip works fine day to day, right up until the manufacturer's servers go down, the company gets acquired or shuts down, or they decide to sunset an older product line, at which point a perfectly functional physical device can become a genuinely useless brick overnight, through no fault of the hardware itself. This isn't a hypothetical, it has happened repeatedly across the smart home industry over the past decade, and it's precisely the failure mode this entire course has been building toward avoiding from Module 1 onward.
The real advantages and disadvantages of WiFi IoT devices
WiFi devices genuinely win on upfront price, often costing a fraction of a comparable Z-Wave or Zigbee equivalent, and they need no separate radio hub or dongle since your existing router already provides the network they connect to, a real advantage for anyone not yet committed to another protocol's infrastructure. Against that, every WiFi device you add consumes a real IP address and a real slice of your router's connection table, and a home with fifty or more WiFi smart devices can genuinely strain a budget consumer router in ways a mesh protocol like Zigbee or Z-Wave simply doesn't, since those protocols form their own separate radio network entirely apart from your household WiFi. WiFi devices also tend to draw meaningfully more standby power than their low-power mesh counterparts, individually negligible, but worth knowing if you're planning dozens of them throughout a large home.
Shelly: the gold standard for local WiFi integration
Shelly, a European manufacturer with strong distribution across the US and UK through Amazon and its own online store, builds WiFi relays, dimmers, and sensors with a genuinely local HTTP and MQTT API built in from the factory, meaning Home Assistant can talk to a Shelly device directly over your local network with no manufacturer cloud involved at all, unless you specifically choose to enable cloud features. Their Gen2 and later product line integrates with Home Assistant natively with essentially zero configuration beyond entering your WiFi credentials during first setup, and their compact form factor, small enough to fit behind an existing wall switch in many cases, makes them a favorite for retrofitting an existing home without visible new hardware. If you buy exactly one brand of WiFi device for this course's starter kit, Shelly is the single safest, most Home-Assistant-friendly recommendation in this entire lesson.
Sonoff and eWeLink: cloud that can be replaced
Sonoff, sold widely through Amazon in both the US and UK, ships most of its devices configured by default to work through its eWeLink cloud app, genuinely convenient out of the box but exactly the cloud dependency this lesson has been warning about. The real appeal of Sonoff for a Home Assistant household is that most of its devices are built around the same ESP8266 or ESP32 chip family that the open-source Tasmota and ESPHome projects, covered later in this lesson, know how to flash directly, replacing the factory firmware entirely with something that talks to Home Assistant locally and never touches eWeLink's servers again. This makes Sonoff hardware genuinely cheap infrastructure for a local-first setup, provided you're comfortable with the flashing process covered further down this lesson, or willing to buy pre-flashed units from specialty sellers who do that work for you at a modest markup.
Budget WiFi brands worth knowing in the US and UK
Meross, Kasa by TP-Link, Wyze, and Gosund are all common budget WiFi brands stocked heavily by Amazon, Walmart, and Best Buy in the US, and by Amazon UK and Argos in the UK, each offering plugs, bulbs, and switches at genuinely low prices. Local Home Assistant integration quality varies meaningfully between them: Kasa devices have a well-maintained official integration with solid local control for many models, Meross similarly integrates reasonably well through a community integration, while Wyze remains one of the more cloud-dependent options in this list with weaker native local support, worth checking current Home Assistant compatibility notes before buying in bulk. Treat all of these as genuinely useful budget options for less critical devices, decorative lighting or a garage door sensor, while reserving Shelly or a flashed Sonoff device for anything you'd be genuinely upset to lose control over.
Tasmota: freedom for ESP-based devices
Tasmota is a free, open-source alternative firmware that replaces the factory software on a huge range of ESP8266 and ESP32-based WiFi devices, turning a cloud-dependent gadget into one that talks locally over MQTT or a simple web interface, entirely under your control from the moment it's flashed. It supports an enormous device compatibility list, maintained by a large, active community, and its configuration is done almost entirely through a web-based console rather than requiring you to write and compile firmware code yourself, genuinely approachable for a motivated beginner willing to follow a documented flashing guide. Once flashed, a Tasmota device integrates into Home Assistant cleanly through MQTT auto-discovery, showing up automatically with sensible default entities the moment it connects, without any manual YAML configuration required on the Home Assistant side.
ESPHome: your own devices without writing code
ESPHome, a project maintained directly by the Home Assistant team itself, takes a different approach from Tasmota: rather than a general-purpose alternative firmware, it's a system for generating custom firmware from a simple YAML configuration file describing exactly what sensors, switches, and behaviors you want a given ESP-based device to have. The result integrates with Home Assistant more tightly than almost anything else covered in this module, ESPHome devices appear natively with no separate MQTT broker required, and updates can be pushed wirelessly straight from Home Assistant's own interface once a device is set up. ESPHome genuinely shines for DIY projects, a custom sensor built from a cheap ESP32 board and a few components from an electronics supplier, but it also has a large library of ready-made configurations for popular off-the-shelf devices, worth checking before assuming you need to write a configuration entirely from scratch.
Tuya: when to use it, when to avoid it
Tuya is not a single brand but a manufacturing platform, an enormous number of generic, often unbranded or store-branded WiFi devices sold across US and UK marketplaces are actually built on Tuya's underlying hardware and cloud infrastructure, regardless of what name appears on the box. Home Assistant has a Local Tuya community integration that can pull many of these devices onto local control by extracting device-specific encryption keys, a genuinely useful workaround but one that involves a more fiddly, occasionally frustrating setup process than Shelly's out-of-the-box local API. If a bargain WiFi device's app icon or setup flow looks unfamiliar and generic, it's worth searching whether it's Tuya-based before buying, that single fact determines how much real local-control work you're signing up for.
Security considerations specific to WiFi IoT devices
Cheap WiFi IoT devices have a genuinely mixed security track record industry-wide, some manufacturers patch vulnerabilities promptly, others abandon older product lines with known issues still unresolved, worth researching a specific device's history before trusting it with anything sensitive like a door lock or garage door opener. This is precisely why Module 8's dedicated network segmentation guidance matters so much for this device category specifically, placing WiFi IoT devices on their own isolated network segment, following the VLAN guidance from Module 2, limits the damage a single compromised device could do to the rest of your home network, even in a worst-case scenario. Flashing a device to Tasmota or ESPHome, beyond the local-control benefit already covered, also has the side effect of removing whatever factory firmware vulnerabilities might have existed, since you're replacing the entire software stack with something open-source and auditable.
Which protocol for which: WiFi, Zigbee, or Z-Wave
WiFi genuinely makes sense for devices that need real bandwidth, a video doorbell or security camera streaming footage, where Zigbee and Z-Wave's low-bandwidth mesh radios simply can't keep up. It also makes sense for one-off devices in a home with few enough total smart devices that router capacity isn't a concern, or for households not yet ready to invest in a separate mesh protocol's controller hardware. Zigbee and Z-Wave, by contrast, tend to win for large batches of simple sensors and switches, where their mesh networking, lower individual power draw, and independence from your household WiFi capacity become real, compounding advantages as your device count grows into the dozens. Lesson 6 builds this comparison out into a complete decision map covering every protocol in this module.
Flashing devices safely: a general overview
Flashing alternative firmware onto a WiFi device generally happens one of two ways: over-the-air, using a tool like tuya-convert that exploits a specific vulnerability in the factory firmware's update mechanism to push new firmware wirelessly with no disassembly needed, or via a physical serial connection to the device's internal circuit board, required for devices where the over-the-air method doesn't apply or has since been patched by the manufacturer. The physical method requires opening the device's case, identifying its programming header, and connecting a small USB-to-serial adapter, genuinely approachable with a good written guide and a bit of patience, but not something to attempt on a device you can't afford to potentially damage on a first try. Always research the specific flashing method for your exact device model before starting, generic advice varies meaningfully between models even within the same brand.
Local API versus cloud API: a technical explainer
A device with a genuine local API, Shelly's default behavior or any Tasmota or ESPHome flashed device, responds to commands sent directly from Home Assistant over your local network, typically in well under a second, and keeps working even if your internet connection goes down entirely. A cloud-API-only device, like most factory-configured Sonoff or budget Tuya devices, requires Home Assistant to send a command out to the manufacturer's server on the internet, which then relays it back down to the device, adding real latency and, more importantly, making the device completely unusable the moment your internet connection drops, precisely the fragility this entire course has worked to help you avoid. Checking whether a specific device offers local API support, easily searchable through the Home Assistant community's integration documentation, is worth doing before every WiFi device purchase from this point forward.
Network segmentation for WiFi IoT devices
Module 2 introduced the idea of a separate VLAN for smart devices, and WiFi IoT is precisely the category that benefits most from following through on it, since these devices sit directly on your household network rather than a separate mesh radio the way Zigbee and Z-Wave devices do. A dedicated IoT VLAN, with router-level rules preventing those devices from initiating connections to your everyday computers and phones, contains the damage from a compromised or poorly secured device to a small, isolated corner of your network rather than your entire household. This is genuinely more setup work than plugging a device straight into your main WiFi, but for a home planning more than a handful of WiFi IoT devices, it's one of the highest-value security investments covered anywhere in this course.
Common problems and how to solve them
A device that keeps dropping off your network is often a WiFi signal strength issue rather than a device fault, particularly for devices installed inside a metal electrical box or behind thick walls, worth checking signal strength through your router's admin panel before assuming the device itself is defective. A device that connects fine but never appears in Home Assistant usually means either the wrong integration was selected, or, for MQTT-based devices like Tasmota, that your MQTT broker add-on isn't running or isn't properly connected, worth checking Settings, Add-ons, and confirming Mosquitto broker shows as started. And a device that worked fine for months before suddenly losing local control, particularly a Tuya-based device, sometimes indicates the manufacturer pushed a firmware update that revoked local API access, a frustrating but real possibility worth knowing about before you spend an evening troubleshooting a hardware fault that isn't actually there.
A real story: replacing a cloud dependency after the fact
One reader had already installed a dozen budget WiFi smart plugs from a generic Tuya-based brand before starting this course, all working through the manufacturer's cloud app with no Home Assistant integration at all. Rather than replacing the hardware outright, they used the Local Tuya integration to pull each device onto local control one at a time over a single weekend, extracting each device's local key through the documented process and testing it in Home Assistant before moving to the next. By Sunday evening, all twelve plugs responded locally with no cloud round trip at all, a genuinely satisfying result that cost nothing beyond a weekend's worth of patient, methodical work, exactly the kind of retrofit this lesson wants you to feel confident attempting on your own existing devices.
Firmware updates: a genuinely different picture from Z-Wave
WiFi devices update over your regular network at ordinary broadband speeds, dramatically faster than the deliberately slow, low-power radio updates Lesson 1 described for Z-Wave, a genuine convenience of this protocol category. For factory-firmware devices, updates arrive through the manufacturer's app and are entirely out of your control, sometimes improving a device and sometimes quietly removing a feature or local API access you were relying on. For Tasmota and ESPHome devices, you control the update timing and content entirely, ESPHome in particular makes it trivial to push your own configuration changes wirelessly whenever you want, a real advantage for anyone actively tinkering with their setup over time.
Recommended starter devices for this course's kit
A single Shelly Plus or Gen2 relay behind an existing wall switch is a genuinely excellent first WiFi IoT purchase for this course, local API, no flashing required, and a real, immediate demonstration of what local-first smart home control actually feels like day to day. Pair it with one or two budget Kasa or Meross plugs for lower-stakes devices like a lamp or decorative lighting, where the occasional cloud dependency matters less. Hold off on cameras and video doorbells specifically until Module 8's security-focused coverage, that category deserves more careful, deliberate treatment than a general WiFi IoT overview can responsibly give it.
What this looks like for your mini smart home
For this course's starter kit, one or two Shelly devices alongside a couple of budget WiFi plugs for less critical devices strikes a genuinely reasonable balance between cost, convenience, and the local-first philosophy this course has emphasized since Module 1. As your confidence and device count grow, revisit the flashing techniques covered in this lesson for any existing cloud-dependent devices you'd rather bring onto local control, a genuinely satisfying weekend project once you're comfortable with the basics.
MQTT: the glue behind much of this ecosystem
MQTT, a lightweight publish-subscribe messaging protocol originally designed for low-bandwidth industrial sensors, has become the de facto standard glue connecting Tasmota devices, ESPHome devices, and countless other DIY and open-source smart home projects to Home Assistant. Installing the Mosquitto broker add-on through Home Assistant's Supervisor gives your network a central MQTT hub, devices publish their state to specific topics, and Home Assistant subscribes to those topics to receive updates, all happening entirely on your local network with no cloud server anywhere in the loop. You don't need to understand MQTT deeply to benefit from it, most integrations handle the topic structure automatically through auto-discovery, but knowing it exists helps make sense of why so many open-source smart home projects mention it by name.
WiFi IoT sensors: temperature, humidity, and beyond
Beyond switches and plugs, a wide range of WiFi-connected environmental sensors, temperature and humidity monitors, air quality sensors, and soil moisture probes for garden automation, are available from the same brands covered earlier in this lesson, and the same local-versus-cloud considerations apply equally to this category. Battery-powered WiFi sensors tend to have noticeably shorter battery life than their Zigbee or Z-Wave counterparts, since WiFi's radio protocol is fundamentally less power-efficient for the brief, infrequent transmissions these sensors typically make, worth factoring in if a sensor's placement makes battery changes genuinely inconvenient, like high on an exterior wall or deep in a garden bed.
Smart plugs specifically: a closer look
The humble smart plug is very often a household's first-ever smart home purchase, and it remains one of the best entry points into this course's whole philosophy: cheap enough to experiment with risk-free, immediately useful for a lamp or a holiday decoration, and a genuinely good test case for practicing the local-versus-cloud evaluation this lesson has walked through repeatedly. Many smart plugs, including several Shelly and Kasa models, also include real-time power monitoring, letting you see exactly how much a given appliance draws, a small taste of the energy-monitoring capabilities covered in much greater depth later in this course.
Choosing between in-wall and plug-in form factors
An in-wall WiFi relay, like Shelly's compact modules designed to sit behind an existing switch, keeps your home looking completely unchanged from the outside, a genuine advantage for anyone renting or simply not wanting visible smart home hardware cluttering up outlets and switch plates. A plug-in device, by contrast, requires zero electrical work, works with any existing lamp or appliance, and can be moved between rooms or taken with you if you move, a meaningfully different tradeoff depending on whether you own or rent, and how comfortable you are working inside an electrical box. Neither is universally better, match the form factor to your specific situation rather than defaulting to whichever one you saw first in a store aisle.
The 2.4GHz-only limitation many budget devices share
Most budget WiFi IoT devices, regardless of brand, only support the 2.4GHz WiFi band, not the faster 5GHz band your router likely also broadcasts, a detail that trips up a surprising number of first-time buyers who assume any WiFi device works on any WiFi network. If your router broadcasts a single combined network name for both bands, this usually isn't a problem, the router picks the right band automatically, but if you've split them into separate named networks for other reasons, make sure you're connecting new IoT devices specifically to the 2.4GHz one, or the device simply won't find your network during setup at all.
A note on router capacity as your device count grows
A typical consumer router handles somewhere between fifty and a couple hundred simultaneous WiFi clients depending on its hardware, comfortable for most households even with a healthy collection of WiFi IoT devices, but worth monitoring if you're planning a large-scale retrofit with dozens of individual smart plugs and switches throughout a bigger home. Signs your router is genuinely struggling include devices randomly dropping offline, slower response times across your whole network, and, in severe cases, the router itself needing frequent restarts, if you notice these symptoms as your device count grows, it's a real signal to consider a more capable router or access point, or to migrate some of that device count over to Zigbee or Z-Wave instead, which don't compete for the same WiFi client slots at all.
Reading a product listing like a Home Assistant user
Before buying any WiFi IoT device from this point forward, search "[device name] Home Assistant" and check the results for two things specifically: whether an official or well-maintained community integration exists, and whether the community consensus mentions local API support or ongoing cloud dependency. A listing's own marketing copy will rarely mention any of this, manufacturers have little incentive to advertise that their product requires their own servers to function, so this quick search habit is genuinely the most reliable filter available to a smart home shopper trying to avoid an eventual regret purchase.
A brief word on WiFi mesh systems and IoT devices
If your home uses a mesh WiFi system, covered in Module 2's networking fundamentals, most modern mesh systems handle WiFi IoT devices without issue, though a few older or budget mesh systems have had documented compatibility quirks with certain smart plug brands during initial pairing, usually resolved by temporarily disabling any WiFi band-steering or client-isolation features during the device's first setup, then re-enabling them afterward. If a new WiFi device consistently fails to complete setup on a mesh network, that specific combination is worth a quick search, this is a well-documented category of minor friction with a generally well-documented set of fixes.
Home Assistant's local push versus polling
Devices with a genuine local API generally fall into two categories: those that push state changes to Home Assistant the instant something happens, and those Home Assistant has to periodically poll, checking in every so often to ask "what's your current state?" Shelly's local API and MQTT-based devices like Tasmota and ESPHome both use the push model, giving near-instant updates in your dashboard and automations the moment a physical switch is flipped. Polled devices introduce a small, sometimes noticeable delay between a real-world change and Home Assistant reflecting it, worth knowing if you're building an automation that depends on split-second timing, since a push-based device will always feel more responsive in that specific scenario.
Building your own devices: a brief glimpse ahead
ESPHome's real power goes beyond replacing existing commercial devices, a later dedicated module in this course walks through building entirely custom sensors and controllers from cheap, widely available components, a garden irrigation controller, a custom multi-sensor combining temperature, humidity, and motion in one enclosure, or a simple relay board wired directly into existing home wiring. This lesson's coverage of ESPHome is intentionally just an introduction, enough to understand what it is and why it matters for the devices you're buying today, the dedicated module ahead will take you considerably further into actually designing and building your own hardware from scratch.
A quick glossary for this lesson's terms
Local API: a device's ability to be controlled directly over your home network without an internet round trip. MQTT: a lightweight local messaging protocol many open-source devices use to talk to Home Assistant. Flashing: replacing a device's factory firmware with alternative, usually open-source, software. Auto-discovery: Home Assistant automatically recognizing and configuring a device the moment it appears on your network or MQTT broker, with no manual setup required. Keep this short glossary in mind as later modules reference these same terms in the context of specific device categories.
Warranty and returns on WiFi IoT devices
A meaningful practical consideration worth naming directly and clearly up front: flashing a device with alternative firmware like Tasmota or ESPHome almost always voids whatever manufacturer warranty it originally carried, a fair trade for most readers of this particular course given the real local-control benefits involved, but genuinely worth knowing about before you flash a device you might otherwise still want to return. Buy devices you're planning to flash slightly outside your standard return window mentally, confirm they work correctly on factory firmware first, then flash only once you're genuinely confident the hardware itself isn't defective in some other way, rather than risking a frustrating return dispute later over a device you've already modified and can no longer send back in its original, unmodified condition.
Why this lesson ran longer than most
WiFi IoT is genuinely the most fragmented, brand-diverse category covered anywhere in this module, unlike Z-Wave's tight certification standard or Matter's unified specification covered in the next lesson, WiFi IoT spans dozens of manufacturers each making their own choices about cloud dependency, local API support, and firmware openness. That fragmentation is exactly why this lesson leaned so heavily on general, durable evaluation principles instead, checking for local API support, researching current Home Assistant compatibility before buying anything, understanding your flashing options, rather than a fixed list of approved devices and brand names that would be outdated within months of this course's original publication date anyway. Carry those same evaluation habits forward into every single future WiFi device purchase you ever make, they'll genuinely serve you far longer, across many more purchases and many more years of this hobby, than any single specific brand recommendation from this lesson ever really could stand on its own.
Key takeaways
A manufacturer's cloud dependency is the single biggest risk with cheap WiFi IoT devices.
Shelly offers genuine local API support out of the box, no flashing required.
Tasmota and ESPHome let you replace factory firmware entirely for genuine local-first control.
Segment WiFi IoT devices onto their own network VLAN whenever your device count grows.
Lesson 3 covers Matter and Thread, the newest entrants in this space, and what they genuinely do change, and honestly still don't yet fully change, about the much wider overall smart home protocol landscape as a whole.
