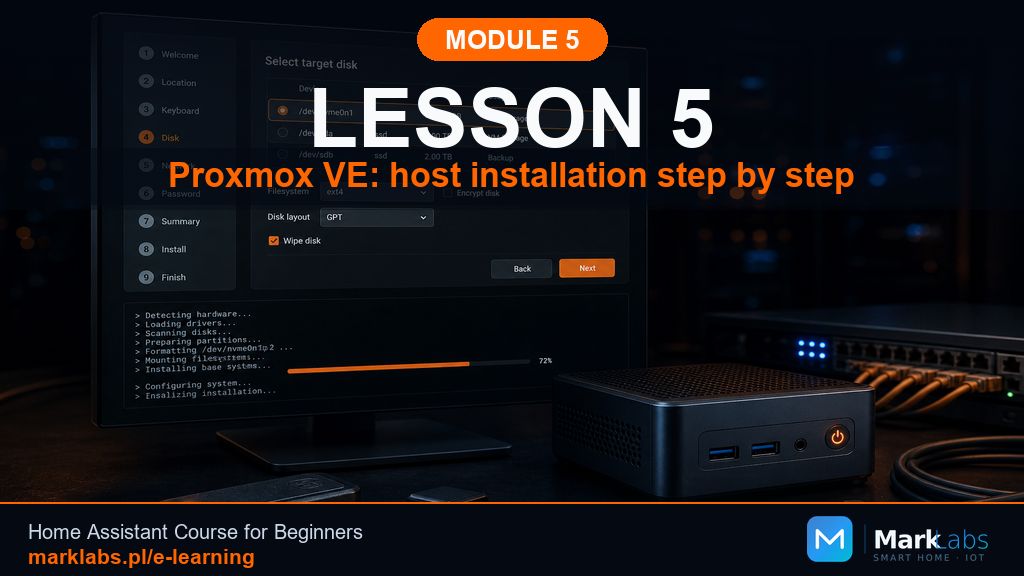
Proxmox VE: Installing the Host, Step by Step
If Lesson 1 sent you here, you've chosen the Proxmox route, running Home Assistant OS as a virtual machine alongside whatever else you want to self-host on the same hardware. This lesson installs Proxmox VE itself, the base layer everything else in Lesson 6 builds on top of.
What Proxmox actually is
Proxmox VE, short for Virtual Environment, is a free, open-source virtualization platform that installs directly on your hardware as its own operating system, not as an application running inside Windows or another OS. Once installed, it lets you create and manage multiple virtual machines and containers, each behaving like an independent computer with its own operating system, isolated from the others, all sharing the resources of your one physical machine. Home Assistant OS becomes one of those virtual machines in Lesson 6, sitting alongside whatever else you choose to run.
Hardware requirements worth checking first
Proxmox runs comfortably on modest hardware, but confirm two things before starting: a 64-bit processor with virtualization extensions, called VT-x on Intel chips and AMD-V on AMD chips, and at least four gigabytes of RAM as a bare minimum, with eight or more strongly preferred if you're planning to run Home Assistant OS alongside other virtual machines. Most mini PCs and thin clients from the last several years meet these requirements without issue, but check your specific processor model if you're unsure, virtualization extensions are sometimes disabled by default in BIOS even on hardware that supports them.
Planning your network before you install
Decide on a fixed IP address for your Proxmox host itself before starting the installer, since Proxmox asks for this during setup and changing it afterward is more involved than getting it right the first time. Pick an address outside your router's automatic DHCP range, following the same fixed-IP planning approach Module 2 covered for any always-on server. Note this address down somewhere, you'll need it constantly for accessing the Proxmox web interface once installation completes.
Preparing the installer
Download the official Proxmox VE ISO from the Proxmox project's website, then flash it onto a USB drive of at least eight gigabytes using a tool like Balena Etcher or Raspberry Pi Imager, both handle standard ISO images without issue despite their names. This is a full operating system installer, similar in spirit to installing Windows or Linux from scratch, expect a proper installation wizard rather than the more automated process used for Home Assistant OS elsewhere in this module.
BIOS preparation
Enter your BIOS or UEFI setup menu and confirm virtualization extensions are enabled, this setting is sometimes labeled VT-x, AMD-V, or simply Virtualization, buried in an advanced CPU configuration section depending on your motherboard manufacturer. Disable Secure Boot for the same reason it needed disabling in Lesson 4, and set your USB installer as the first boot device. These settings matter more here than almost anywhere else in this module, Proxmox itself relies on virtualization extensions being active to function at all.
Running the installer
Boot from your USB installer and follow the graphical setup wizard, accepting the license agreement, selecting your target storage drive, and choosing your region and keyboard layout. When prompted for network configuration, enter the fixed IP address you planned earlier, along with your router's address as the gateway and an appropriate subnet mask, matching the network settings Module 2 helped you establish. Set a strong root password when prompted, this account has complete administrative control over the entire host, and treat it with the same seriousness as any other administrative credential in your household.
First boot and reaching the web interface
Once installation completes and the system reboots, remove the USB installer and let Proxmox boot from internal storage. From another device on the same network, open a web browser and navigate to https:// followed by the IP address you configured, on port 8006. Expect a browser security warning about an untrusted certificate, this is normal and expected for a fresh Proxmox install using a self-signed certificate, proceed past it to reach the login screen, then sign in with the root account and password you set during installation.
A quick post-install configuration note
Proxmox may prompt you about enterprise repository subscriptions on first login, a paid support offering aimed at business customers, not something you need for a home lab. Switching to the free, community no-subscription repository is a well-documented, one-time configuration change covered in Proxmox's own official documentation, worth doing early so future updates pull from the correct source without repeated warning messages.
Success criteria
Reaching the Proxmox web interface login screen and successfully signing in means your host installation succeeded. Nothing is running on it yet in terms of actual services, that comes in Lesson 6, where you'll create your first virtual machine and install Home Assistant OS inside it. This lesson's job ends here, at a working, empty Proxmox host ready for its first virtual machine.
Troubleshooting common Proxmox install problems
If the installer refuses to start or reports a missing virtualization feature, revisit your BIOS settings, virtualization extensions being disabled is by far the most common cause. If the web interface won't load after installation, double-check you're using https, not http, and confirm you're including the 8006 port number, a frequently forgotten detail. If your browser blocks the page entirely due to the certificate warning, look for an option to proceed anyway or view advanced details, standard browser behavior for any self-signed certificate, not a sign of a broken installation.
Why choose Proxmox specifically over other virtualization options
Several virtualization platforms exist for home use, but Proxmox has become the de facto standard within the self-hosting and Home Assistant community for a few concrete reasons worth understanding before you commit an evening to installing it. It's genuinely free and open source with no artificial feature limitations pushing you toward a paid tier, unlike some commercial alternatives that gate useful features behind subscriptions. Its web-based management interface means you never need a monitor permanently attached to the host itself, everything from creating virtual machines to monitoring resource usage happens through a browser on any device on your network. And its backup and snapshot tools are genuinely robust, letting you capture a complete, restorable image of your Home Assistant virtual machine before making any risky change, a safety net this course will lean on repeatedly in later modules covering more advanced configurations.
None of this means Proxmox is strictly better than the bare-metal route covered in Lesson 4, it's a different tool suited to a different goal. If your only plan is running Home Assistant and nothing else, bare metal remains simpler with fewer moving parts to understand. Proxmox earns its extra complexity specifically when you want to run other self-hosted projects on the same hardware, or when you value the safety net of easy, complete snapshots before experimenting with configuration changes.
Storage choices during installation
The Proxmox installer will ask you to choose a filesystem for your target drive, with ZFS and the more traditional ext4 both available as options. For a typical single-drive home lab setup, ext4 is the simpler, more predictable choice and entirely sufficient for running Home Assistant alongside a modest number of other services. ZFS brings genuinely powerful features, built-in data integrity checking, snapshots at the filesystem level, and support for combining multiple drives into resilient storage pools, but it also demands considerably more RAM to run well and adds a real layer of complexity that's difficult to justify unless you already have a specific reason to want it. If you're at all unsure, ext4 is the safer starting point, and you can always explore ZFS in a future project once you're more comfortable with the platform.
A real story: one host, three projects, zero regrets
One member of this course's community installed Proxmox specifically to run Home Assistant, following this exact lesson, and within a few months had also added a personal file backup service and a small self-hosted photo gallery to the same physical machine, each running as its own isolated virtual machine with no interference between them. When a configuration experiment inside the photo gallery VM went badly wrong, restoring from a Proxmox snapshot taken minutes earlier fixed it in under two minutes, no impact whatsoever on the Home Assistant VM running alongside it. That kind of isolation and easy recovery is precisely the payoff this lesson's extra installation complexity buys you, invisible on a quiet night with nothing going wrong, and genuinely valuable on the night something does.
Resource planning: how much to reserve for Home Assistant
Before moving on to Lesson 6's virtual machine creation, it's worth thinking ahead about how you'll divide your host's total resources. A comfortable starting allocation for a Home Assistant OS virtual machine is two CPU cores and four gigabytes of RAM, enough headroom for the core platform plus a reasonable set of add-ons and integrations without starving other virtual machines you might run alongside it. Proxmox lets you adjust these allocations later without reinstalling anything, so this isn't a permanent, unchangeable decision, just a sensible starting point that Lesson 6 will walk through configuring directly.
Remote access to your Proxmox host
Once you're comfortable with the basics, Proxmox's web interface is reachable from anywhere on your local network, not just the device you used during installation, letting you manage virtual machines from a laptop in another room just as easily as from the machine sitting next to the host itself. Accessing it from outside your home network is a separate question entirely, covered properly in this course's later module on remote access, and involves real security considerations well beyond the scope of tonight's installation. For now, local network access is all you need, and it's genuinely convenient once you're used to it.
Updating Proxmox after installation
Unlike Home Assistant OS, which updates itself automatically with built-in rollback protection, Proxmox is a full Debian Linux-based operating system underneath its polished web interface, and its updates follow a more traditional, manual pattern. After switching to the no-subscription repository mentioned earlier, updates are applied through the web interface's built-in update manager or through standard command-line tools if you're comfortable with a terminal, and neither is particularly frequent or urgent for a home lab, unlike Home Assistant itself, which benefits from staying current more aggressively. A reasonable habit is checking for Proxmox updates every month or two, applying them during a quiet period, and always taking a snapshot of any running virtual machines beforehand as a simple safety net, exactly the kind of workflow this platform was designed to make painless.
A word on power loss and unclean shutdowns
Because Proxmox is now the single point of failure for everything running on this hardware, including your future Home Assistant instance, it's worth taking power reliability more seriously here than you might for a simple bare-metal install. A brief power outage that would just mean a short reboot for a bare-metal Home Assistant OS install now risks corrupting the host's own filesystem if it happens mid-write, taking down every virtual machine on it at once rather than just one service. This isn't a reason to avoid Proxmox, but it is a genuine reason to consider an uninterruptible power supply if your area experiences frequent outages, a relatively small investment that protects meaningfully more value once multiple services and virtual machines share the same single piece of physical hardware rather than each having their own dedicated box.
Naming your host thoughtfully
During installation, Proxmox asks for a hostname, the name your host identifies itself by on the network. It's a small detail easy to breeze past, but worth a moment's thought if you plan to run multiple virtual machines and containers on this host over time, a clear, descriptive hostname like homelab or proxmox-server makes later documentation, troubleshooting, and any command-line work meaningfully easier to follow than a generic default left over from the installer. This name is also visible in the web interface's title bar and throughout various system log files, so choosing something sensible now saves a small but real amount of low-level friction for as long as this particular host stays in active service in your home.
A note on time zones and the system clock
The region setting you chose during installation also determines your Proxmox host's system clock and time zone, worth double-checking is correct before moving on, since an incorrect time zone can cause subtle, confusing problems later, mismatched timestamps in logs, scheduled tasks firing at unexpected hours, or certificate validation errors that are genuinely difficult to trace back to their real cause. You can verify and adjust this setting from the Proxmox web interface's node summary and system settings if anything looks off, a two-minute check now that can save real confusion during troubleshooting sessions many months down the road, particularly once your Home Assistant virtual machine and its own automations are layered on top of this same underlying clock.
What Lesson 6 will build on top of this host
With Proxmox itself installed and reachable, the next lesson picks up from exactly this point: creating a new virtual machine, attaching the Home Assistant OS disk image to it, allocating the CPU and RAM resources discussed above, and booting it for the first time. You won't need to touch anything covered in this lesson again for that process, this host installation is a one-time task, everything from here forward happens through the web interface you just successfully reached. Take a short break if you'd like, tonight's hardest technical hurdle, getting a full hypervisor installed and configured correctly from scratch, is now genuinely behind you, and everything that follows from here builds in smaller, more approachable steps on top of the solid foundation you just finished putting in place.
Key takeaways
Proxmox needs virtualization extensions enabled in BIOS to function at all.
Plan your fixed IP address before installing, changing it later is harder.
Reach the web interface at https://your-ip:8006 after installation.
This lesson ends with an empty host, Lesson 6 adds the Home Assistant VM.
With Proxmox installed and its web interface reachable, continue to Lesson 6 to create your Home Assistant OS virtual machine.
